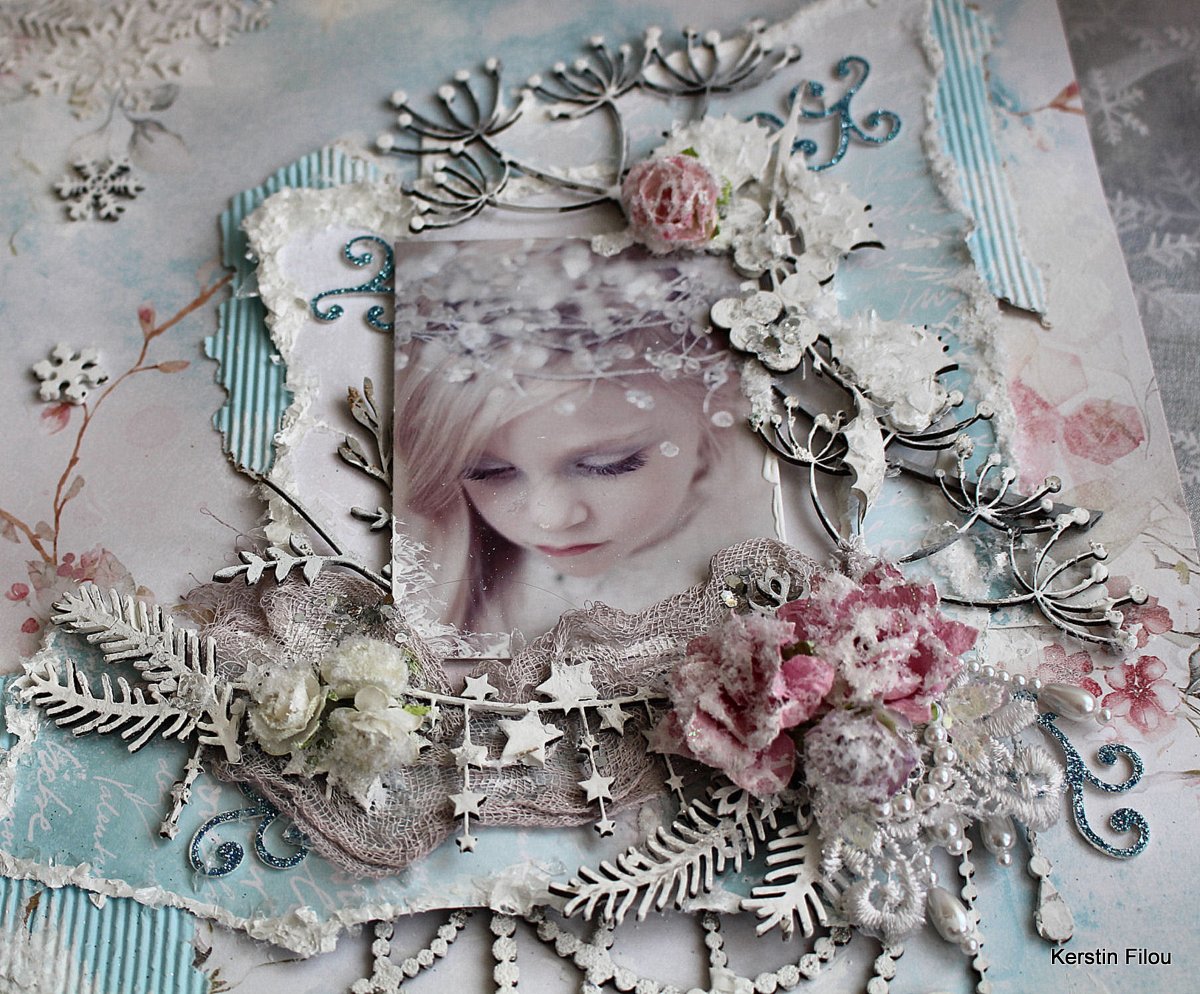
to start using texture paste and paint through for the background.


Hello it’s my turn today to share a project and I thought that I would share the Card Holder that I made to store my Altered tags in.
I used The MDF Card Holder for this project.
Good morning how are you? I am here today with a little hybrid of the two Dusty Attic challenges. Remember you still have time to do either the sketch or mood board or if your feeling extra creative why don't you enter twice, that will give you two chances to go into the draw and what's better than that?
So here's a reminder of the Mood board...
Floral Corners DA0848 |
ATC Frame #5 DA1523 |
Small Tea Leaves DA2599 |
Branch #4 Small DA1184 |
Our monthly Moodboard is an absolutely wonderful natural inspiration,
some close up's
Hi everyone! Some inspiration using the
beautiful February moodboard.
I was totally inspired by the colour
palette of the moodboard – but I did add some gold in which I felt worked well
with the sunrise image. I pulled a heap of papers and embellishments in the
colours and then selected my Dusty Attic chipboard and coloured it to match. I
will take you through what chipboard I used and what techniques I applied.
I started with the background so that it
could dry. I used a heavy weight mixed media cardstock and painted it with blue
watercolour. Once that was dry, I used the Rainbow stencil and inked with oxide
inks and a sponge over the watercolour.
With the title, I coloured the cursive part
of the title in matt blue wax and then added an opal wax over it to give it
some shine.
For the word “EVERYDAY” I used a plum wax,
and once that was dry, I dabbed gold wax on the bottom half of the letters to
give an ombre effect.
I then painted the dandelions with gold
ink. I use Kuretake Brilliant Gold Mica Ink which works so well on raw
chipboard to give an incredible gold finish in one coat. I used one large and
two small dandelions.
For the Scrolls, I wanted to do another
ombre effect, but in purple, so I used three different purple waxes to go from
a light to dark purple.
I then layered the chipboard under and on
top of the various elements that I used on the layout.
There is a process video if you would like
to see exactly how I made this layout:
https://www.youtube.com/watch?v=ofedKMvhvnE
I hope you have a chance to get some
creative time in soon.
Dusty attic products:
Find
Beauty In The Everyday – Dusty Attic – Australian owned and operated Laser
Cutting business
Dandelions – Dusty Attic –
Australian owned and operated Laser Cutting business
Scroll Set #2 – Dusty
Attic – Australian owned and operated Laser Cutting business
Rainbow #1 Stencil
– Dusty Attic – Australian owned and operated Laser Cutting business