Showing posts with label branch. Show all posts

Wednesday, 31 May 2023

A Lifetime is not long enough ... - Adri Du Preeez

Hello everyone!

Welcome to the blog today. My May design team layout features beautiful Dusty Attic chipboard pieces.

 I made this layout to celebrate our 40th wedding anniversary on the 7th May.

Here is my layout.


The branches, wildflowers, and wild grass were first covered with cleared gesso and then Distress Oxide in Vintage Photo and Iced Spruce. Press the two Distress Oxide Ink pads onto a craft mat and spritz them with water creating small droplets.  I started with Iced Spruce for the base color and slid the chippies through the droplets a few times and dried them with a heat tool. Repeat with Vintage Photo and dry in between. 

The beautiful and perfect title was heat embossed with white embossing powder.


I chalked the two bird's nests with Chocolate Versa Magic Ink and the edges with Americana Acrylic paint in Slate Grey. The eggs were painted with white acrylic paint and Americana Acrylic paint in Slate Grey.

The butterflies and polaroid frame were first covered with white gesso and then painted with Americana Acrylic paint in Peaches 'n Cream and Spa Blue.


To color the Wordpl@y words I lightly covered them with white acrylic paint and Americana Acrylic paint in Peaches 'n Cream and Spa Blue.

A

After everything glued down I added art stones and splatters with diluted white gesso.

Dusty Attic products used.


Thank you for visiting the blog. 

Visit the Dusty Attic online shop for more amazing chipboard designs.


Friday, 24 February 2023

Beauty - Pascale B - Mood Board Inspiration

Hello Sweeties,

Today I'm on Dusty Attic blog with a new mixed media panel, inspired by the February color combo. I must confess that I stick to the purple and the light blue. 


Here is the colorful February color combo. 


I glued some collage sheets on the canvas board. Next, I added a design with paper paste and a stencil.  Finally, I added white crackle paste. When everything was dry, I painted the background with different acrylic paints to match the colors of the photo I have chose. 


I primed all the chipboard with white gesso. I covered the ATC Frame #5 with the Sterling Foundry wax. Then I added Denim Blue wax to give it a blue tone, then Soot Antiquing wax to aged it.


I sprayed the Floral Corner with Open Arms Amethyst, then covered it with UTEE. The ink make like bead of color under neath. I sprayed again the ink, then heat the UTEE one more time. The result is a marble effect. 


I painted the branch with a mix of Aubergine Impasto and Burnt Sienna liquid acrylic paint. For the Tea Leaves, I used Aubergine and Titanium White, then Old Silver wax. 


I select a few Nature's Bounty flowers that I colored with the Open Arms Amethyst. I want them to be darker as they were in the shadow side of the photo. I used the White Pearl wax to add some light and dark brown liquid acrylic to add shadow.


To finish, I added glitter.


Dusty Attic products:

Floral Corners
DA0848

     ATC Frame #5
DA1523

     Small Tea Leaves
DA2599
Branch #4 Small
DA1184


Other products:
  • Spray inks - Lindy's Gang (Open Arms Amethyst);
  • Embossing Powders - Ranger (UTEE);
  • Foundry Wax - Ranger (Sterling);
  • Stencil - Stencil Girls;
  • Floser - 49 and Market (Salt Nature's Bounty);
  • Art Ingredients - Finnabair Prima (Winter Glitter Set);
  • Art Alchemy Liquid Acrylic - Finnabair (Prussian Blue, Ultramarine, Violet, Ink Black, Burnt Sienna, Titanium White);
  • Art Alchemy Impasto - Finnabair (Linen, Aubergine);
  • Art Alchemy Waxes - Finnabair (Denim Blue, Soot, Old Silver, Withe Pearl);
  • Art Extravagance - Finnabair Prima (Paper Paste, White Crackle);
  • Art Basics - Finnabair Prima (White Heavy Gesso, 3D Matte Gel, Soft Gloss Gel).

Monday, 16 January 2023

You stole my Heart - Rikki G - SKETCH Inspiration

Good morning how are you? I am here today to share with you the first Dusty Attic Sketch challenge !!!! So you now have the opportunity to win with either the Mood board or Sketch so how good is that ?

I am a huge fan of sketches, I love that they give you a starting point for your work to evolve from there.

Do you love sketches?

So without further ado here is the sketch. 


 So to start off my interpretation of the sketch I started with working the background papers and getting that all squared away with the layers.....


Then I focused on my photos and what series of photos I need to fill out the double layout.


Now you might notice that the instead of the three photos on the left hand side, there are two, I love things to be in odds so rather than 8 photos I wanted 7 ( Plus this works well if you dont quite have enough). 

So where the other photo would be I made a tag cluster alternative you could add a journal block.


Next is about adding the embellishment clusters, to start off with to give you a base to work off, add Branch #3 in the middle of the pages and then work on fussy cutting and making height to add the chipboard pieces........

Then ones you have the fussy cutting pieces down, add the maiden fern throughout the embellishment strips.


The aim is to weave the fussy cutting, die cuts and chipboard in and out of each other making it seem like one.....


With the spacing you can afford to add a larger title.


If you dont like your hand writing print it !!!  Add a gap in between each line so you can give yourself plenty of room to cut and stick on your page.


I added rhinestones and clear sequins around the background dont forget to add some trails in between the photos, to tie the two pages together.


Maiden Hair Fern


All you need to do is add your take of the challenge into the comments section on the Dusty FANattics Facebook page HERE for your chance to win one of two amazing $50 Credits to choose any. 

Good Luck and have fun creating.


Saturday, 6 August 2022

Trust your heart - Adri Du Preez - Mood Board Inspiration

Hello everyone!

Here is my layout inspired by the stunning August mood board, and featuring Dusty Attic chipboard pieces.  

For this layout, I used the 49 and Market Vintage Artistry Airy pattern paper from the Essential collections and rub-ons and ephemera stack elements from the Vintage Artistry Coral and Natural collection. 

This is the mood board.


 and here is my layout.


All the chippies were first covered with a layer of white gesso.

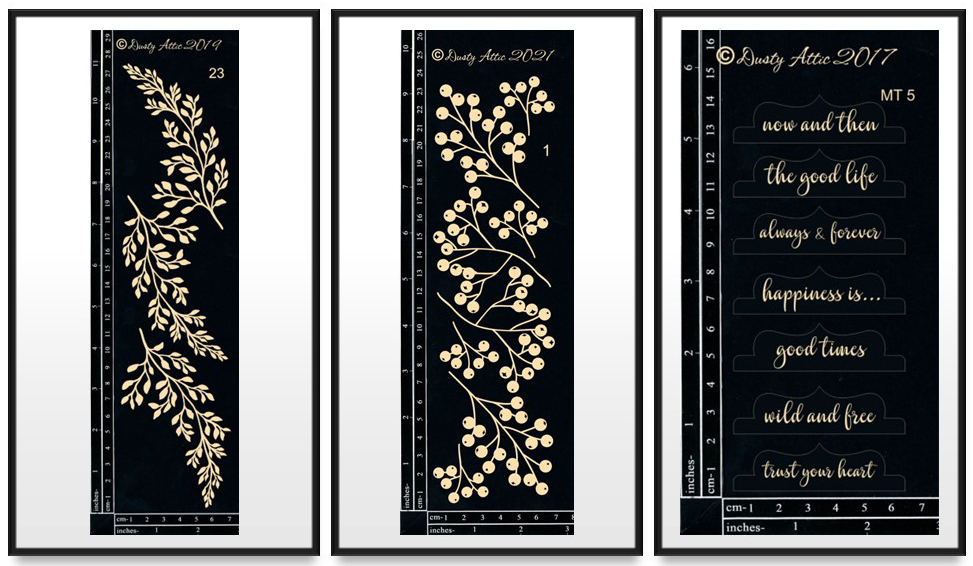
I covered the Botanical Ringlet with Americana Acrylic paint in Mint Julep Green, Gooseberry Pink, and dry brushed with white acrylic paint, cut it in half, and used the other half under the large butterfly.  I used the mini tab "trust your heart" as my title.


The nest and eggs were painted with Americana Acrylic paint in Traditional Brunt Umber, Grey Slate, and, dry brushed with white acrylic paint.

The small branch was coloured with Distress Oxides in Mowed Lawn, Iced Spruce
 and Ground Espresso.


The Christmas Berries were painted with Americana Acrylic paint in Gooseberry Pink, and dry brushed with white acrylic paint. Foliage #23 was painted with Americana Acrylic paint in Oyster Beige.


The final touches to this layout included art stone and splatters with diluted white gesso.

Dusty Attic products used.


Thank you for visiting the blog today.  I hope you find time to play along with this mood 
board.  Share your projects on our Facebook Page here for your chance to win a $50 
(AUD) credit for two lucky winners to the Dusty Attic online shop so you can choose your 
very own chippies you would like to use.

Happy crafting!