Monday 29 June 2020

Perfect - Adri Du Preez - Mood Board Inspiration

Hello everyone!

Today I am sharing a layout inspired by the beautiful June mood board using some amazing chipboard pieces, lots of flowers and die cuts.

Here is the mood board.
To enter all you have to do is add your take in the comments section of the Dusty FANattics page on Facebook HERE 
This is the sketch I used designed by Debbie sanders.

and here is my layout.


This is how I treated the chippies.

I heat embossed the beautiful Fancy Frame set and Mini Titles
 with white embossing powder.


I painted the Polaroid frames with Americana Acrylic paint in Peaches 'n Cream and Blue Mist and embossed the edges of the frames with gold embossing powder.


 I painted the Flutterbies with Americana Acrylic paint in Blueberry and Blue Mist and then applied Art Alchemy Wax in Vintage Gold.


 I randomly applied coarse gesso the cogs.  Once dried I covered them with black gesso.  I then dabbed the cogs with Americana Acrylic paint in True Ochre and Sea Breeze and applied Art Alchemy Wax in Vintage Gold. I then dry brushed the cogs with white gesso.


The leaves were heat embossed with Lindy's embossing powder in Madonna Robe Blue Gold.


The heart arrows were just painted with Americana Acrylic paint in Blueberry.
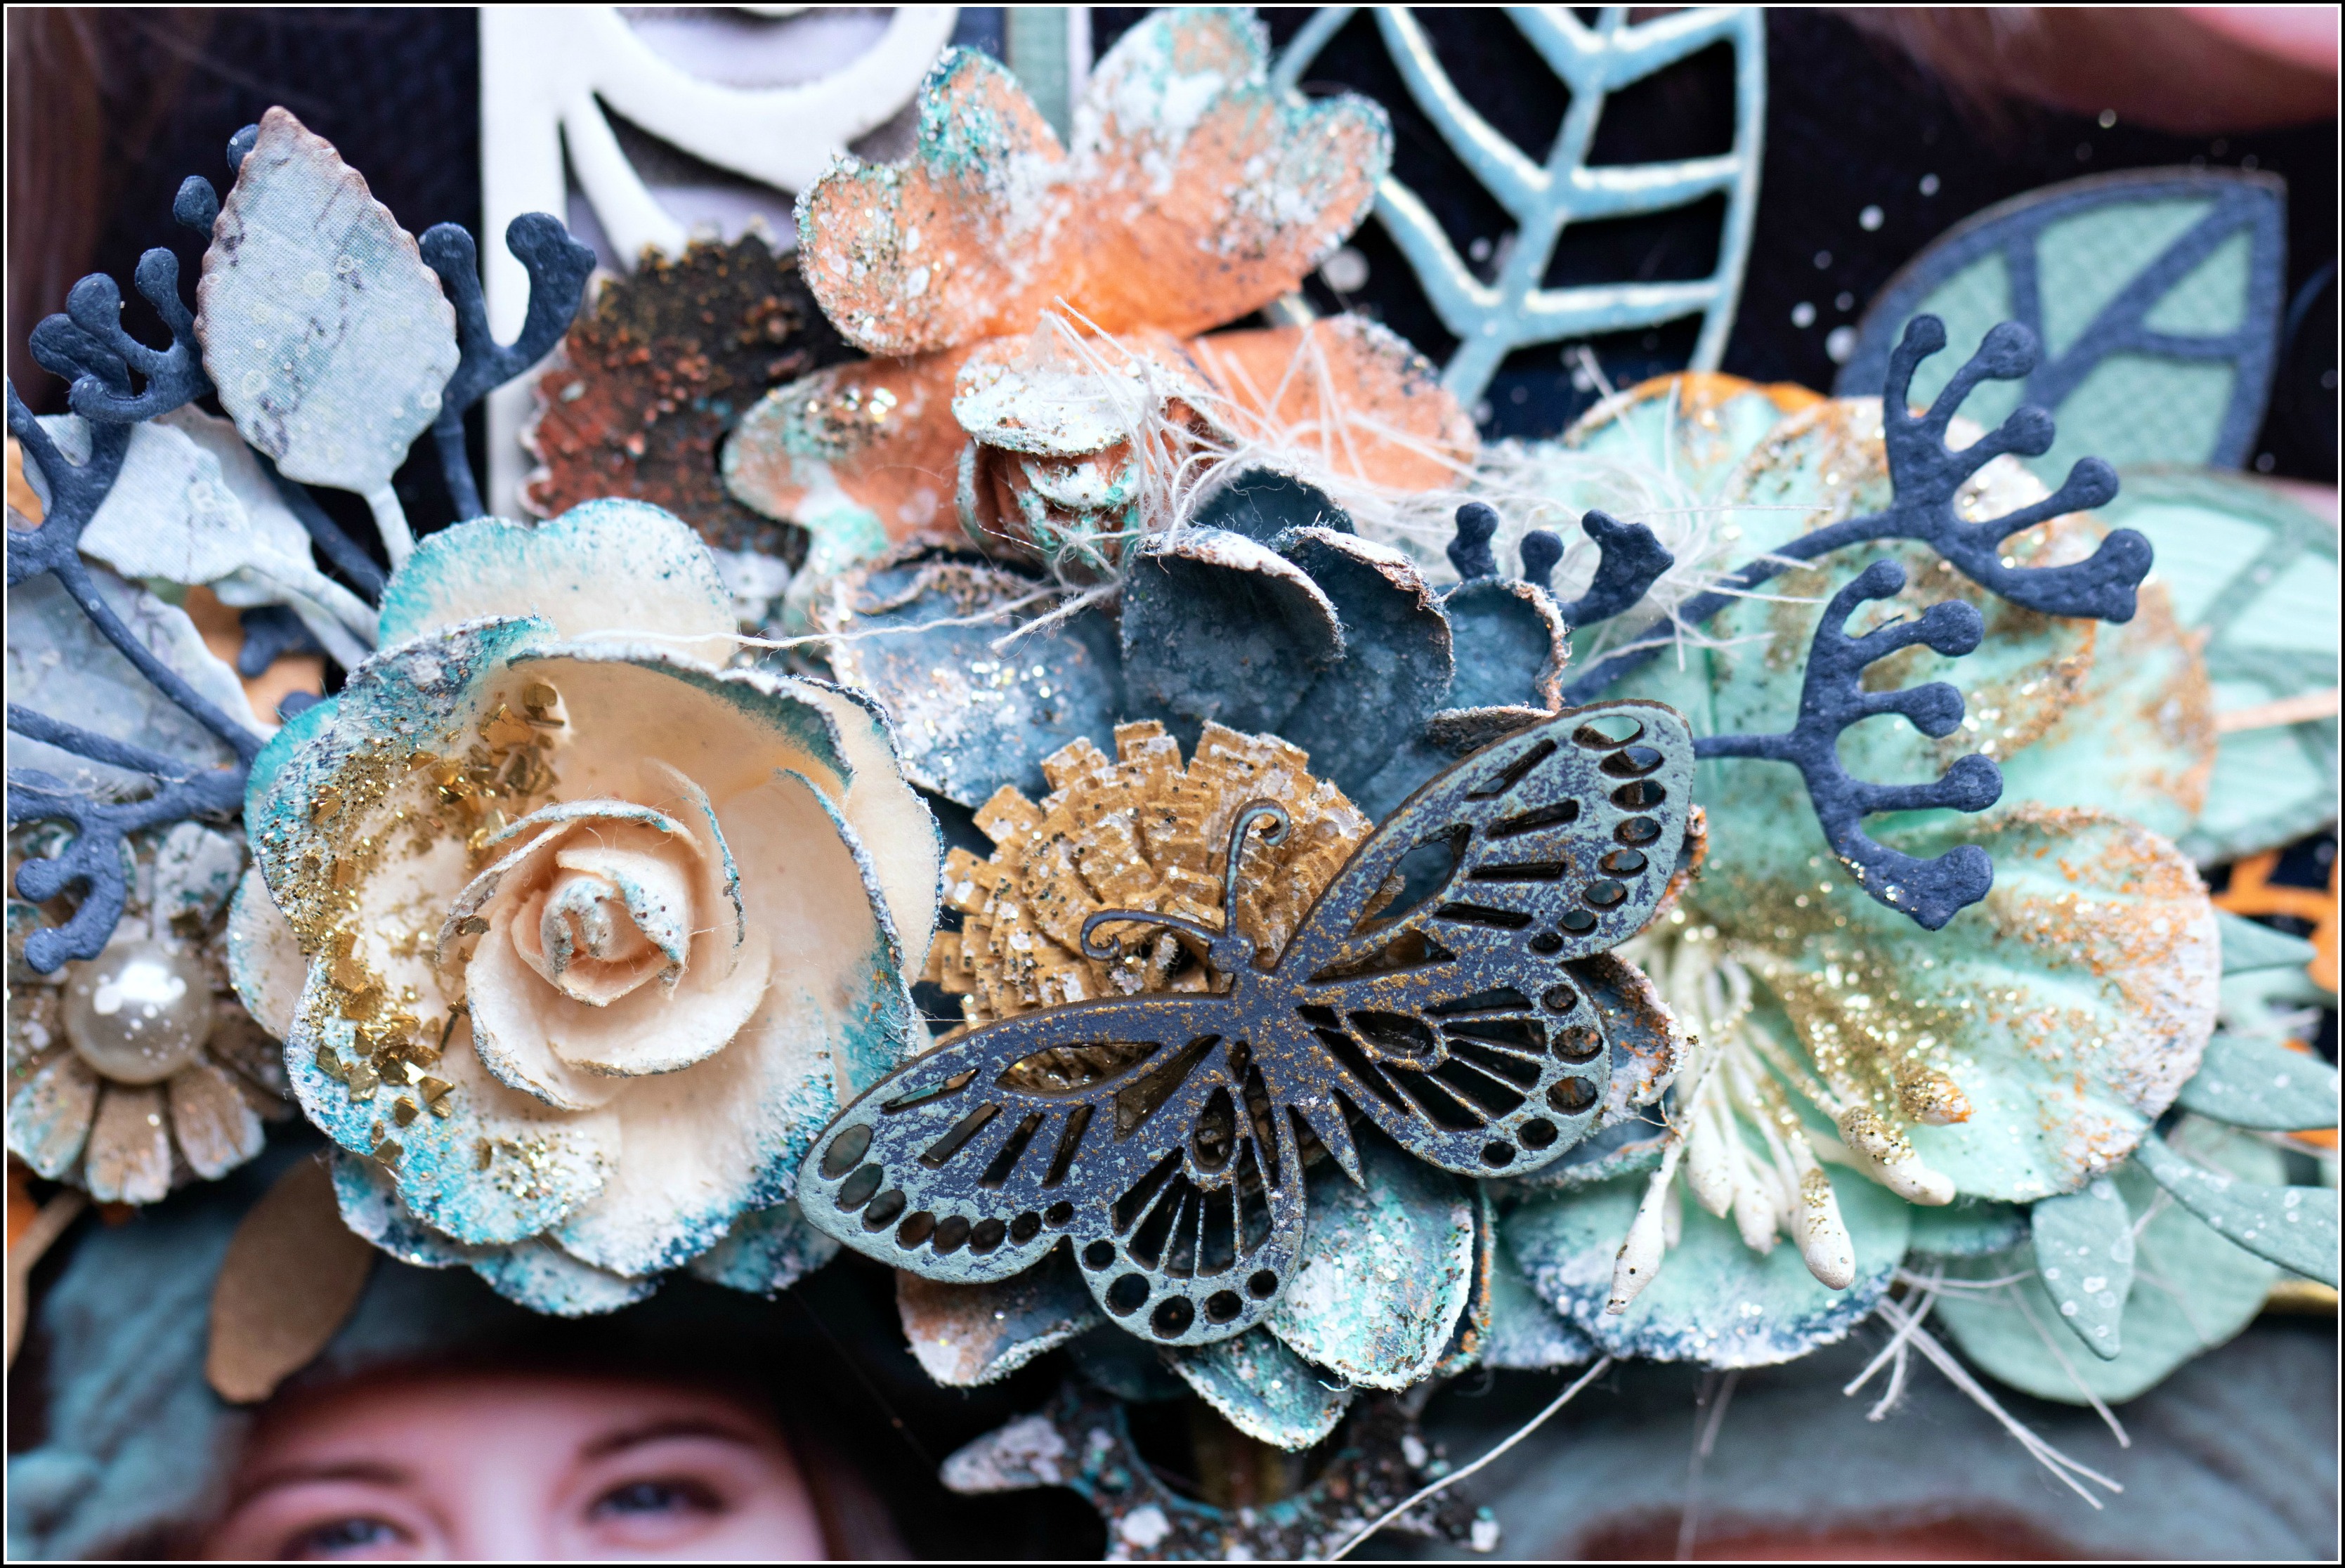

Some close ups.


These are the Dusty Attic chipboard pieces that I used.


Thank you for visiting my blog today. I hope you find some time to play along with this mood board.
Happy crafting!

Underwater treasure - Kerstin Filou (Altered Bottle)

Welcome creative friends!

I was inspired to create a steampunk
bottle in altered art, because
I discovered my creative passion for
upcycling projects, especially for glass bottles.


 I used a liquor bottle as base
and worked with some awesome chipboards and some mixed media products
from Finnabair, DecoArt and Ranger.


 Tips & Tricks


 1 I glued all the chipboards and texture elements
with 
construction adhesive on the glass bottle

 2 primed with two chalky finish paints from DecoArt

3 I love to use diluted colours - here two Distress
Spray
 colours for the deepenings, this creates interesting effects

4 some grungy effects with Rust Effect Paste
(Finnabair)
 and highlighted with wax cremes some
close up's

I was in love with this special porthole, it consists of two parts,  which are glued together, a porthole with 3D effect, my favourite.
I extended it with two pipes suitable to steampunk style.


 And another favourite of mine, this very amazing seadragon created with embossing powder and diluted acrylic paint


 The bottle had an inappropriate imprint embossed in the glass on the side, which had to be concealed. The new borders were ideally suited for this.


 in illuminate state with battery
cylinder lighting


Dusty Attic chipboards used


Porthole
11″ (2 piece)


Industrial
Pipes


Industrial
Chains


Seadragons


Anchor #2


Bali Border
#4


Ocean Wave
Small


Thanks for your visit!

Happy crafting!


Kerstin


Saturday 27 June 2020

Always Find time .... - Karan Gerber - Mood Board Inspiration


Good Morning Friends and welcome to inspiration today for Dusty Attic.


Its Karan Gerber here to host a project share for you today and i have a layout designed to share with you based on Junes Mood Board Challenge.

I am sad to say that i will be stepping down as a Design Team Member for Dusty Attic at the end of the month. I am doing this so that i can assist my family in building our forever  home, 9 hrs north of where we currently are on beautiful Lake Huron, here in Ontario, Canada. 

It has been such a pleasure being here for the past six months inspiring you and sharing my projects, I hope to be back once all the dust settles.


My Inspiration for today: 


Here is my take on the Mood board Challenge


To enter the Mood Board all you need to do is add your own take on the challenge and pop it in the comments section on Dusty FANattic's Facebook page HERE


I love the color Orange and pulled the orange and blues out of this challenge and designed this layout


This photo was taken in the south rim of the Grand Canyon of hubby and I in 2018! 

I decided to make it black and white. I made the title and foliage branches white by embossing them with white embossing powder


the fancy border i set at the top and bottom of the corrugated cardboard and used red rust paste on them dabbing a bit of white snow paste on top


the second Fancy Border #13 i used on the side of the photo and again dabbed rust paste on. 

The title here, is perfect for what we are all going through right now; to find time for the things that make us happy. 

Hubby and I love to travel, and although our travel plans were cut short, our cruise cancelled; we still find time to do the things we love, like canoeing, and kayaking, we love being on the water.

I hope you are able to find time to do the things that make you happy too. 


The foliage i cut apart all three branches and tucked them in and out of the 49 and Market flowers which i toned down with snow paste and gesso. 

I hope you have enjoyed my project share with you today!


Friday 26 June 2020

Underwater Treasure - Kristy Abela - Mood Board Inspiration

Well well, winter is here... I wanted to create something for this months' moodboard that reminded me of what it's like to live on the coast, when swimming is NOT an option. My kids were born in a little seaside town on the Mid North Coast of NSW. We would rug up and take walks on the beach. I remember the sand would be so cold that our feet went numb but if you have under 10's, just try and keep them out of the water. Well they're not little anymore and this is as close as they get. 


I am in love with the papers that Stamperia produce, designed by Antonis Tzandinakis. I have had the pleasure of getting to know the guy and do about 10 of his classes and play around with his techniques. With this month's inspirations, I merge some of the best I learned from him... and my own favourites. I used crackle paste on the background and then used some oil paint to age it and a bit of Lindy's sprays in teal and copper to enhance the colours used in the original paper because I didn't want to lose the tones that matched the mood board perfectly.


I used lots of texture and layers on my pages. Keeping with the theme of Underwater Treasure, knowing that there is more going on under the ocean than on top these days. I fussy cut my favourite elements from the paper range and matted them with black card stock. I used a solid colour to make the title pop this time. 


I painted the Shells and Corals in white Gesso and dabbed it thickly with my brush to create peaks in the paint. This allowed me to create ridges for the Lindys and waxes to sit on. I also used white for the compass. I sprayed some colour on my craft mat and put the chipboard into it - face down. The ridges collect the shimmer and give it something to grab onto. This is also true for the waxes. I apply them with my finger tip and gently rub across the raised surfaces

Tip: The colours vary so much when you use chipboard in natural, white or black. If I am unsure I paint the back of the chipboard piece in sections of each option and test it. Then when I know what I prefer I flip it over and use my preferred choice. 


I painted the Stars, Anchor and chains in black gesso. I used the dabbing on the anchor and chains... It gives off a fantastic textured effect, when teamed up with waxes looks like aged metal. #lovinit! I left the stars with a flat coat. I find that the variation in textures makes them stand apart from each other better even though they have the same base coat. 


To break up my layers I added some sisal in between. Anything white is a good 'page break'. I am not a brave creator and really struggle with adding colours that stand out among my page elements so I like to use neutrals. I really loved the page as it was, however I felt I needed something to unify all the elements... Art stones! Can't get more aquatic than that. 


This is our Mood board for the month, if I have inspired you to join in post your entry on the Dusty Attic Blog and pop it into our Facebook group Dusty FANattics and see what other people are creating with Dusty Attic Chipboard.


Thanks for looking and links to products are below!