Thursday 26 November 2015

Daddy & I - Patricia Basson

Hello to all my Bloggie friends today!
I am fortunate to have a few sheets of 7 Dots Studio papers and what better product to combine them with than my ever favourite Dusty Attic chipboard!!!
This is a photo of me and my Father when I was only a few weeks old...
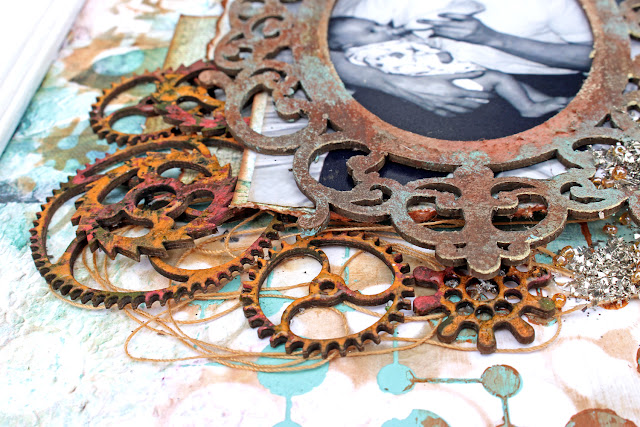
At first I planned on having the frame behind the photo but after all the work I put into it and seeing what it looked like I decided to rather put it on the photo.


I used the Cog Stencil and some brown ink to add interest to the back page. I then thickened Hot Chocolate and Oceania Paint with Ayeeda's Magic Powder to create a nice thick paste that I used with the Circuit Stencil.


I wanted to add texture to my chipboard and also to my page and to achieve this I added some cotton to the top and bottom of my photo stack and Finnabair Plum Glass Beads, Sterling Glass Glitter and  fine Black glitter.


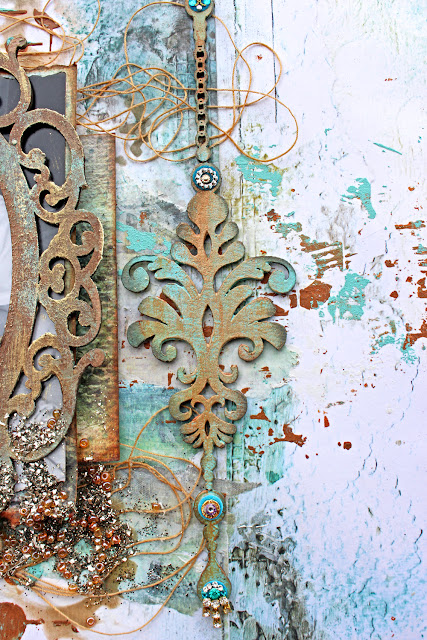
The Vintage Frame and Ornate Pendant were both painted with the following Dusty in Colour Paints...Hot Chocolate
Mountain Meadow
Oceania
Sunburnt Orange.
I just painted each colour randomly and kept going until I was happy with the antique effect that I was going for. Once dry I distressed the frame in places with a sanding block to expose some raw chipboard which I then inked with Spiced Marmalade Distress Ink. Finally I gave it a light dry brush swipe with Gold Opal Magic Mica Powder.


Using various Distress Stains and paints...Abandoned Coral, Peeled Paint, Spiced Marmalade and Vintage Photo, I coloured the Cogs. I also added a little clear UTEE to them.


A few Bling elements on the Ornate Pendant...
~~~~~

Find these and many more in the Dusty Attic Store...


Thank you for your visit...

Being a great father is like shaving.
 No matter how good you shaved today, 
you have to do it again tomorrow. 
~Reed Markham~

Tuesday 24 November 2015

Altered CD - Lizzy Hill

G'day! I thought for my Dusty Attic extra this month, I'd do something Christmas-sy.
I had this CD & decided to create a sort of spinner decoration.
Here's the end result. This is my 'funny' photo. I found a hook on our verandah, but DH was in the background. He decided to 'hide', LOL!!!
Giggles! This is a double sided creation....& I've done a step by step, if, like me, you've got CD's that could be 'up-cycled':
1. Adhere ribbon through centre hole, onto both sides of the CD:
 2. Cut out patterned paper. Use CD as a template. I've used 2 different
papers:
 3. Adhere. I used PVA glue, which worked really well:
4. Add your title, or some nice Christmas words.
I outlined my words, as they didn't 'pop' quite enough:
5. Using the HANGING MASON JARS, I painted them white with a Sharpie
paint marker, then wrote the words on them. I added gold glitter nail polish
& finally some fine glitter, which stuck beautifully to the nail polish:
 For the 'wrong' sides, I added my own lid lines with a marker:
6. Time to fancy up the FEATHER CHARMS #2 & #3:
Using DUSTY ATTIC paint in VINTAGE GOLD over the Sharpie white
paint pen, then adding some Tattered Angels Glimmer Glaze on the baubles, with
some fine glitter sprinkled over, this is how they turned out:
The ORNATE PENDANTS #2 got a coat of the paint only:
 I also added a touch of gold to some of the Hanging Mason Jars:
Here is how the front and back turned out:
I LOVE how you can actually HANG some of the little jars - on the 
right side, above.
I really find those 'traditional' colours of red and green hard to use, so
was pleased with these ones! Some close ups:
 You can see I also rubbed some DA Vintage Gold paint around the edges:
And the 'joy' side:
 I added a die cut bell behind the chippy on this side, too:
I hope this gets you enthused about some Christmas decorating. It is coming up fast!
Thanks for looking & happy scrapping ~ Lizzy.

Sunday 22 November 2015

Treasures - Heather Jacob

Hi there my friends , a great big warm welcome to the Dusty Attic blog . We are in Spring here in Australia and today I have a nature layout to showcase .  Gardening, blooms and nature are some of my favourite things in life.

This month I have used a Photograph of some seaside daisies, poking their happy little faces through the rustic cast iron fence .

TREASURES 
Dusty Attic materials used 
French flourish border/ DA0275
Bird cage  /DA0678
Hanging Mason Jars/ DA1364
Leafy Stem #5 /DA1144
Decorative frame #1  /DA0207
Dusty in color Mountain Meadow /DA0916
Dusty in color Oceania /DA0912 

The colors are mixed together to achieve this hue.
I began with Mountain Meadow
 and gradually added tiny amounts of Oceania until I was happy with the tone .

Dusty in color Mountain Meadow /DA0916
Dusty in color Oceania /DA0912 


Leafy Stem #5 /DA1144
the leafy stem is trimmed, 
then painted and layered over and under the right side of photo .

loving these little mason jars... adorable x


Decorative frame #1  /DA0207
I placed this frame upside down and added a couple
 of altered metal embellishments to the centre of the circle  .

 thanks so much for popping by and taking a look at my work 
and all the other inspiring creations at Dusty Attic 
bye for now 
big hugz to you 
love Heather x
Heather Jacob www.heatherartandlife.blogspot.com

Friday 20 November 2015

Art Is Canvas -with tutorial - Mood Board Inspiration - Rachelle Sigurdson (plus some bonus creations)

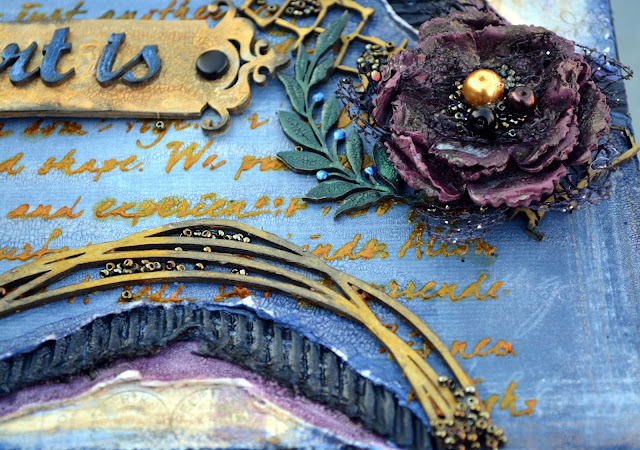
Hello, today I am here to share with you a canvas I did using Dusty Attics Mood Board for November. The photo used, is a close up from my last post, so I repeated some of the products used on my last post...

 The challenge  has an amazing prize of a $100 Dusty Attic Gift Voucher for the winner and to enter you simply need to use the Mood Board for Inspiration, you can interpret it anyway you like. The only requirement is that Dusty Attic chipboard is used in your creation. Once completed simply add your link to the right side bar of the Dusty Attic blog.

The Dusty Attic used:
Spring Blooms #3
Spring Blooms #3
String Frames small
string frames small
Barb Wire Frames
barb wire frames
Flower Layers #4  mixed pack
flower layers #4 mixed
mini Branches #2
mini branches #2
Swirl Vine #2
swirly vine #2
Fish Net Panel
fish net panel
Name Plates #5
name plate #5
Flutterbies #3
flutterbies #3
Word Tags #1
word tags #1
mini Script ABC set
mini Script ABC
Dusty Attic Texture Paste
Dusty Texture paste
Dusty in Colour Denim
Dusty in Colour Raisin
Dusty in Colour Gingernut
Dust in Colour Gingernut
Dusty in Colour Clear Crackle Varnish
Dusty in colour clear crackle varnish
The Maja Design used:
Walking-in-the-forest-P
Jeans
Jeans
Enjoying-Outdoors-P
Time for reflection
Time for reflection
Time for reflection bs
Time for reflection-BS
Other products used:
Petaloo - Textured Collection - Mixed Layering Flowers - Black
Petaloo-Textured mixed layering flowers
Prima - Art Extravagance - Texture Paste - Graphite - 8.5 Ounces
Prima Texture Paste-Graphite
Prima - Art Basics - Heavy Gesso - Black - 8.5 Ounces
Prima heavy gesso-black
Prima - Memory Hardware - Glass Pearls
Prima glass pearls
Lyndy's Stamp Gang
grab a guy gold. afternoon delight denim,jazzy jiven purple
LuminArt: Black Emerald & Emperors Gold
My first step was to soak the flowers in warm water, separate the chipboard layers,then I crumpled them up. 

I then painted the under side & top with DA paints Denim & Raisin....
Next step,painted on a thick coat of Clear crackle...
Paper Layers

I painted all of the paper with clear crackle....
Did some stencil work,using Gabi's new stencil moving vines, & prima texture paste,graphite..
I painted the DA swirly vine with clear crackle. Once that had dried I painted it with LuminArt,Black Emerald..I also used the black emerald on the stencil...
LO, is now turning into a canvas, that I had painted with black gesso....
I did some more stencil work, using DA texture paste that I had mixed Lyndy's Stamp Gang,grab a guy gold
I also used that on the fish net panel, frames,nameplate & butterflys...
I layered the flowers with the chipboard layers, & Petaloo textured flowers. I used a brad to hold them together. I then painted them with Lyndy's Stamp Gang, afternoon delight denim & jazzy jiven purple. The next step was to glue on the beads,then the Prima pearls...


This is a wedding LO I did....
The Dusty Attic used:
Vintage Frame
Vintage Frame
Elegant Pearls
Elegant Pearls
Ornate Pendants #3
Ornate Pendants #3
Word Pack #9
Word Pack #9
Ferns
Ferns
Flutterbies #3
Flutterbies #3
ATC Frame #1
ATC Frame #1
Here is another LO I did using some of Dusty Attic's amazing Chipboard pieces...

The Dusty Attic used:
Foliage #4
Foliage #3
Foliage #3
Mini Captions #3
Mini Captions #3
Spring Blooms #3
Spring Blooms #3
String of Hearts Frame set
String of Hearts Frame
Ferns
Ferns
This is a Christmas Card I made....
The Dusty Attic used:
Party Lights #3
Pine Sprigs
Misteltoe
Mistletoe
Bird Nests #2
Bird nests#2
Stars #3
Stars #3
mini Stars
mini stars
Teeny Tiny ABC set
Teeny Tiny ABC
Thank you so much for taking the time to look....Rachelle