Tuesday 27 August 2019

The perfect Sunset - Kristy Abela

Hi Attic Dwellers!! 
Welcome to our Mood board for July!

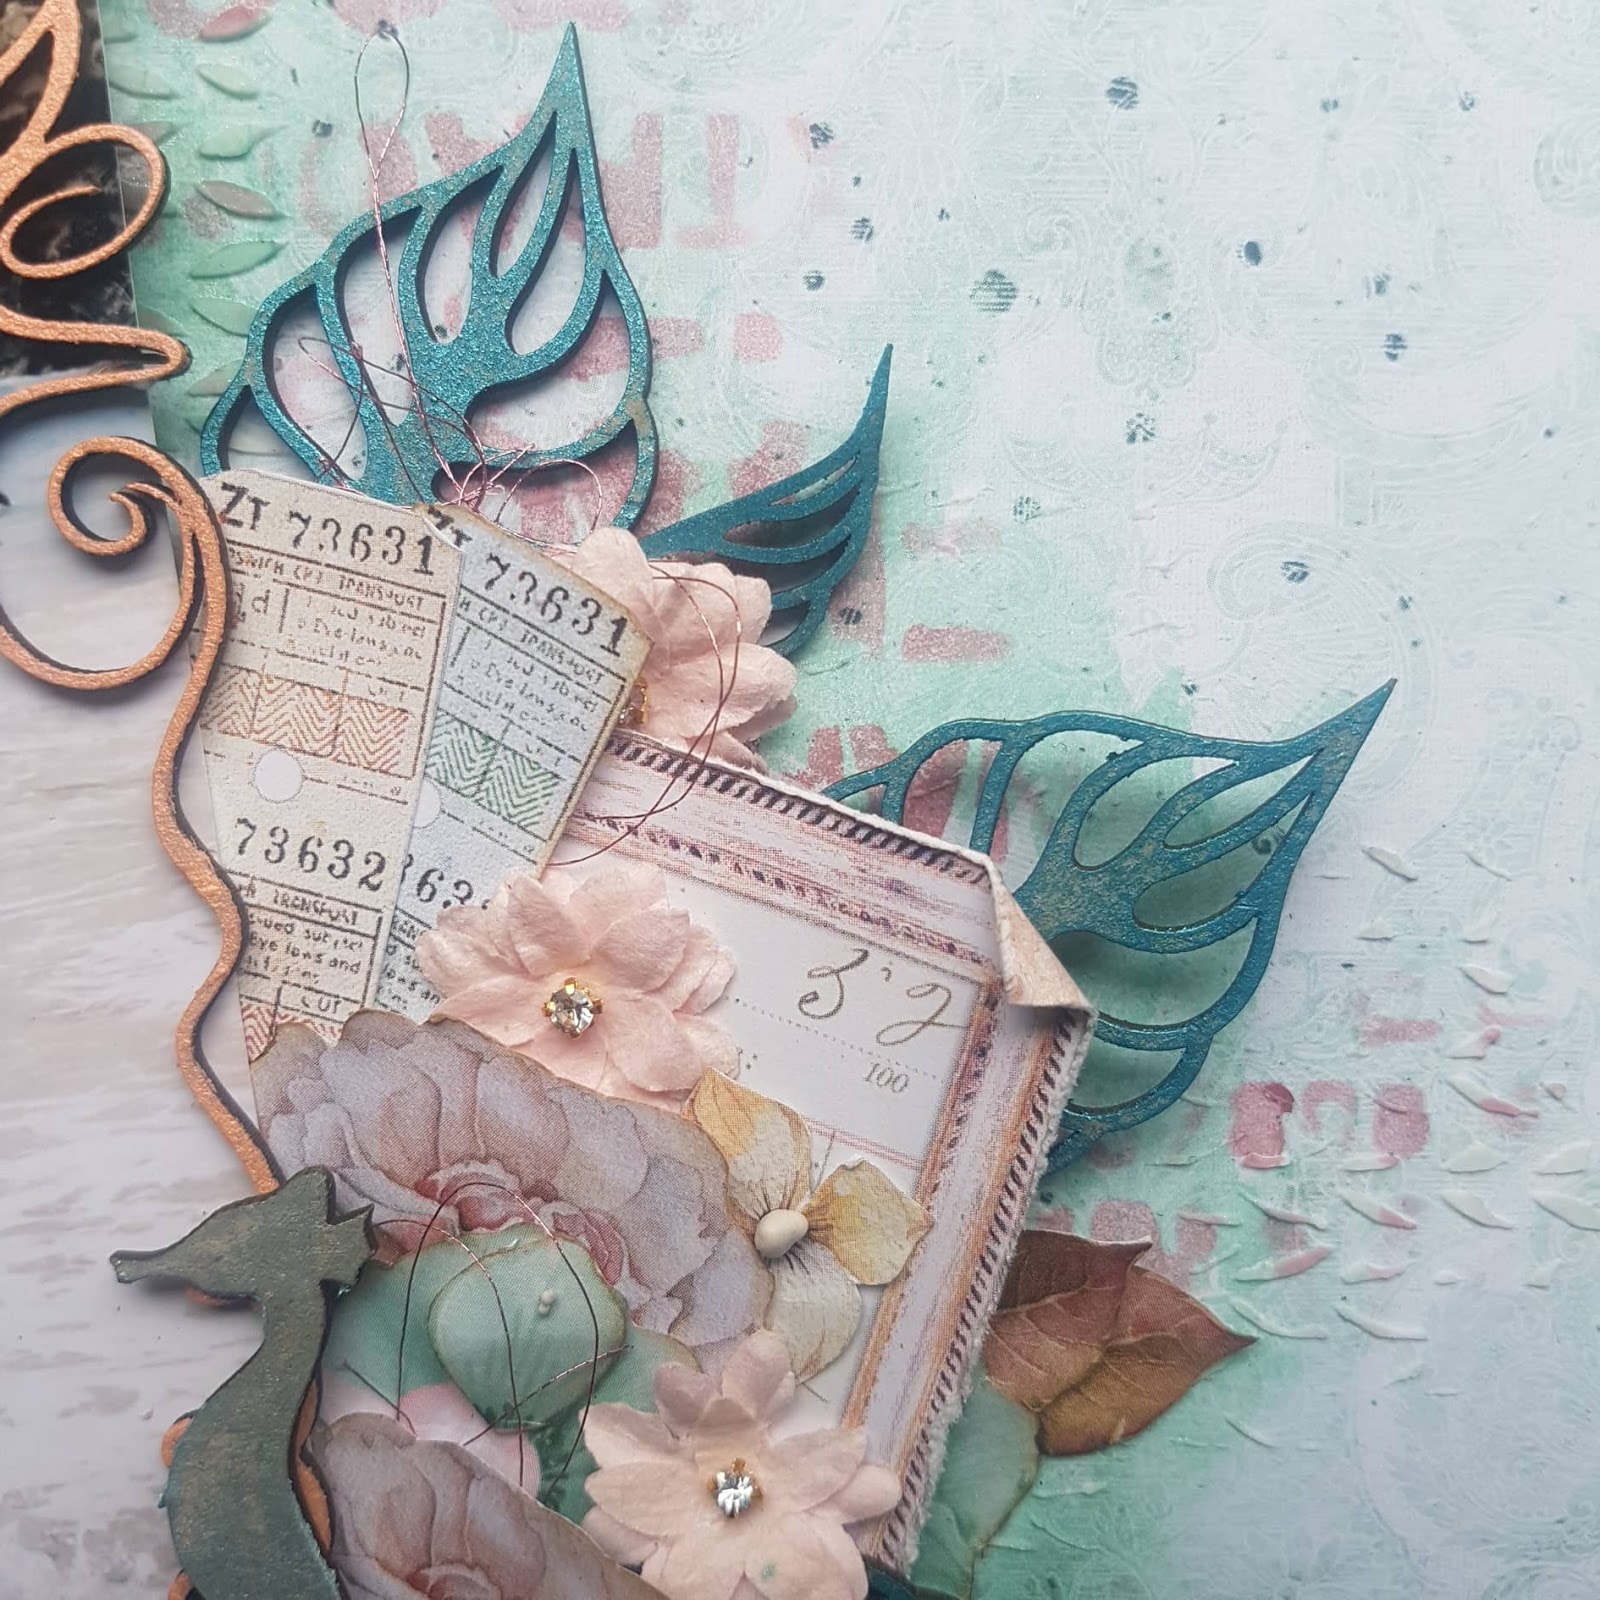
I have put together a comical layout using some of the slapstick Chipboard. I love the final product


I used Cocoa Vanilla Midnight range to bring this page to life. I used my go-to tearing technique to mimic the ombre effect in the photo. There are actually three pieces in there... the middle sheet has been engulfed!


I used Distress Oxide sprays in my background. 

Have you seen that Jen is now stockinng them in the online store???   HERE 
I love their milky matt texture... 


I coloured the chipboard in chalk acrylic - love this paint as it has a real tooth to it making the finish totally matt.


WOW - check out those diamonds...


 I used some resin castings from some moulds I recently acquired. Super cool!!I


 I hope that this has given you a new way to look at chipboard!!


Abela Artistry


Monday 26 August 2019

Beauty - Mary Tzalla with VIDEO TUTORIAL


Hello dear friends!
Mary with you today and I have a new layout with a video tutorial to share with you. As always I found my photo on Pinterest and this one inspired me to create a soft romantic page in green, white and brown tones. 

But, before I continue more I want to give all the proper credits to the ''unknown'' photographer. To create my page I used Maja Design papers from the gorgeous ''Vintage Summer Basics'' collection along with some gorgeous Dusty Attic chipboards and beautiful 49 and Market flowers.


You can watch all the procedure here…


  The paper I used is the ''1921'' and I started by applying a coat of clear gesso. Then, I created texture with Finnabair paper texture paste and the Dusty Attic Damask #2 Stencil. When the paste dried, I randomly stamped using 49 and Market stamp sets. I added color with the Lindy’s Gang ''Greased Lightnin' Green'' spray.


Next, I cut out some pieces from the ''Lattice Small'' panel and colored them with Finnabair Rustic Brown acrylic paint. Continued with the ''Mini Foliage'' and ''Hanging Vines'' chippies which were also painted with the Golden Moss paint. Some waxes in bronze and white gold were randomly rambed on them. The ''Juliette Balcony #2'' and the chipboard from the ''Mini Bird Cages #1'' were heat embossed with the Stampendous Aged Taupe embossing enamel.


 Then, I layered all the gorgeous elements around my photo and added in some 49 and Market  flowers from the ''Wildflowers, Country & Seaside Blooms'' sets. At last, I added the title word ''Beauty'' from the ''Wordpl@y #2 BLACK'' set and finished it up with art stones, glass beads and glitter.


Dusty Attic products used:


 49 and Market products used:


I hope you enjoyed my project!

Thank you for stopping by! 


Sunday 25 August 2019

Summer - Tanya Cloete - Mood Board Inspiration

Dusty Attic 

Moodboard Inspiration 

Beach Layout

'Summer Fun'

Hello dear Dusty FANattics!
Love the stunning colours and tones of this months 
mood board. Absolutely fabulous! Here is my take  on the Aug challenge.


Inspired by the these fabulous colours and picture I created a beach layout
featuring a combination of the stunning Prima Marketing Inc collections French 
Riviera and St. Tropez and lots of gorgeous Dusty Attic chipboard. I prepped 
my page with some clear gesso and added Prima Color Bloom Sprays
 and a mixture of paper texture paste and mica powder over a stencil. I randomly 
added some stamp images and paint splatters .I added rust pastes and metallique 
waxes to some of the chipboard pieces, the others have been coloured with distress
 inks, I have added crackle accents to these. I heat embossed the chipboard
 title 'Summer' and the 'FUN' word I inked with distress oxide. I adorned my photo
 cluster with some gorgeous Prima flowers, starfishes, sea shells, and torn pieces of lace.


Dusty Attic Product List:


Thanks for stopping by!

Happy Papercrafting!

Tanya


I love my Cat - Michelle Van Oudtshoorn

Hello everyone!

Oh my goodness! I am just loving all the new dog and cat chipboard releases - and I have used the new cat chipboard to do my project for you today.


I have used some Mintay Berrylicious paper to create my layout, tearing the 2nd paper added to the base page. The chipboard has all been painted in white first, and then once dry, have added Dusty in Colour paints and painted these (Watered down). Once these were dry I then sanded them.
I started with attaching the photo to the frame (isn't this frame just adorable with all the cat icons?), then arranging matting papers behind. These were then adhered to the page with foam tape. I then added the flower cluster to the side adding in the dusty attic blooms and the cut cat paw chippies.
I have then added the broken bits of mesh in the cluster as well as around the frame, and add the fish bones from the cat icon chippie.
I have finished off adding some 49 and Market wishing bubbles, some stamping and then adding some blue paint around the papers and flowers to left the photos and the flower feature.
Just love the cat icons on this frame.

These are the products I have used:

Thank you for visiting, and have a super day!

Michelle


Saturday 24 August 2019

Cherish - Michelle Van Oudshoorn - Mood Board Inspiration

Hello there!
Here is my take in the lovely moodboard for August. Gosh I just love this moodboard ... so inviting, I would just love to be there .....

 Here is my take on the moodboard inspired by the colours

I have used some of the new release chippies - they are just so gorgeous!

I have started off with clear gesso on the page. Once this as dry, I stencilled the background with texture paste using the Dusty Attic Knitting Stencil. The background chipboard is from the Polaroid Frame Set #1. I have used the outside frame and one of the slides with the cherish word. The photo was then placed on this frame.

I used Creative Expression Gilding Polish to colour all my chipboard. I first done the frame and placed this on top of the photo before I added fussy cut flowers.

Once this was all placed. I the tucked in the Tropical Foliage #6 under the flowers, and added some Blooms #3. And I just had to add the gorgeous little mini shells - they are just so cute.

I finished off the page adding some art stones and adding some ink around the edges of the design.


Products used:

Thanks for stopping by!