Showing posts with label Pet Chipboard. Show all posts

Wednesday, 23 February 2022

A Girl and her Dog - Belinda Spencer - Mood Board Inspiration

 Hello Dusty Attic fans!

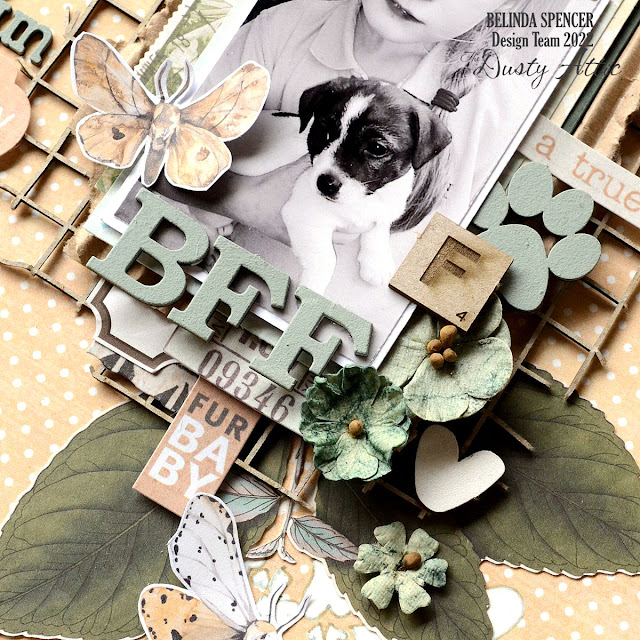
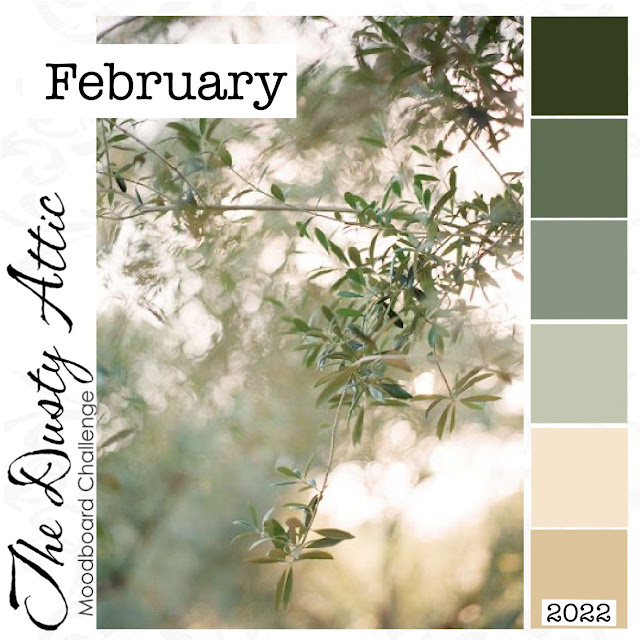
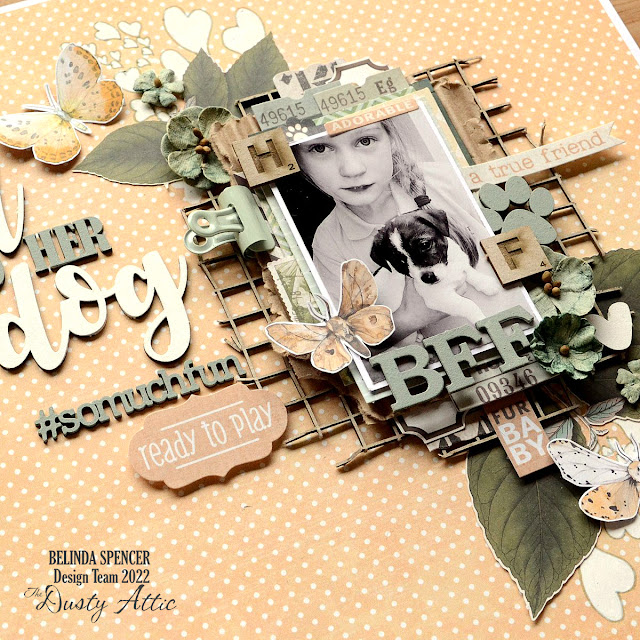
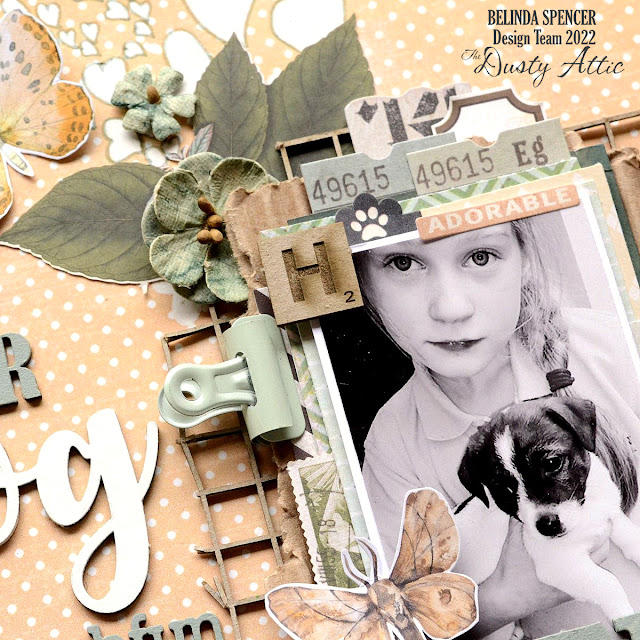
It's Belinda here with you today to share my layout inspired by the gorgeous February Mood Board using lots of fun Dusty Attic products.


Here's a peek at the Mood Board


'A Girl and her Dog'


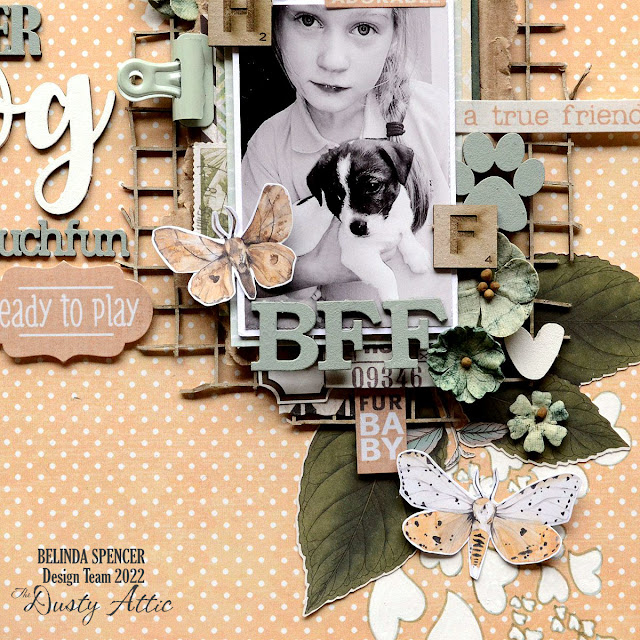
For this layout I started by adding some stencilling to the background patterned paper using the Heart Attack Stencil with white gesso. The white spots on the paper made the love hearts look weird so I used a fineliner pen to add an outline.


Next I created a stack of co-ordinating patterned paper, a torn piece of the corrugated card and a Grid Panel at the bottom. I tore the edges of the grid panel away in places to give it a more rustic look.


Next I painted the chipboard pieces that I wanted coloured. I gave those pieces a couple of coats of gesso first. Then I mixed up some acrylic paint to match the mood board and applied that to select pieces.


Finally I assembled my layout adding my photo and some extra embellishments.


The Dusty Attic products used:


Thanks so much for stopping by the blog today. I hope you find some time to play with the mood board and some awesome Dusty Attic chipboard too.

Cheers
Belinda


Saturday, 29 May 2021

My Girl Ziva - Belinda Spencer - Mood Board Inspiration

 Hello Dusty Attic fans!


It's Belinda here today to share my latest layout for The Dusty Attic inspired by the May mood board and featuring lots of fun chipboard pieces and some Dusty In Colour Paint.

'My Girl Ziva'

Here's a reminder of the gorgeous mood board for this month:


For my layout I began by applying some Mountain Meadow Dusty In Colour paint to my background with a palette knife. I love the messy look a palette knife gives. Once the paint was dry, I used the Distressed Grid stencil with some heavy white gesso to add some interest. I flicked over some more colour using Posca Paint Pens.


Next I painted all of my chipboard pieces with several coats of heavy white gesso letting them dry between coats. Once the gesso was dry, I painted some of the pieces with Dusty In Colour Paints in Oceania and Dusty Pink. Some of the pieces I left white to break up all of the colour on the page and also because I just love the look of crisp white chipboard pieces on my pages.


My favourite thing is layering! Lots of layering!! So my next step was to layer all of my chipboard pieces as well as patterned papers in the mood board colours and my photo. Oh and I used a leftover 'negative' piece from a set of tabs that you can see poking out at the top of my photo/paper stack. I love to find ways to use up my leftover bits of chipboard so nothing goes to waste.


Here's what I used:


DA0912 Dusty in Colour Oceania
DA0916 Dusty in Colour Mountain Meadow


DA0862 Mini ABC Set Lower

Thanks for stopping by the blog today! I hope you find some time to get creative with awesome Dusty Attic products too.

Cheers
Belinda

Sunday, 25 April 2021

A boy and his dog - Rikki G - Mood Board Inspiration

 Good morning how are you? Rikki here today with some grungy, stencil based inspiration for you so why dont you grab your stencils and give it a go.

One of my favourite things to do is to get a little bit messy with my pages and what better than that right? Sometimes its a little hard to start, it depends on my mood really, this is where stencils are a perfect starting point...… and that doesn't mean grab the texture paste.... especially if your time poor or your just too impatient to let things dry.


To start off grab a couple of stencils I have used Dusty Attics Floral StencilCityscape StencilBrick Wall Stencil.

I started off with the Brick Wall stencil and I used this months mood board for my colour inspiration.... 


Using Tim Holtz Oxides - Wild Honey, Seedless Preserves, Wilted Violet and Black Soot.


So I started off by adding pockets of colour on my background, once that was done I went in with the Brick wall Stencil, just in small areas alternating between the three colours, but doing it lightly it allows you to see and add other stencils, like the Cityscape with the Black Soot ink.

To get my city skyline I just moved the stencil across the page- then I realised I needed a bit more height to the city because the photo was going to over it all..... so with a little bit of manipulation I just selected and inked one building at a time.


Once the City is in place you can go back over the top with the Brickwall Stencil and start to darken up your colours. This is also the perfect time to introduce more Black Soot to your background with some background stamps.


With the Floral Stencil, I used only Black Soot, the joy of the oxides are they allow a transparent look without overwhelming the page so you can see the colours underneath and when they dry you can see all your layers without it turning to a bad brown colour.


I wanted to make my Cityscape background to look a bit like a graffiti wall so I just used a black mist and ran it down the corners, and a very cool effect happens where the oxide is placed its has a little resistance so you can see the all the details of the stencils.


Initially I started with the chipboard only being in Black Soot ink but when placed on the background it was lost.....so with my waxes I added the orange and purple on them and used a peacock coloured wax for a highlight and contrast colour.


I hope this has inspired you to go and play with your Dusty Attic Stencils, if you give it a go dont forget to share with us on the  Dusty FANattics Facebook page HERE .

And while your at it why dont your enter this months Mood Board Challenge?

We would love to see your take on our moodboard.  Don’t forget to share your projects on our Facebook page. Why not enter the Mood Board challenge yourself? 

All you need to do is add your take of the challenge into the comments section on the Dusty FANattics Facebook page HERE for your chance to win one of two amazing $50 Credits to choose any. 

Good Luck and have fun creating.


Floral Stencil


Cityscape Stencil


Brick Wall Stencil


Dog Border


Sunday, 12 July 2020

You had me at Meow - Kareen Dion

Hello everyone!
So it's my turn today to show you some inspiration!
I made a layout with my beautiful cat "Biscuit", 
the chipboards about the cats are perfect! 

I embellish my layout with the Frangipani #2 chipboard. I applied a thin layer of white paint and then I applied watercolor on them to color them.

I used the title "You Had Me at Meow". The title is simply used with black paint and 
I put a little bit of white gesso on it to soften a little bit the title.

On the background, I used the Ornate Circle #2 chipboard. I used watercolor and a little
bit of white gesso on it.

I painted the chipboard Banners #4 with black paint.


Material used : 


I hope you liked it and we see us soon for more inspiration!
Thank you for stopping by!


Friday, 29 May 2020

Love is in the Air - Kerstin Filou

Welcome creative friends!

May is known here to be the best month to get married. But in these difficult times it's not always easy connected with many difficult decisions,
 many celebrations are postponed.

So I needed a little joyful cheering present for a dog fan just like me. 
I created a mixed media collage in grunge style, 
which will be glued on a canvas and used as a new wall decoration.


some close up's


A friendly bright sunshine (stencil from DecoArt) 
added with white Modeling Paste and highlighted with golden wax creme


The edges were decorated with white crackling paste applied unevenly with a palette knife  and then stamped with a texture stamp and brown Archival inkpad


For the lettering I used a special dark blue embossing powder 'Salted Navy Enamel' from Emerald Creek 


afterwards I used golden and brown wax cream and finally everything was painted over again in dry brush technique with white gesso


 Dusty Attic chipboards 

Love Is
Wet Noses

 Broken
Bits #8 – Diamonds

Industrial
Stars

Paw Prints –
Dog


Happy crafting!

Thanks for your visit!