Showing posts with label Creative Layers. Show all posts

Wednesday, 4 October 2023

Art Journal page and Christmas Card - Heather Woodall

 Good morning

Today I've done 2 projects for you.

The first one is bright and colourful. It is a double layout with a 70's hippy theme from a recent retreat that I attended.
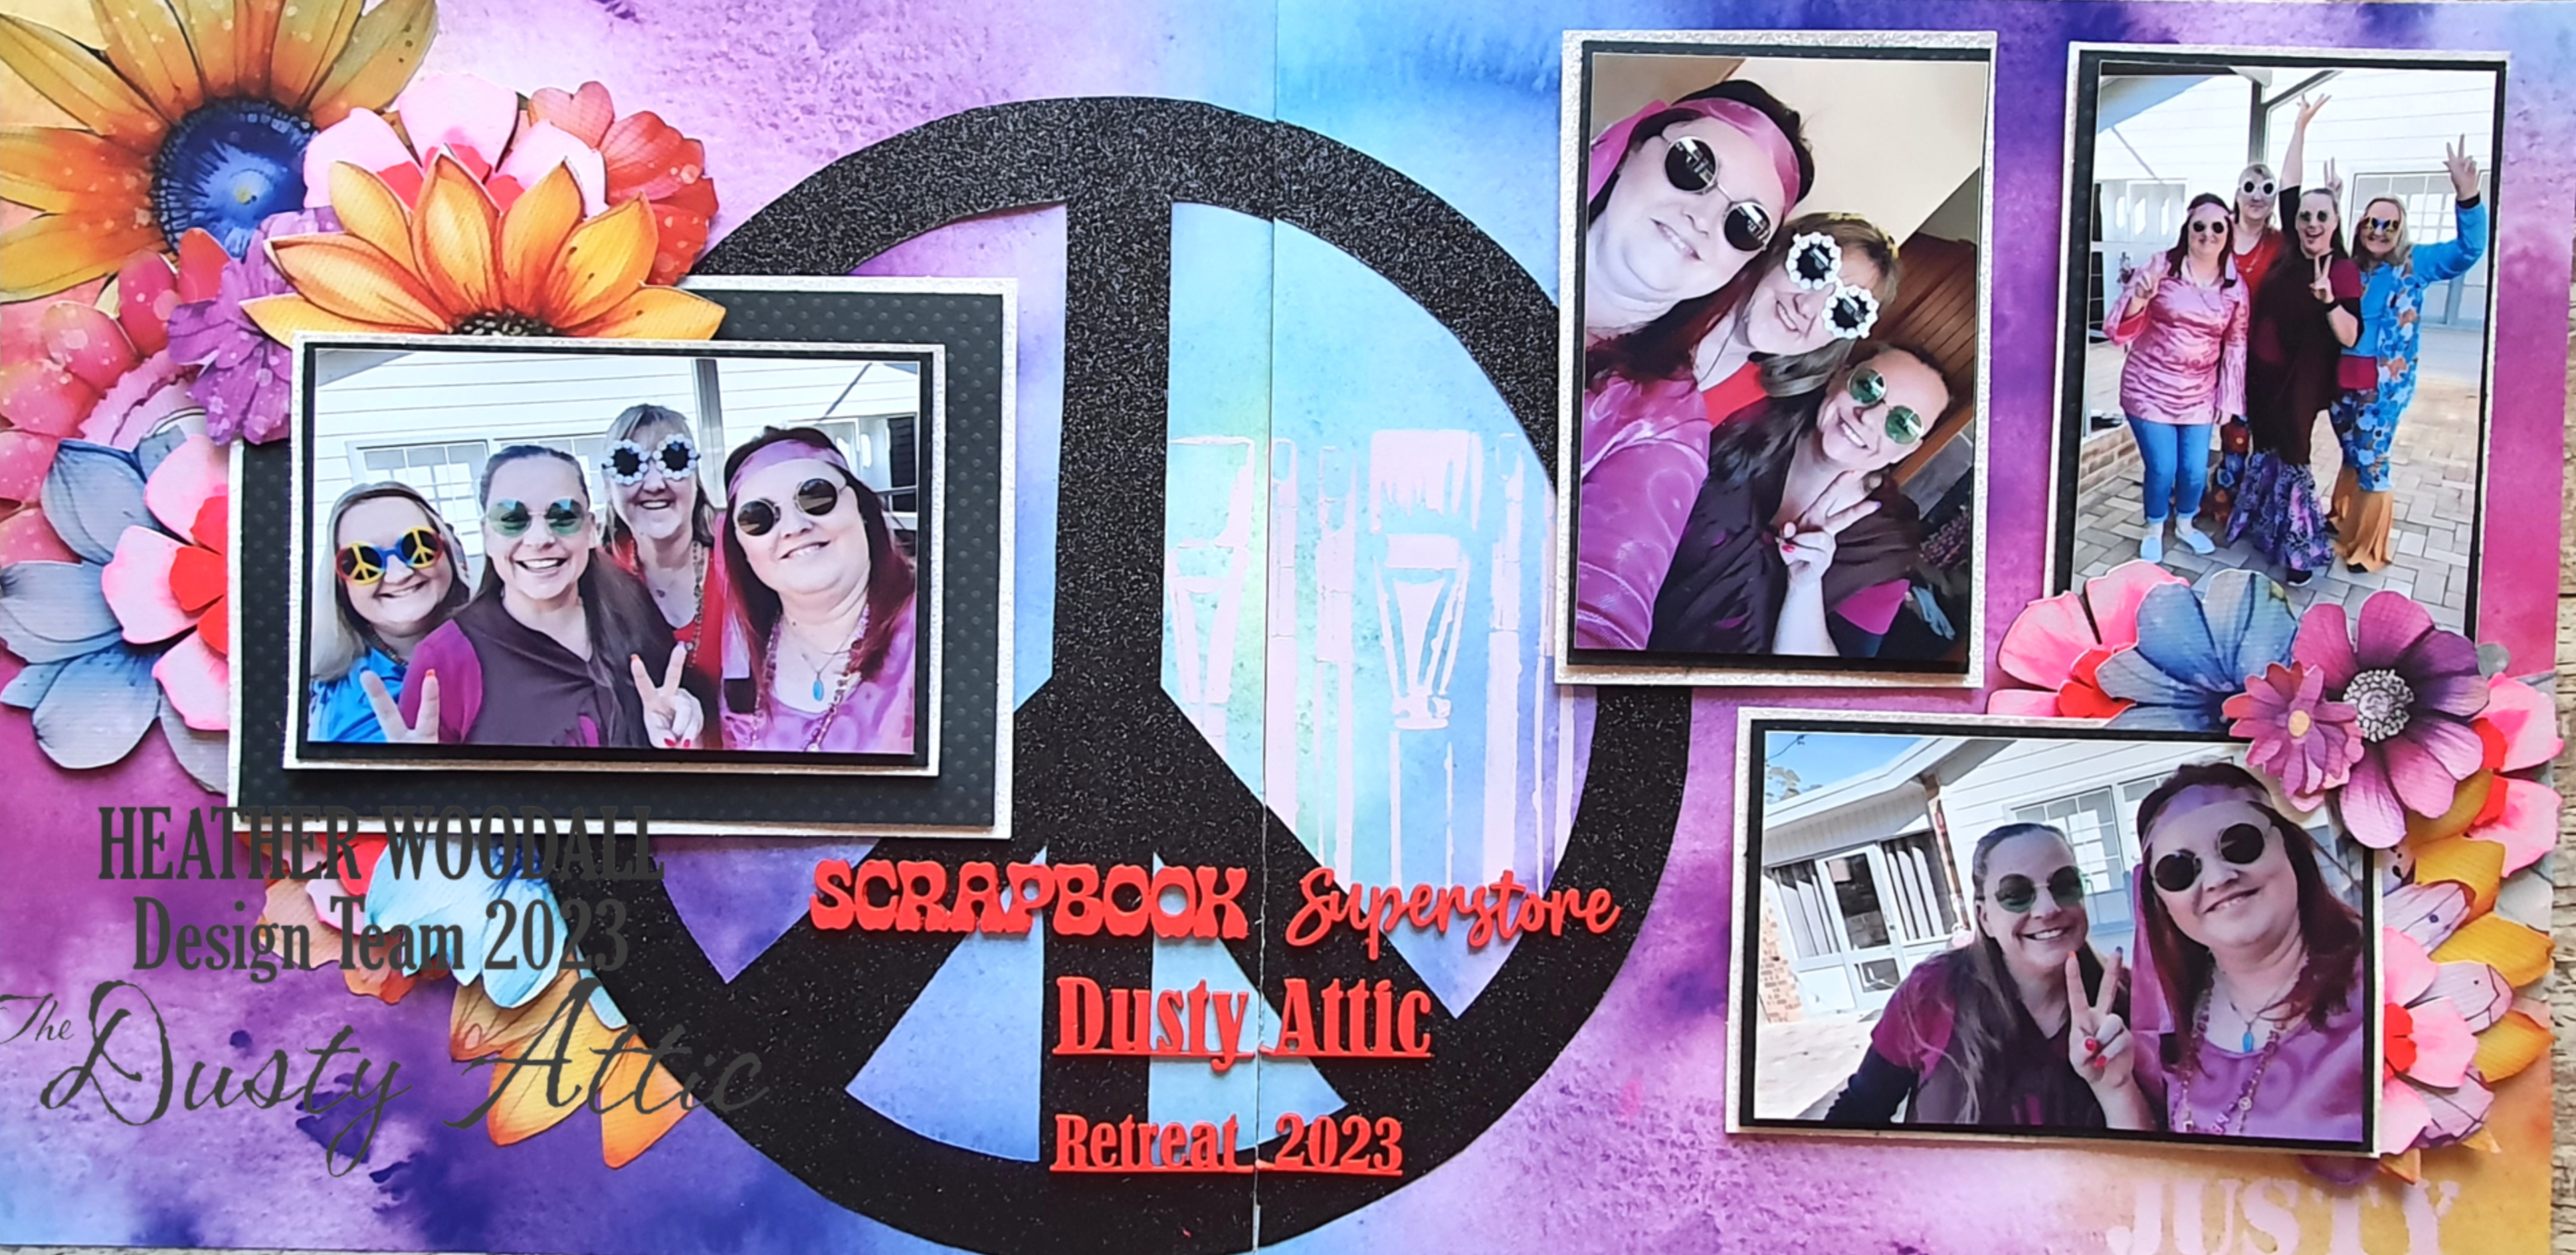

I started with the super bright and floral papers from PaperRoses. I then created the peace sign using black glitter cardstock. But before sticking it down I added some stenciling in the background, using the Paintbrushes Stencil (DA36011), and some soft pink paint.

While I was stenciling I used ABC Stencil (DA1770) to stencil in the word "Justy" in the bottom right corner. At retreat I was trying to say Jennifer from Dusty Attic and it came out "Justy", and it kinda stuck.


I then painted the Flowers Layers #6 (DA1078) with the same soft pink and then added some hot pink accents to them. and tucked them in amongst my fussy cut paper flowers. To make the packet go further I cut the larger ones in half as you only see half the flower anyway.


To finish off the page I used my hot pink paint to pain the chipboard title that Jen very kindly gave us at retreat.

My second project was a quick and simple Christmas card.


I have used the super cute Aussie Chrismtas range from Studio 73 as my starting point, and in my Dusty Attic basket I had a couple of Creative Cluster #6 packs that had been partly used, but still had the trees. So I used a combination of green, brown light/sage green and a gold to paint them, and of course used my gold paint for the starts on top. The Christmas number plate, I used black paint all over and into the word, then lightly ran some gold paint over the top.


Thank you again
Heather


Thursday, 27 April 2023

The Simple life - Miss Carrie


Hello, crafting friends. It's Miss Carrie here with another scrapbook project for you to try. Today, I am working with a ren fest photo and chose to create a more fanciful scene with floral layers, bits of chipboard, transfers and texture paste.


I started by building background layers with stencils and floral chipboard pieces. I wanted to bring out the red hair in both our children., so I created a soft pattern in the background with the chicken wire stencil and mahogany ink. Over the top, I added a textured pattern using the distressed grid stencil. I mix opaque grit paste with walnut ink to create this lovely design.


After adding a few layers of ephemera paper, I added some chipboard elements from the wildflower 3 pack pack. I gave these a soft coat of white paint to help them stand out over the neutral papers.


 I did cut these chipboard pieces apart so that I could continue the stem potion below the photo. This also reduced some of the bulk on the page.

Behind the photo, I added layers of bookplate ephemera, floral rub on transfers, acetate leaves, and elements from the creative layers 9 collection. I shaded the chicken wire and flora pieces with a mix of blue distress oxide sprays to match the soft blue in the rub-on transfers.


I layered these items with small tea leaves, botanical leaves, and the flowerposie. To bring some more colour to the page, I painted the posies with distress oxide sprays. After prepping them with white gesso, I poured some ink into the paint palette and added a few layers of colour.

The title on this page also came from the creative layers collection. To make the phrase stand out, I painted this with a soft white, then added a coat of dark brown. Before the paint had a chance to dry, I wiped off the dark brown so that it only stayed within the letters on the chipboard.


I chose to keep the title simple and layered it over a few chipboard phrases with a little blue heart. I brought a few more phrases with a little adventure chipboard phrase with a little adventure chipboard phrase and a circular phrase from the designer disc 10 collection.

The word disc was painted in a soft white and then layered with a chipboard frame to help it stand out more again the botanical pieces. The script letters on the disc are beautifully designed and create a lovely statement piece on the page.


Throughout the page, I tucked more leaves and floral bits and added some texture with twine. I tucked the story behind the photo in a little pocket and topped it off with a tab. 


I hope this project inspired you to try something new. 

I cant wait to see what you create 

Botanic Mix 6 https://dustyattic.com.au/product/botanic-mix-6/ 

Designer Disc 10 https://dustyattic.com.au/product/designer-disc-10-words/ 

Chicken Wire Stencil https://dustyattic.com.au/product/chicken-wire-stencil/ 

Flower Posie https://dustyattic.com.au/product/flower-posie-4/ 

Wildflower 3 https://dustyattic.com.au/products.php/?product=Wildflower-%233 

Creative Layers 9 https://dustyattic.com.au/product/creative-layers-9/

Distress Grid Stencil https://dustyattic.com.au/product/distressed-grid-stencil/  


Friday, 22 July 2022

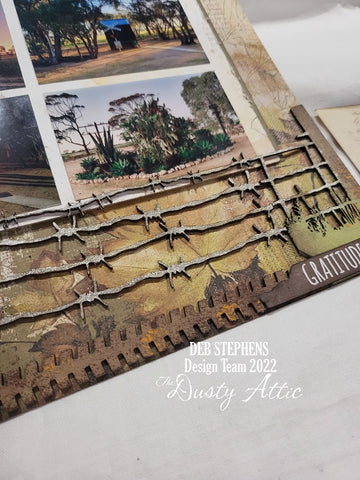
Bruce Rock Country Papercraft retreat - Deb Stephens

One of the best Craft Retreats is Country Papercraft at Bruce Rock in the Wheat belt of Western Australia. We always have such an amazing experience when we go there and Marg and Vicki look after everyone so well. I always take a stack of photos when I am there and need to be efficient in how I scrap them, so I use smaller photo sizes which makes it easier to use multiple photos on a single or double layout. Of course, I’m not averse to having a feature page or two in the mix as well but there are just too many photos for me to do that when recording memories for each trip.

This double layout features Vintage Artistry In the leaves- Autumnal and Journal Cards Paper by 49andMarket. I have used a large DA piece called Rustic Farm Fence #1 DA0855 which I cut so that I could make it stretch out across both pages. I extended this feature by joining additional barb wire DA0154 chipboard and adding the smaller barb wire from the Creative Layers #9 DA2805 set as well a small tyre track DA1194.

Gum Trees DA0743 (and from the Creative layers set) were painted and layered up to give depth. I didn’t have any Cart wheels in my stash, so I decided to use Industrial Jumbo Gears DA2860 instead.

I used another Industrial Jumbo gear and the rest of the Creative Layers set to complete the layered cluster on the left hand side layout. The Bruce Rock and Country PaperCraft Retreat chipboard pieces are a custom cut set by Dusty Attic, available from the Retreat itself, which helps finish off my double layout perfectly, along with some words from the barcodes of the paper.

Here are some more pictures of the Layout and the DA products I used. Until next time, Take care!

Friday, 20 May 2022

Totally Smitten - Lynette Jacobs

 Lynette here, welcome to the blog today. I have the pleasure of sharing some inspiration for May.  These precious photos were taken when our family spent time at the beach on my birthday in January.  Little Eben wasn't going to miss out on any love.


Dusty Attic products used:

Heart stencil

Creative layers #8
                         
Mini Foliage #2
       
Mini captions #8

Some close up details:
I first applied some texture paste to three of the corners of the white cardstock background paper and then started putting my page together.
The chipboard pieces were heat embossed with white and green embossing powder.


I love it when another memory is documented. 
 
Thank you for visiting the blog.  Visit the Dusty Attic online store for more amazing designs.

Happy crafting


Thursday, 26 November 2020

Adore - Belinda Spencer - Mood Board Inspiration

 Hello Dusty Attic fans!!


It's Belinda here today to share my layout inspired by the November Mood Board featuring some gorgeous Dusty Attic chipboard pieces.

'Adore'


Here's a peek at the stunning inspiration. Such soft, pretty colours:


To start this layout, I added some heavy white gesso swiped across the background patterned paper. Once dry, I applied some Dusty In Colour Dusty Pink acrylic paint over the Starry Night Stencil using a latex make-up wedge. I dried this off with a heat gun and then placed the stencil back over the top to trace around some of the stars with a number 1 Micron Pen.


I painted all of the chipboard pieces with heavy white gesso as the base. While I had the Dusty Pink paint out, I painted the title, a mini heart button and the 'you are the best' sentiment.


Next, I painted all of the leaves with the Dusty in Colour Jungle Green paint. Once they were dry, I drew some detail on them using a fine white Posca Paint Pen.


The Dusty Attic products used:


Thanks so much for stopping by the blog today! I hope you find some time to be inspired by the mood board too.

Cheers
Belinda


Thursday, 23 April 2020

NEW RELEASE - Mothers Day

Hello To all of our Dusty FANattics
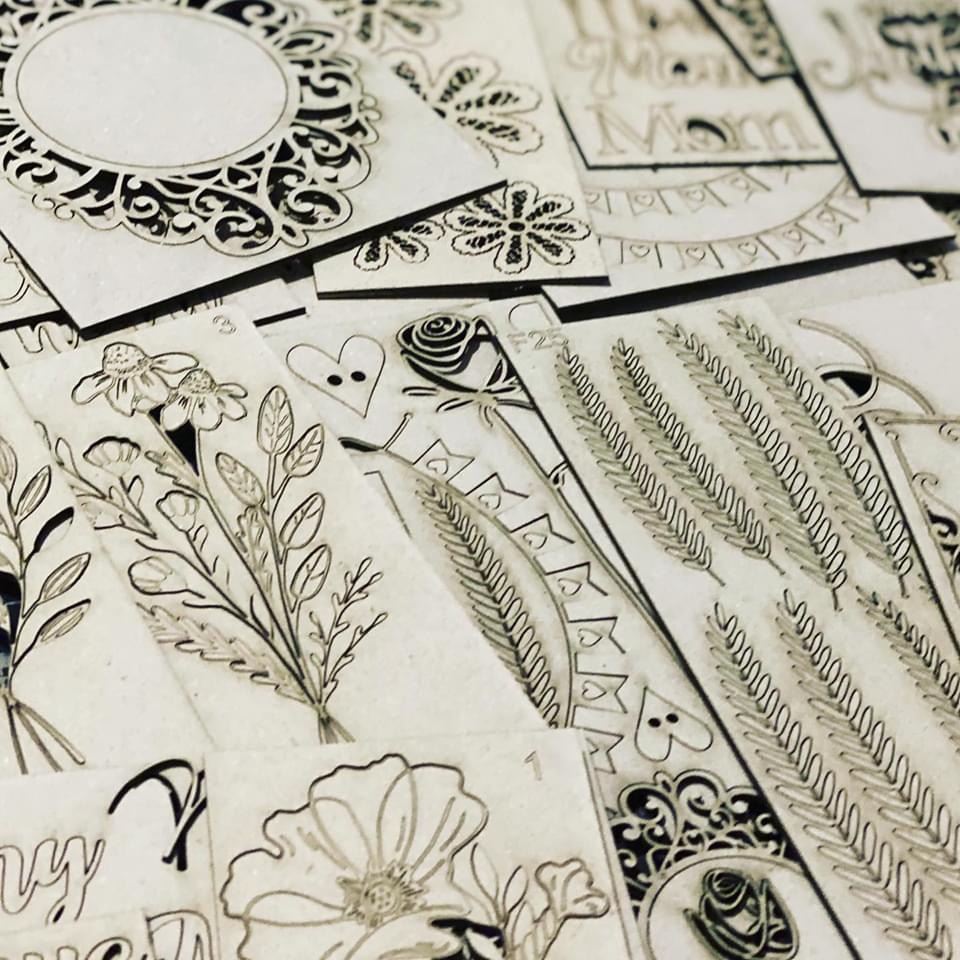
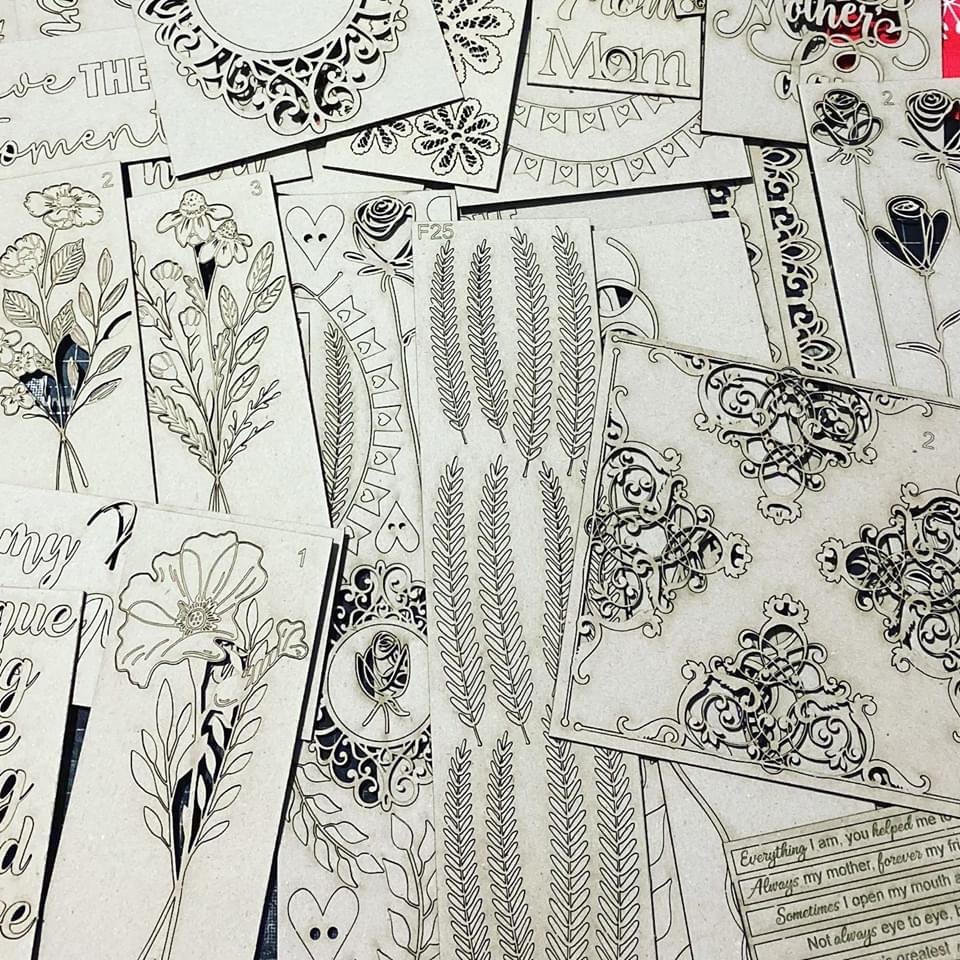
Mothers Day in Australia is held on the second Sunday in May and we have some wonderful new frames, stencils and chipboard designs to celebrate those very special Mums in our life. Here are a few of the designs available. 
You can find all the new Mothers Day designs here.
These are just a few of our whole release, of course they are so pretty you don’t just need to use them for Mothers Day
Please note: We send all our parcels out by Express Post as these are the only items currently leaving Australia. Due to COVID-19 government restrictions there has been reduced flights resulting in a backlog of parcels and all parcels are being delayed due to this process. 
Check out our extensive range of chipboard and stencils while
you are browsing our new chipboard designs.

Love Jen xxx
Owner and Creative Director
Dusty Attic