Tuesday, 15 January 2013

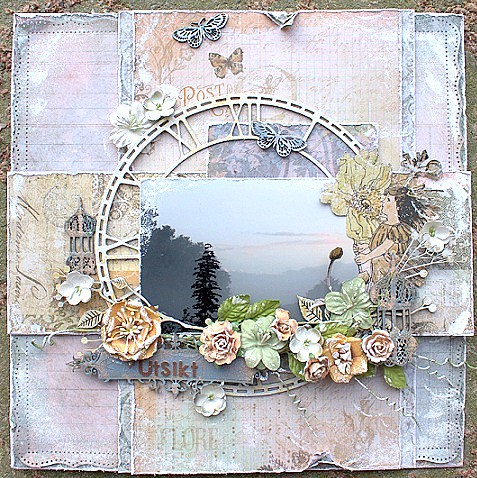
"Utsikt" - Helena Johansson DT

Utsikt


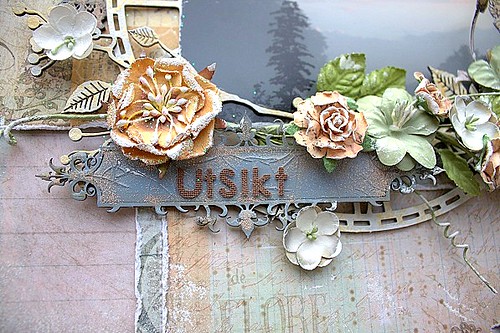
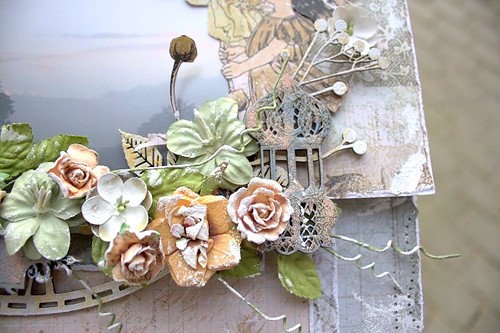
This Dusty Attic layout is made after the January Sketch, made by our very talented Mistra! I have used the brand new Morrocan Lamps (DA0835 and DA0836). I have a small tutorial on how I painted the lamps further down. I treated the Vintage Nameplate the same way as the lamps.

The Skeleton Clock Face (DA0430) was painted with Dusty in Colour, Navajo White and Vintage Gold. The Branches and Berries (DA0729) was painted the same way. I just love chippies that you can tuck into a flowercluster - perfect for a flowergirl like me!

Speaking of flowers, I have used some beautiful Dusty in Blooms on this page too - Grassy Knoll and Bridal Veil. Finally I have used Flutterbies #3 (DA0766), painted with Dusty in Colour, Storm Cloud and Faded Denim.

Here's a close-up of the Flutterbies and Skeleton Clock Face. You can barely see the Gold colour, but it gives a beautiful shine to the chippies.
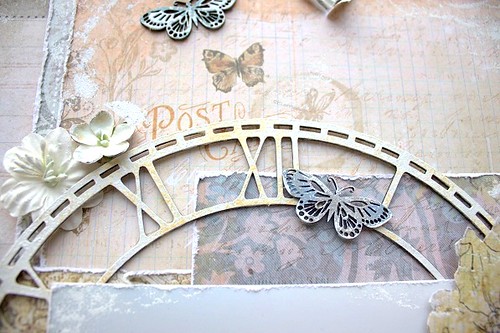
Utsikt detalj4

Here's the smaller of the Morrocan Lamps:
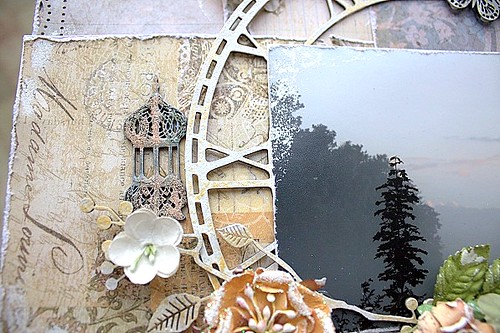
Utsikt detalj3

I placed my title "Utsikt" (which means "View", by the way) on the Vintage Nameplate.
Utsikt detalj2

Here's the larger of the Morrocan Lamps, and some of the Dusty in Blooms:
Utsikt detalj

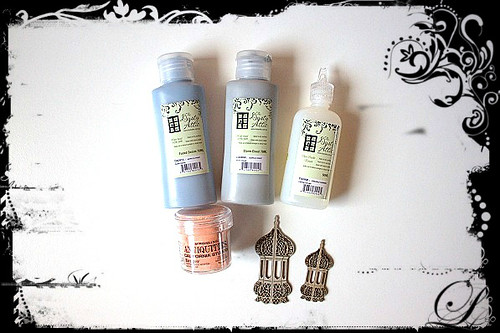
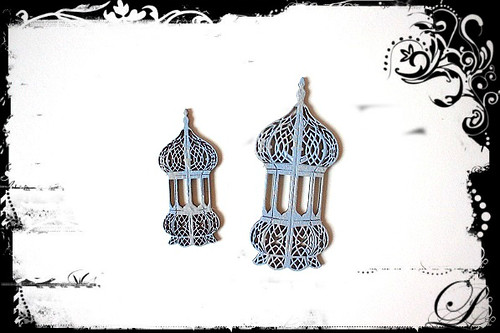
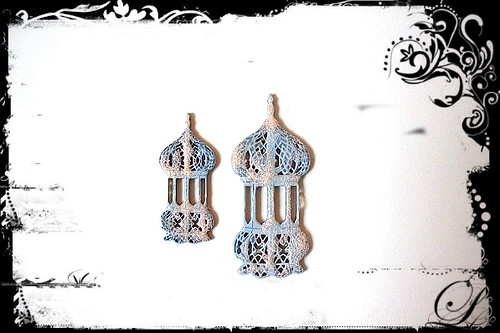
Here's a small tutorial on how I did the Morrocan Lamps. I have used one medium sized lamp (DA0835) and one mini lamp (DA0836). Dusty in Colours used: Storm Cloud, Faded Denim and Clear Crackle Varnish. Finally I have used Antiquities Embossing Powder.
Lamp tutorial 1

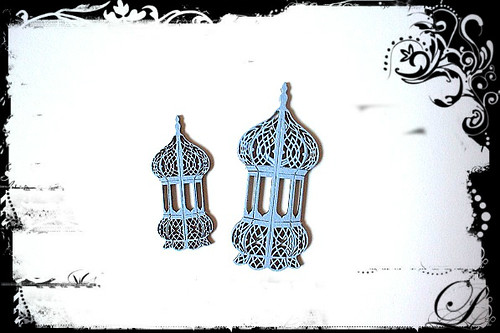
First I painted the lamps with Faded Denim, using a sponge.
Lamp tutorial 2

Then I painted the lamps with Storm Cloud, but not on the entire chippie, just a bit here and there to make the colours mix a bit.
Lamp tutorial 3

After the acrylic paint had dried, I put on Clear Crackle Varnish, a medium thick layer. This varnish dries in about an hour, depending on how thick of a layer you put on of course. Right after I had put on the varnish, I sprinkled some Antiquities Embossing Powder here and there. The powder works more like glitter when used just as it is, and gives the chippies a really nice look!
Lamp tutorial 4

There, my Morrocan Lamps are ready. The colors matches my photo and papers just perfectly!

Monday, 14 January 2013

"We Call Her Little Horns" - Belinda Spencer DT

Did you know that The Dusty Attic now has its very own range of gorgeous paints as well as Crackle Varnish and Gloss Varnish??

Exciting, right?!!

Here is a layout I created using some of those beautiful paint colours as well as the awesome Crackle Varnish and some new chipboard...


I used a sponge to dab some of the Navajo White paint over a TCW chicken wire template on my background paper...


I painted the Stump and Grass with a combination of Cashmere, Faded Denim, Lavender Blush and Storm Cloud and then gave a coat of Navajo White over the top to tone all of the colours down to co-ordinate with my layout. I applied a fairly thick coat of the Crackle Varnish over the top, once the paint was dry, to get some really good cracks happening...


Dusty Attic products used:

Chipboard:


Thanks so much for stopping by!!

 Happy scrappin'
B-) xoxo

Sunday, 13 January 2013

January ATC by: Mistra Hoolahan


 This Month The ATC Theme is - Fairies & Flutterflies
January ATC's by: Mistra
 

 Mistra Hoolahan
The background was covered with tissue paper and then applied some Liquitex Opaque Flakes to one side and them sprayed my little heart out with Smooch Spritz.The chipboard was all firstly painted white, with some Smooch Spritz applied to the mini scroll, some Smooch Glitz to the Flutterby wings and the Fairy was dressed with Smooch Ink and Smooch Glitz on her dress.  I created new wings for her with the Flutterbies #3 chipboard.


Dusty Attic Products used:

Chipboard:

Paints/Mediums:
Dusty in Colour - Alabaster

Mis xo

January ATC's by: Belinda, Helena, Loiuse

 This Month The ATC Theme is - Fairies & Flutterflies
January ATC's by: Belinda, Helena, Louise


Belinda Spencer - Live in the Moment


For this atc I have printed a photo of my daughter in her fairy costume on matte photo paper. I then coloured her dress and shoes with Lyra Watercolour Crayons and flicked some Glimmermist over the top. I have also stamped a quote directly onto the image as well as the grasses at the bottom. I painted some Dusty In Colour Dusty Pink DA0907 around the distressed edge of the image. I created her fairy wings using a butterfly from the Flutterbies DA0766 which I embossed with Stampendous Shabby Pink Embossing Enamel.


Cheers B-) xoxo


Louise Collins - Love, Value, Inspire


Hi, here is a photo of my first ATC. I used the black paint with crackle glaze on top then rubbed gold into the cracks. The background was made by soaking a piece of grunge board with water then spraying with mists so they all blend. I also used DA Butterflies #3 and Blooms.

Dusty In Bloom Cornsilk Code: DA0806
Clear Crackle Varnish Code: DA0900
                         Soot Acrylic Paint Code: DA0925                          


Lou Collins XX


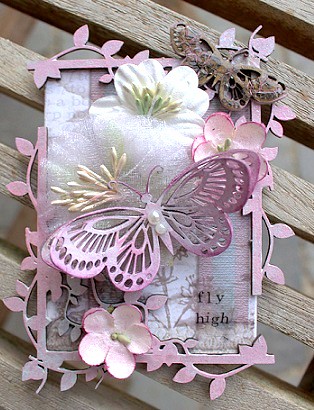
Helena Johansson - Fly High 

January ATC

This ATC is made for Dusty Attic and the January Theme "Fairies and Butterflies". I have used Flutterbies #3 (DA0766), corners from Devine Frame Set (DA0733) and Dusty in Blooms (Bridal Veil, DA0805). I painted the corners with acrylic paint from Dusty Attic, first Navajo White and then Dusty Pink. The larger Butterfly I first soaked in water to divide the wings a bit. When dried, I painted with Navajo White and Dusty Pink, then misted with a light pink glimmer mist and painted with light pink Pan Pastels. The smaller Butterfly I painted with Clear Crackle Varnish, on the raw chippie, then I used some light pink Pan Pastels on the cracks, when dried. The smaller white flowers I misted with light pink glimmer mist, then I used pink pan pastels on the edges of the petals.

Pop in on the Dusty Attic ning-page to see more ATC's and join our ATC swap! Dusty Attic has lots of mini chipboards that are super fun to work with when creating ATC's :)


Friday, 11 January 2013

'Loading On the Texture with Dusty Attic Goodies!" by Gabrielle Pollacco - Gabrielle Pollacco DT


Photobucket
Hi everyone! It's me, Gabrielle!  For this layout I wanted to use a bunch of the newest goodies I got from Dusty Attic.  Did you know they now also have amazing paint and mixed media products?  As well as corrugated card and leaves and blossoms of all sorts?   For this layout that I scrapped of my youngest daughter Meagan eating ice-cream (in her usual messy way!)
 I used a whole bunch of Dusty Attic chippies (the NEW 'Flower Buds', 'Wrought Iron Fence', 'Birds Nests', 'Grass Cluster #1' and the 'Typwriter Font - ABC') and I painted them with lots of the new gorgeous shades of acrylic paint from DA (Bisque, Pesto, Navajo White, Hot Chocolate, Mountain Meadow) as well as using bits of the NEW Corrugated Card and Dusty Blossom's Leaves to accent the page.  Here are the products I used.... 
Photobucket Photobucket
I painted the 'Flower Buds' with the Hot Chocolate acrylic paint and then just roughly dabbed some Navajo White paint on them to give them a distressed look.  For the grasses, I gave them each a coat of white Gesso first then painted them with 'Bisque' and dry brushed some Mountain Meadow at the tips and bottom.  The 'Wrought Iron Fence' I again painted with the Hot Chocolate and hit it with a bit of Tim Holtz Antique Bronze Distress Stickles.  The alpha's were painted with the DA Pesto paint, dabbed with a little of the Bisque paint.  I added some Stardust Stickles and coated them with Tim Holtz Glossy Accents.   Here are some close-up views of my page... 
Photobucket Photobucket Photobucket
Another fun thing I did with the paints is that I took the Hot Chocolate acrylic paint added some water (about 1 part paint to 3 parts water) put it in a Dusty Attic Spritz Bottle (Yep, they make them too!) and used it as a spritz for the background design of my paper.....it worked really well, no clogging!).  And a final step I did was dry brushing some Navajo White paint over different areas of the page once I glued it all together (over the corrugated cardboard, the blooms, the chippies and cheesecloth and burlap), this gives the page a more over-all distressed look.
I hope you enjoyed seeing my latest Dusty Attic project as much as I enjoyed making it! 
Photobucket


Thursday, 10 January 2013

"Love, Adore, Forever" - Geraldine Pasinati DT

Hi there and thankyou for dropping by! Firstly  'Happy New Year' and I hope that 2013 is a wonderful and lucky year for you all. Secondly, the reason for my blog post today..... to share with you my first ever official Dusty Attic DT layout ~ featuring the latest 'NEW 2013' release products.

'Love, Adore, Forever'


Dusty Attic Products:
Morrocan Border
Morrocan Accents
Dusty In Bloom Leaves
Dusty In Bloom Wild Moss


Other Products:
Tim Holtz crackle paint, Basic Grey & My Minds eye paper,
Melissa Frances resins, ink and Prima chalk.
** Tip ~ Ink your chipboard before applying your crackle paint
and the ink will combine with paint to add a soft and distorted colouring**

Till next time,....G!

Tuesday, 8 January 2013

January Guest Designer - Shona Keehn

We would like to welcome our first Guest Designer for this Year~ Shona Keehn.
Shona works magic with Dusty Attic and we are such a fan of hers!


My name is Shona Keehn and I am from British Columbia, Canada. I have 3 children, lots of grand babies and a wonderful husband of 27 years. I am thrilled to be a guest at Dusty Attic for January. Using chipboard pieces on my creations has become one of my go to embellies, whether I alter them or just leave them natural, they are definitely one of my favourite embellishments.  

I have been scrapping for many years but have just found my scrappy style in the last couple of years, Shabby Chic with a bit of grunge, and it is definitely something that I change up lots. I am always trying new techniques, and experimenting on chipboard pieces is one of them. I love to start with palettes and sketches. I find it amazing all the variations from just one starting point. 

Some of Shona's layouts are shown below
they are just beautiful ...... 

Just the 2 of us


Sparkle in her eyes
Brrr
I get so much inspiration from everyone in the scrapping world
 and I hope that you can get some from me. 

Shona's Blog can be seen ... HERE 

Monday, 7 January 2013

January ATC's by: Gabrielle and Geraldine

 This Month The ATC Theme is - Fairies & Flutterflies
January ATC's by: Geraldine & Gabi


Geraldine Pasinati
Hi there, making an ATC for me is surely a challenge as I don't often create on such a confined and small space. I was brought up with that old saying 'Dream big or Think Big'  and that was my plan for 2013, however I must say I did thouroughly enjoy thinking small here and now have a full year of  Dusty Attic ATC challenges to do so.

 If you are unfamiliar with ATC's they are better known as 'Artist Trading Cards'~ miniature works of art!  Size 2.5 x 3.5 inches.

'Embark'

Dusty Attic Products:
Fancy Labels Code: DA0491

Vintage Clock 2 Code: DA0262
Butterflies #2 Code: DA0842

Other Products:
Melissa Frances, Kaisercraft, Prima Chalk inks and bauble & Tim Holtz Crackle Paint.
Thanks for dropping by and I hope the blog inspires you to join in the challenge and create an ATC. Come join us on the Ning and share your creations.
Till next time, G!


Gabrielle Pollacco

Here's my January ATC...I went with butterflies as well.  I painted the butterflies blue, dry brushed with some bronze paint and coated the whole thing with Waterfall Stickles.


Hi Girls, This is my January ATC
 I went with the butterfly theme for my ATC. 
I used the 'Mini Arch Windows"
 and the "Flutterbies #3" for mine.
 I gave each of them a coat of white Gesso, for the window I rubbed a
 bit of Chestnut brown chalk ink on the edges and coated it with some Crackle finish. 
The butterflies got some bronze paint brushed on them at the tips and then gave
 them a coat of Waterfall Stickles.


Gabrielle xo


Sunday, 6 January 2013

"One & Only" - Karen Shady DT

I have been really excited for this day to come. Today, is my first reveal as a Design Team member for THE DUSTY ATTIC. I have been a hoarder of Dusty Attic products for a long time, they are my guilty little secret :). I have drawers full of beautiful, intricate chipboard pieces, just waiting patiently for that 'perfect' layout to put them on. Why do we scrapbookers do that ? why do we 'save' our favourite products for that 'perfect' page, its not like you cant just go out and get more. ( I also have a stash of 'really special' papers too, but shhh, dont tell anyone OK)

 Being a part of the design team this year, has finally given me the push Ive needed to get them out of the drawers, and onto my layouts, and I must say, they look so much more beautiful on a page, than stuck inside my drawer.

My style is quite florally, but, Ive tried to make this layout a little more masculine. This is a photo of 3 of my 4 boys, taken recently on a trip to Sovereign Hill. Ive used the top layer of the DA Swirl frame, these come in a pack of 2, so i still have another one to use later, I kept the frame natural, as it blended perfectly with the browns in my layout.

I painted the ornate name plate ends using a makeup sponge, and the brand new Dusty Attic acrylic paint, in Navajo white. I find the makeup sponge to be the easiest way to apply paint, as it gets into all the little nooks and crannies, in even the most intricate chipboard pieces.

I inked the piece of Grass border, using Tim Holtz 'Walnut' coloured distress ink. The darker coloured distress inks take to the chipboard really well. I used a makeup sponge to apply the ink, then, gave a lighter application to the flower tops, kind of stippling it on randomly, leaving some parts un inked, as you can see below. 
 
 
'You are my one and only' Layout by Karen Shady
THE DUSTY ATTIC PRODUCTS USED
Vintage nameplate set

Thanks so much for visiting today, I hope I have inspired you to take your stash of 'special scrappy things' out of the drawers, and get them onto a layout.


Hugs
Karen