Sunday, 24 December 2023

MDF Caddy - Pascale B Scrap

Hello Sweeties,

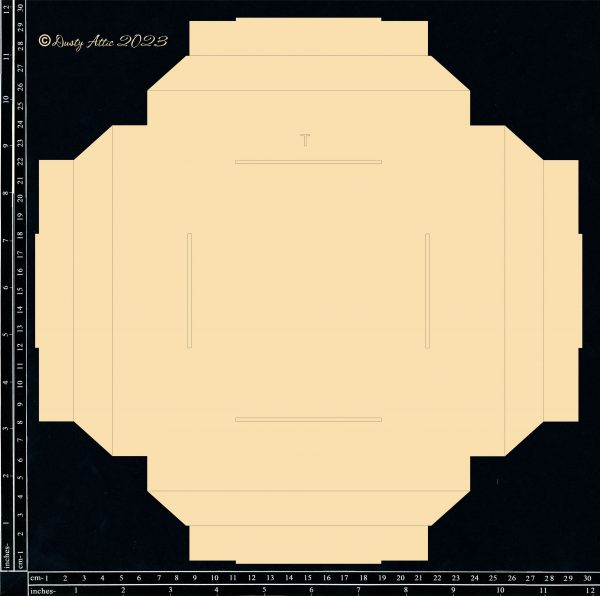
Today I'm up on Dusty Attic blog with a caddy. Have you seen all the new MDF available?


Before assembling the Caddy, I primed it with white gesso and covered all the pieces with tissue paper. When done, I added a design with the Postcard stencil and a gold paste.


I selected different gears that I primed with black gesso. I primed also some Small Tea Leaves and Rose Leaves. I colored the leaves with bronze, gold, and silver waxes.


I created four clusters with the gears and cogs: one on each side of the caddy. When happy with the composition, I covered all the elements with rust paste. Next, I added the metallic flowers and the leaves.


To finish, I added some glitter.


Dusty Attic products:
Other products:
  • Tissue Paper - Finnabair Prima (Science Lover);
  • Mechanicals - Finnabair Prima (Metal Blooms);
  • Art Ingredients - Finnabair Prima (Luminous Glitter set);
  • Art Alchemy Waxes - Finnabair Prima (Aged Bronze, White Gold, Old Silver);
  • Art Extravagance - Finnabair Prima (Vintage Gold Icing Paste, Brown Rust Paste, Orange Rust Paste);
  • Art Basics - Finnabair Prima (White Heavy Gesso, Black Heavy Gesso, 3D Gloss Gel, Soft Gloss Gel).
Thursday, 21 December 2023

Close together or Far apart ... - Kim Arnold


Hi everyone! I am back with some more inspiration from this month’s beautiful mood board – and with the green and red colours of the board and the fact that it is December, what could I do but scrap Christmas photos.


From the huge range of Dusty Attic chipboard, I chose one of the amazing 12x12 Christmas frames, some Christmas words and a title, which although it is not Christmasy, is perfect for this layout of family and friends who can’t be together at Christmas. I will take you through what I have used and what techniques I applied.


I started with the beautiful frame. There is so much detail on this frame! I painted it red and then sprayed it with an acrylic paint spray so that the finish had a shine to it. I love how the red pops against the green paper that I chose for the background. The strong contrast allows the details of the frame to really show.


I then worked on the title, painting it with gold mica paint. This gold paint works perfectly directly on the chipboard and gives such a beautiful shine. I attached the title so that it works in with the photos. I love long titles with different fonts and this title was 100% perfect for this layout.


The Christmas labels are already black. The words are engraved onto the black chipboard. I didn’t have to do anything to these as I really liked how the black worked with the layout. I chose to use four of the labels – three in a cluster with the journalling and one with a small cluster of embellishments above the start of the title.


I hope you have a chance to get some creative time in soon – maybe you might get a mood board inspired layout done!

Happy scrapping
Kim x


Dusty attic products:

https://dustyattic.com.au/product/christmas-frame-large/

https://dustyattic.com.au/product/christmas-labels-black/

https://dustyattic.com.au/product/close-together/#&gid=1&pid=1


Wednesday, 20 December 2023

Joy Overload - Sue Smyth


With Christmas on the way, we will all have lots of photos to scrapbook , I also like to make layouts to give as gifts, I have given my nieces an album each and every year I add to it in the form of new layouts. I am sure this will be one that I will send their way too.


I love to start a layout with white cardstock and make my own mixed media background. Here I have used shimmer dusts to make a water colour style background. Then I have used Deck the Halls paper pack to embellish, from Bee Arty.


Here are a few close ups, the frame is a die cut piece that I have used cotton to sew on, you could actually to this to a chipboard frame too with a bit of patience and a hole punch. 


ss


Here is a quick how to to make the Pine trees look so snowy 


To alter the chipboard fir trees, I have used a mix I like to use often, Faux snow, which is 1 part white gesso and 1 part white glitter with a few drops of dimensional magic too.


But this time I have painted over the top in sections to resemble a gree tree with snowy branches. I have used Fern shimmer dust from Colour Blast. While wet I have sprinkled with lots of fine white glitter. You can also use the faux snow mix to paint the chipboard snowflakes too and then sprinkle with more glitter.


Happy Crafting 

The Chipbord I used 


Tuesday, 19 December 2023

My favourite colour is Rainbow - Heather Woodall

 Good morning

I had so much fun creating these projects. I had paint everywhere!!

I started with the DA3621 Circular Picture Pie - Circular picture pie – Dusty Attic – Australian owned and operated Laser Cutting business as my design idea, both as a template and as a chipboard piece.


I have used it as a template only on a art journal page, and then as a template then a chipboard piece on a scrapbook page.


The base of both the journal page and the scrapbook page I have used 3 soft colours and a large paint brush to softly add to the page. I have then used 3 different stencils and the same colour paints to stencil over the top.


I have then used the Circular Picture Pie Chipboard as a template to trace around on both the journal page and scrapbook page to create a colour wheel base.

I have then chosen my paint colours and applied to create the colour wheel.


Over the top of both I have used a more pastel version of each colour and the DA3601 Paintbrush Stencil - Paintbrush Stencil – Dusty Attic – Australian owned and operated Laser Cutting business


To finish off the Art Journal Page I used a large black Posca Pen to write the title and highlighted with a white gel pen.


To finish of the scrapbook page I attached the Circular Picture Pie Chipboard using clear drying glue. I then used Posca pens to paint the "My Favourite Colour is Rainbow" title as well as the rainbow and clouds. These were all then attached using clear drying glue. 


Thank you

Heather


Monday, 18 December 2023

Beautiful Moments - Michelle Van Oudtshoorn

Hello lovelies

This year is just about done and dusted and this is my last Dusty Attic project for 2023!

Something a little different from a layout, I have created a project using a Dusty Attic shadow box (DA3431). This comes flat, and has been etched that you make up the box - as in the first photo in the collage. This is then folded up and glued together to make up the box, which I then painted with heavy white gesso. When this was dry I then added stenciling to the frame using the Postcard Stencil (DA3598). I have added patterned paper to the bottom of the box for the background.
Once dried, I then used a mix of Prima Art Alchemy metallic and matte colour waxes to add colour to the frame. 
The mini foliage (DA2786) and the title "Beautiful Moments" (DA3322) were also gesso'd and coloured using the same Art Alchemy waxes.

I then layered flowers and fussy cut flowers to the right bottom inside corner of the shadow box and built this up, before adding the Geometric border (DA1029) - which I cut off the ends to create a decorative feature on either end of the flower clusters. The photo and the rest of the flowers, fussy cut elements were then added once the border was adhered. This piece of chipboard border was painted with Prima Art Alchemy Sparks Acrylic Paint.
I have added the mini foliage through the flower clusters on the outside as well as on the inside. I finished off adding pearls throughout, and dry brushing white paint to some of the flowers.
These are the Dusty Attic products I have used:


Thanks for visiting the blog, and I will see you all in 2024. Best wishes for a happy new year!

Hugs,
Michelle