Showing posts with label September Mood Board. Show all posts

Thursday, 27 September 2018

Through the Trees - Kavitha - Mood Board Inspiration


Hello everyone,

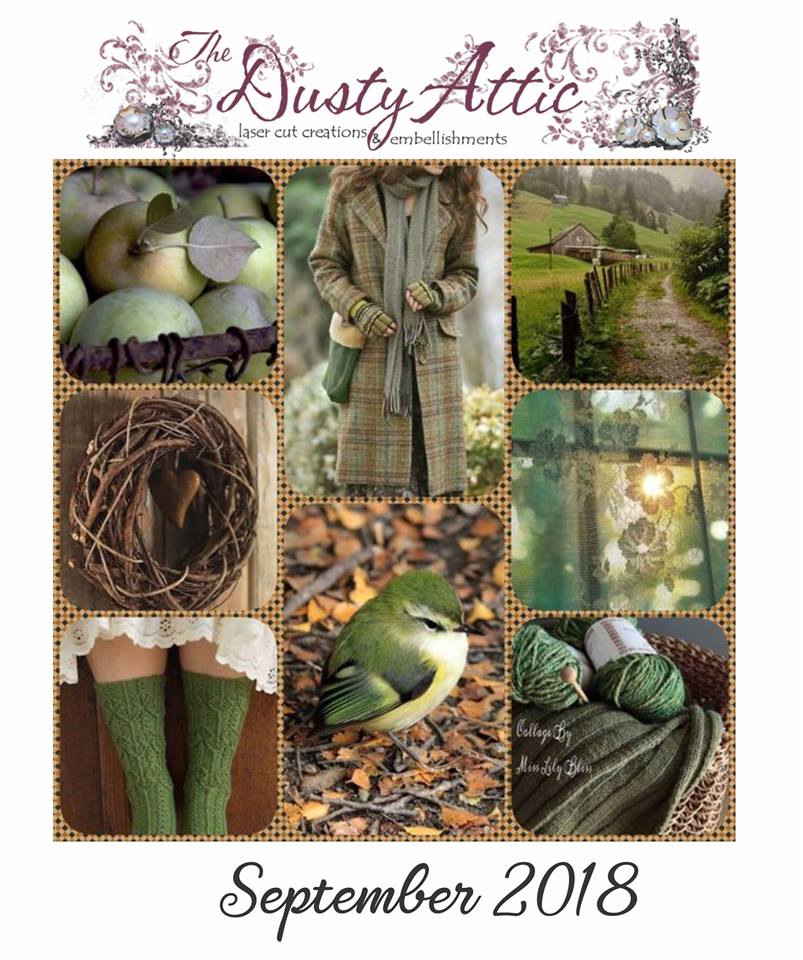
Kavitha here today to share my mood board inspiration project.How gorgeous are those colors this month?.Just before autumn,the leaves are getting darker and the climate is warmer, I adore this season and all its colors. 


I tried to create a warm atmospheric layout in forest fairy theme using all gorgeous green and brown shades form the mood board.


The large "Leafy frame set " is cut up into pieces and used as branches all around the layout.I have also used some of my favorite foliage's amongst the flowers


The drift wood pieces and wood slices from the new release perfectly fitted my layout,how gorgeous and natural they look?
I have used tones of flowers for my layout including the gorgeous "dusty in bloom" grassy knoll


Products used:

Foliage #8
Leafy frame set #2
Iron garnish #6
Drift wood #2
Wood slices
Dusty in bloom grassy knoll

 I hope you liked my inspiration,do join us to win one of the two $50 gift certificates to the
 DUSTY ATTIC ONLINE STORE.

Thank you for stopping by


Tuesday, 25 September 2018

Autum the Nature Fairy by Joanne Bain - Mood Board Inspiration

Hi Everyone!!

Joanne here today sharing my latest creation created for the gorgeous Dusty Attic September Mood Board Challenge. The challenge gives you the chance to win one of two $50 Dusty Attic Gift Vouchers. To enter you simply need to use the Mood Board for Inspiration, you can interpret it anyway you like. The only requirement is that Dusty Attic chipboard is used in your creation. Once completed simply add your link to the right side bar of the Dusty Attic Blog.

So this is the September Mood Board..


Loving the Autumn colours.

This is my interpretation.

'Autumn'
 'My Nature Fairy'


Her name is Autumn and she is my nature fairy. As you can probably see I was inspired by the colours of the mood board especially the picture on the top right. To dress Autumn I have used lots of  Dusty chipboard.


Autumn has all types of natural friends there are birds, ants and butterflies. She is adorned with flowers and vines that were painted to my desired colour.


Here dress was made from cheesecloth which was pulled apart and frayed to give a soft texture feel.


Her back cluster is made up of the smaller Industrial Heart, Boho Feathers and Fantasy Fronds. The created the grass pieces on the base stand I cut apart a Rosemary sprig.


Her wings were made from a double up of chipboard. I have used Laurel Sprigs and the thinner pieces of the Layered Flourish set.


So love the little mini Dusty butterflies, I have added a sprinkling of these little guys all over her. Here you can see the set of small mini branches and some of the small branches from the Foliage set.


This part of the front cluster was made up from one of the wings from the Wings #3 set.


Dusty Attic
Materials List
DA0677 Mini Ants
DA0766 Flutterbies #3
DA0893 Mini Butterfly #2
DA0727 Mini Birds #3
DA1184 Branch #4 Small
DA2117 Wings #3
DA1467 Laurel Sprigs
DA1953 Industrial Hearts
DA1732 Boho Feathers
DA1714 Rosemary #2
DA1872 Foilage #10
DA1349 Fantasy Flower
DA1351 Fantasy Fronds
DA1731 Layered Flourish

Other
590253 Watercolour Confections Pastel Dreams
584276 Watercolour Confections Decadent Pies
964078 Sparks - Fairy Wings
964054 Sparks - Dragons Eye
963095 Art Alchemy Metalique Brass Hardware
Prima Flowers and Vine
Cheesecloth


Joanne
xx

Sunday, 23 September 2018

Home - Belinda Spencer - Mood Board Inspiration


Hello Dusty Attic peeps!

Today I am sharing a layout based on the stunning September mood board. I love the beautiful earthy colours so much that it inspired me to create a layout about the patch of earth that is my home.

'Home'


I started with a gorgeous woodgrain patterned paper background. Next I added some texture paste over the Chicken Wire Stencil to compliment the photo of our family farm. Once dry, I used a white paint pen to highlight the texture.


I layered some matching patterned papers together and added those to the layout.  


Next up I used Pesto and Forest Dusty In Colour paints to alter the Flower Buds # 2, Mini Dots, Mini Heart Button as well as the BRAND NEW Tree Designer Disc # 17.

Here's a closer look at the detail on the Flower Buds chipboard.


I used the Mini Him & Her chipboard to represent the members of my little family and painted them white with a paint pen. I used the same paint pen to colour the title too. To finish I added the 'farm life' title from the Wordpl@y # 12 in black.


Dusty Attic products used:


Thanks so much for stopping by the blog today!

Cheers
Belinda


Wednesday, 19 September 2018

Find beauty in the Everyday - Rosalie Duke-Stanley - Mood board inspiration


I love using photos that show little moments in life. This photo of my grandson Noah exploring nature when he was out with his mum.

I wanted to use chipboard in a way that bought the nature on the page that featured in the photo. I painted the fence palings with a mixture of browns and added texture with rust paste and wood grain stencil. Once dry, paint on various different brown inks to add the wood grain colour to the chipboard. Tip - I cut the palings to size to fit behind the photo. Trace the ends onto the cut end to have the shaped top of the other pieces. 

Paper base - I used a page from the 49 and Market Tattered Garden paper range. Randomly spread modeling paste with the Dusty Attic burlap stencil. When dry, add various Lindy Stamp Gang madicals in green and brown to added colour to the dried paste. 

Using the larger leafy pieces, cut so that you have 4 pieces (2 larger) and add a green texture. For the pieces that will be laid on top, paint with a lighter green so that there is depth to the layers. (I didn't use the smaller leafy pieces in the 12 in chipboard - save them for another layout).

Once dry, build up the layout and if needed, slightly bend the leafy pieces and glue to make them curve around and under the layout. 

Add the birds (painted brown with a fine line of black on the edges to help define against the other chiboard) behind and using one of the longer ones, glue on so that it supports the work 'everyday'. Painting the words - paint smaller words in brown and add a fine line of white around the edge to define the letters when is sits on top of the other chipboard. For the larger word - paint in Dusty Attic - jungle green - and paint a fine edge in dark brown around the edge of the letters.

Tip - As this layout has several layers of chipboard, you will need to add some smaller pieces of spare chipboard pieces glued in underneath to help stabilise the layout. 

The finished effect should show differnt layers of chipboard and have a layered effect that represents looking through the leaves/brancjes of the forest.