Thursday, 24 January 2013

"Sugar and Spice and Everything Nice" by Olga Znamenskaya

Hello Dusty Attic fans - this is the first blog post for Olga - she has an AMAZING
Wax resist technique to share with you as well as her Awesome Project ...


Project
DA0920 Dusty in Colour Jungle Green
DA0911  Dusty in Colour  Lavender Blush
DA0903 Dusty in Colour Navajo White
DA0907 Dusty in Colour Dusty Pink
DA0808 Dusty In Bloom Evening Blush
DA0848 Floral Corners
Butterfly ATC


Tutorial "Shabby Chipboard"

Paint chipboard with dark brown acrylic paint (Dusty Attic Hot Chocolate).


When the paint dries take a candle and rub it against all corners. Dust away the remains of the wax - no white crumbs should be left on the surface!
  Then cover everything with white acrylic paint  (Dusty Attic Navajo White ). You may apply a few layers.
When everything's dry to touch, we begin the most intriguing stage.
Use a piece of sand paper or a nail file to wipe away the paint on the waxed places. Be gentle - you don't want to sand away everything to the core. Don't be too passioante with sanding, it should look natural, so some places need only a light touch.

ATC and tutorial
DA0923 Dusty in Colour Hot Chocolate
DA0903 Dusty in Colour Navajo White
DA0922 Dusty in Colour Gingernut
DA0834  Morrocan Border
С уважением, Ольга http://pastilka.blogspot.com/

Monday, 21 January 2013

"Memories Journal" - Natasha Naranjo Aguirre DT

Hi Dusty Friends!  Natasha here today and I have a journal to share with you.  It's not just any journal... it's a Dusty Attic Journal!  
I used a stencil to create this gorgeous texture on the cover of the journal.  And the colors... they are Dusty Attic paints!  Yes, Dusty Attic now has the most gorgeous colors of paints and varnish too!
Here is one of the new releases, a Moroccan border. 
 I can never get enough of these mini words!
 This floral cluster is made up of gorgeous Green Tara flowers and ribbon.
And here is the inside of the journal!  The inside covers were also painted with Dusty paints.
Thanks for stopping by today!  
Many hugs...
Natasha
Dusty Attic Products Used:
Dusty Journal DA0950 Moroccan Border DA0834 Mini Words #1 DA0386 Dusty in Colour - Raisin DA0910 Dusty in Colour - Dusty Pink DA0907
Moments of Tranquility


Friday, 18 January 2013

"Sixteen" - Mistra Hoolahan DT


Hi everyone, today I have this layout I have done for my son... he's just turned 16 and insists on very grungy work from me now, now flowers, no sparkles.  So this Tribal Frame was perfect to help fill the layout!


The frame was painted lightly with cream paint, then inked with Olive Vine, Patina and Truffle Mix'd Media Inx and spritzed with Mountain Meadow paint I had watered down.  After I had glued down the frame I filled some with modelling paste and then spritzed again with Mountain Meadow and Pesto paints.


The corrugated background is also from Dusty Attic.  I used the reverse with the solid paper and tore some away randomly, this was painted with cream and Mountain Meadow paint.


The Typewriter ABC Set was painted with Golden's Micaceous Iron Oxide and Stainless Steel paints, it' about as 'sparkly' as I'm allowed to get these days LOL!


Thanks for stopping by, until next time, take care of you!


Products Used:

Chipboard:

Mediums:
Dusty in Colour - Mountain Meadow, Pesto
Warm White and Unbleached Titanium Paints
Golden Micaceous Iron Oxide, Stainless Steel Paints
Modelling Paste

Trims:

Other:
Owl Trinket
Buttons


Wednesday, 16 January 2013

"A Penny For Them" - Louise Collins DT & Tutorial

We all know that Dusty Attic is well known for its beautifully designed chipboard pieces, but did you know that you can also buy Dusty Attic Paints, Glosses and Blooms too?

I had so much fun playing with the wet mediums on this layout, so I decided to do you all a little tutorial on how I used DA products to create this weathered, distressed background.


Firstly, I began by marking where my main layers would be covering the background up. By doing this you avoid using your precious paints in places where they will not be seen...such a waste!


 I chose to not cover my whole background, but just have the centre of my page distressed, so I thickly painted on some Dusty Attic Acrylic in Alabaster with a brush.


The next step was to paint on some of the DA Clear crackle varnish over the top of your dried White acrylic. This should be really thick for good big crackles, or thinner for smaller crackles.  


The next step is the most important for this technique. You must WAIT!!
If you can stand it, preferably overnight, but otherwise at least a couple of hours. Once you start to see crackles appearing you can use a heat gun to finish the crackling process but NOT BEFORE!

When it is finished it will look something like this...


Now to add some colour, tone down the shine and emphasise the texture.
I have watered down two different coloured Dusty Attic Acrylic Paints, Hot Chocolate and Denim.
To do this a squirted a little in a small cup (an egg cup is ideal) and mixed in the same amount of water.

To emphasise the crackles, I used a sponge applicator to gently rub some of the Denim watered down paint into the crackles. Some of the clear varnish may flake off, but don't worry. This just adds to the distressed effect!
I then used a small paint brush to flick and splatter some of the Hot Chocolate watered down paint around the page. Some of this will also settle into the crackles.


After allowing it all to dry and stitching a zigzag border, I constructed the rest of my page on top of my weathered background.

I also used my Hot Chocolate Acrylic Paint to edge my corrugated cardboard sections, and with a sponge over a mask for the wood grain affects on the edge of my page.

Dusty Attic Products used:

Acrylic Paints:
On Butterflies - Denim DA0914, Faded Denim DA0913, Alabaster DA0902.

On Floral Piece - Bisque DA0921, Pesto DA0918, Crushed Olive DA0917, Forrest DA0919, Faded Denim DA0913,

On Background - Hot Chocolate DA0923, Denim DA0914, Alabaster DA0902.

Clear Crackle Varnish DA0900

Dusty in Bloom - Cornsilk DA0806, Blue Bonnet DA0807

Chipboard - Flutterbiies DA0389, Floral Corner piece & Small Butterfly *COMING SOON*

Corrugated Cardboard DA0830

  Lou Collins XX 

Tuesday, 15 January 2013

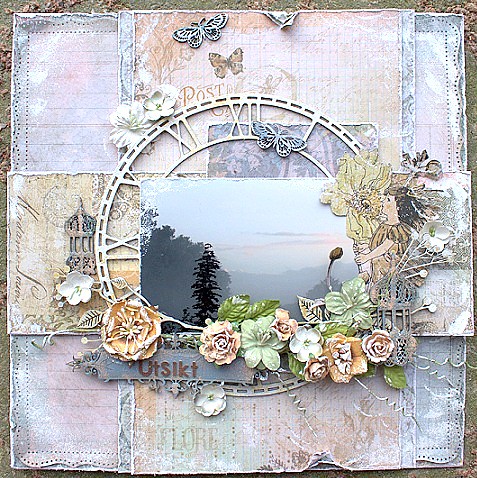
"Utsikt" - Helena Johansson DT

Utsikt


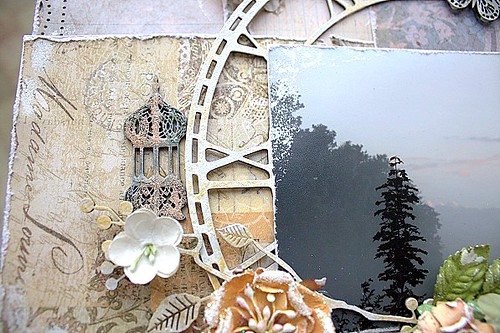
This Dusty Attic layout is made after the January Sketch, made by our very talented Mistra! I have used the brand new Morrocan Lamps (DA0835 and DA0836). I have a small tutorial on how I painted the lamps further down. I treated the Vintage Nameplate the same way as the lamps.

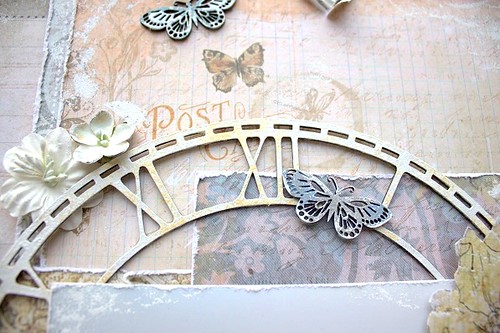
The Skeleton Clock Face (DA0430) was painted with Dusty in Colour, Navajo White and Vintage Gold. The Branches and Berries (DA0729) was painted the same way. I just love chippies that you can tuck into a flowercluster - perfect for a flowergirl like me!

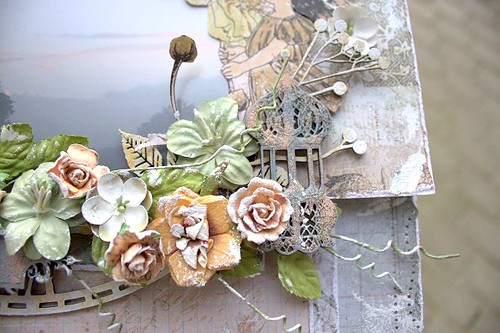
Speaking of flowers, I have used some beautiful Dusty in Blooms on this page too - Grassy Knoll and Bridal Veil. Finally I have used Flutterbies #3 (DA0766), painted with Dusty in Colour, Storm Cloud and Faded Denim.

Here's a close-up of the Flutterbies and Skeleton Clock Face. You can barely see the Gold colour, but it gives a beautiful shine to the chippies.

Utsikt detalj4

Here's the smaller of the Morrocan Lamps:

Utsikt detalj3

I placed my title "Utsikt" (which means "View", by the way) on the Vintage Nameplate.

Utsikt detalj2

Here's the larger of the Morrocan Lamps, and some of the Dusty in Blooms:

Utsikt detalj

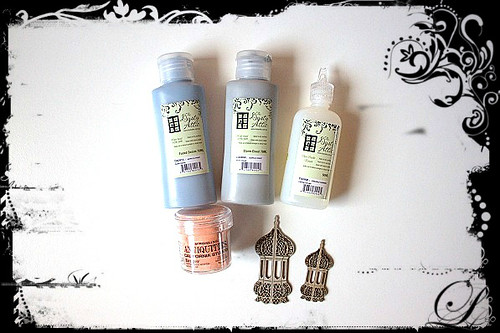
Here's a small tutorial on how I did the Morrocan Lamps. I have used one medium sized lamp (DA0835) and one mini lamp (DA0836). Dusty in Colours used: Storm Cloud, Faded Denim and Clear Crackle Varnish. Finally I have used Antiquities Embossing Powder.

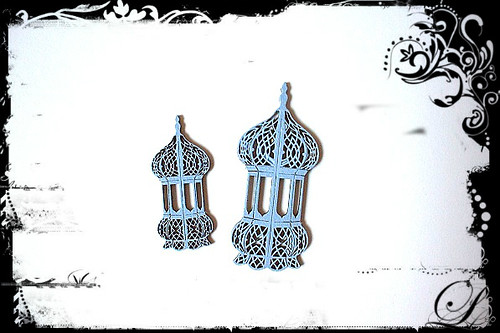
Lamp tutorial 1

First I painted the lamps with Faded Denim, using a sponge.

Lamp tutorial 2

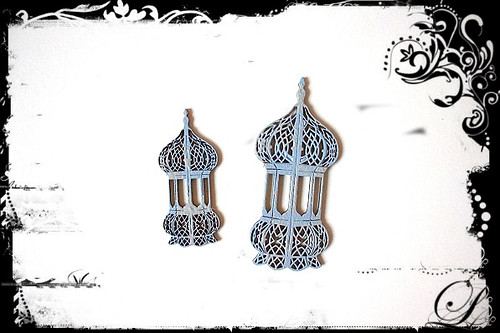
Then I painted the lamps with Storm Cloud, but not on the entire chippie, just a bit here and there to make the colours mix a bit.

Lamp tutorial 3

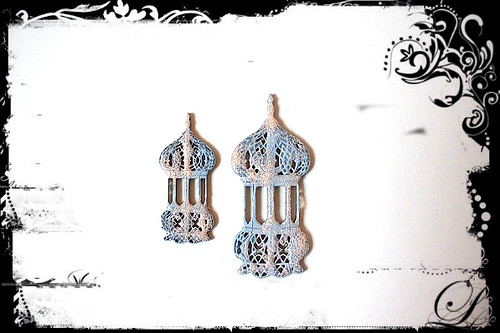
After the acrylic paint had dried, I put on Clear Crackle Varnish, a medium thick layer. This varnish dries in about an hour, depending on how thick of a layer you put on of course. Right after I had put on the varnish, I sprinkled some Antiquities Embossing Powder here and there. The powder works more like glitter when used just as it is, and gives the chippies a really nice look!

Lamp tutorial 4

There, my Morrocan Lamps are ready. The colors matches my photo and papers just perfectly!

Monday, 14 January 2013

"We Call Her Little Horns" - Belinda Spencer DT

Did you know that The Dusty Attic now has its very own range of gorgeous paints as well as Crackle Varnish and Gloss Varnish??

Exciting, right?!!

Here is a layout I created using some of those beautiful paint colours as well as the awesome Crackle Varnish and some new chipboard...


I used a sponge to dab some of the Navajo White paint over a TCW chicken wire template on my background paper...


I painted the Stump and Grass with a combination of Cashmere, Faded Denim, Lavender Blush and Storm Cloud and then gave a coat of Navajo White over the top to tone all of the colours down to co-ordinate with my layout. I applied a fairly thick coat of the Crackle Varnish over the top, once the paint was dry, to get some really good cracks happening...


Dusty Attic products used:

Chipboard:


Thanks so much for stopping by!!

 Happy scrappin'
B-) xoxo

Sunday, 13 January 2013

January ATC by: Mistra Hoolahan


 This Month The ATC Theme is - Fairies & Flutterflies
January ATC's by: Mistra
 

 Mistra Hoolahan
The background was covered with tissue paper and then applied some Liquitex Opaque Flakes to one side and them sprayed my little heart out with Smooch Spritz.The chipboard was all firstly painted white, with some Smooch Spritz applied to the mini scroll, some Smooch Glitz to the Flutterby wings and the Fairy was dressed with Smooch Ink and Smooch Glitz on her dress.  I created new wings for her with the Flutterbies #3 chipboard.


Dusty Attic Products used:

Chipboard:

Paints/Mediums:
Dusty in Colour - Alabaster

Mis xo

January ATC's by: Belinda, Helena, Loiuse

 This Month The ATC Theme is - Fairies & Flutterflies
January ATC's by: Belinda, Helena, Louise


Belinda Spencer - Live in the Moment


For this atc I have printed a photo of my daughter in her fairy costume on matte photo paper. I then coloured her dress and shoes with Lyra Watercolour Crayons and flicked some Glimmermist over the top. I have also stamped a quote directly onto the image as well as the grasses at the bottom. I painted some Dusty In Colour Dusty Pink DA0907 around the distressed edge of the image. I created her fairy wings using a butterfly from the Flutterbies DA0766 which I embossed with Stampendous Shabby Pink Embossing Enamel.


Cheers B-) xoxo


Louise Collins - Love, Value, Inspire


Hi, here is a photo of my first ATC. I used the black paint with crackle glaze on top then rubbed gold into the cracks. The background was made by soaking a piece of grunge board with water then spraying with mists so they all blend. I also used DA Butterflies #3 and Blooms.

Dusty In Bloom Cornsilk Code: DA0806
Clear Crackle Varnish Code: DA0900
                         Soot Acrylic Paint Code: DA0925                          


Lou Collins XX


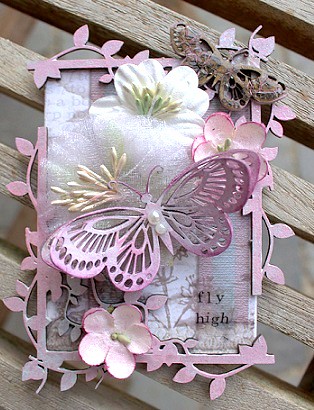
Helena Johansson - Fly High 

January ATC

This ATC is made for Dusty Attic and the January Theme "Fairies and Butterflies". I have used Flutterbies #3 (DA0766), corners from Devine Frame Set (DA0733) and Dusty in Blooms (Bridal Veil, DA0805). I painted the corners with acrylic paint from Dusty Attic, first Navajo White and then Dusty Pink. The larger Butterfly I first soaked in water to divide the wings a bit. When dried, I painted with Navajo White and Dusty Pink, then misted with a light pink glimmer mist and painted with light pink Pan Pastels. The smaller Butterfly I painted with Clear Crackle Varnish, on the raw chippie, then I used some light pink Pan Pastels on the cracks, when dried. The smaller white flowers I misted with light pink glimmer mist, then I used pink pan pastels on the edges of the petals.

Pop in on the Dusty Attic ning-page to see more ATC's and join our ATC swap! Dusty Attic has lots of mini chipboards that are super fun to work with when creating ATC's :)