Tuesday, 16 April 2013

'Birdhouse' by DT Louise Collins

Since spring has finally sprung here in the UK (at least it hasn't snowed for a week!), it seemed fitting that I tried decorating one of these gorgeous Dusty Attic Birdhouses to celebrate the season!

Have you seen the sheet of three chipboard birdhouses from the new April release? All the pieces you need to construct three pretty little homes are all cut from one 12" chipboard sheet!

So here is how I decorated just one of them...although I do plan on making them a set of three and planting them around my home :-)


 To do this, I simply popped all the pieces out from the sheet I needed and decided which ones I wanted to cover in flat paper. I drew around these ones and cut the shapes out.

 
I used PVA glue to stick the papers to the pieces, and after ten minutes drying time, I sanded all the edges, paying particular attention to the assembly notches.
(Notice I have left the two roof pieces bare???)

 
Next I assembled the birdhouse. I slotted all the pieces together, running PVA along all the edges first. I then tied a couple of elastic bands around the whole house to hold it together while the glue dried overnight.

 
The next morning I took the bands off and the Birdhouse was super sturdy! Now time for me to decorate the roof...
I used a decorative punch to make the roof tiles by punching borders and trimming the strips to fit the roof width. I stuck these down in layers, starting at the bottom.
 
Then finally the pretty bits! I added some DA Grass Clusters #2 and painted them with a green DA Acrylic Paint. While it was drying I spritzed the tops of the grasses in yellow to add a bit of interest.

 
Once the grasses were stuck to the house, I added DA Roses, some gems and some fibres to finish.
Now to find somewhere to hide it in my home and see who notices it first :-)


Monday, 15 April 2013

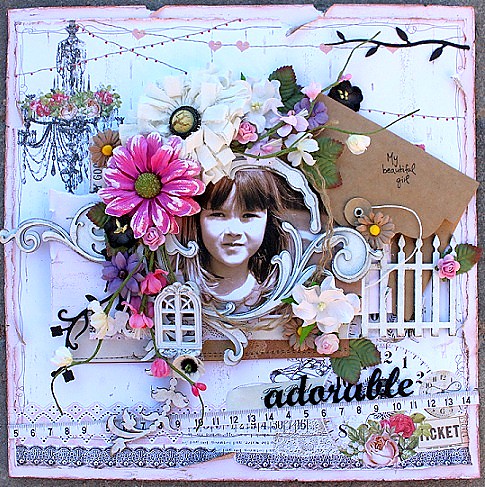
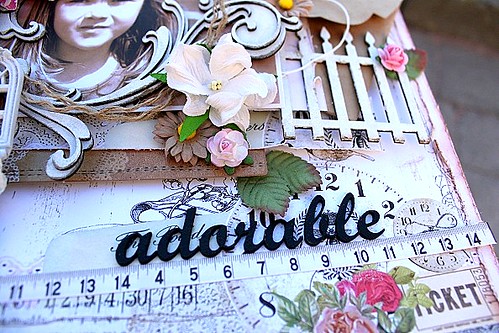
'Adorable' Layout by DT Helena Johansson

 
'Adorable' Layout by Helena Johansson
 
Adorable DA

One of my all-time favourite Dusty Attic chipboard pieces is the Decorative Scroll #1 (DA0213). I have used it several times and I will definitely use it again! For this page I have painted it with gesso and then distressed the edges. I have treated the Leafy Flourish #2 (DA0874) and the piece of Picket Fence Border (DA0175) the same way. The alpha is called Mini Script ABC set (DA0859) and I painted it with Dusty in Colour, Soot (DA0925).

I have also used some sweet Dusty Roses, Candy Pink (DA0953) and Pink Sorbet (DA0966), and Rose Leaves (DA0962).

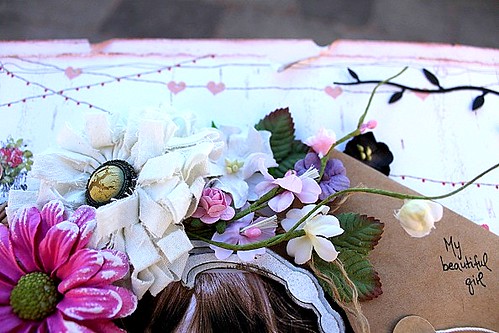
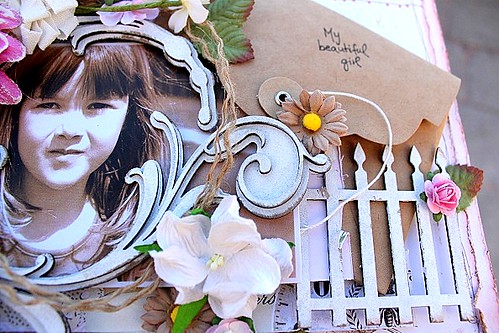
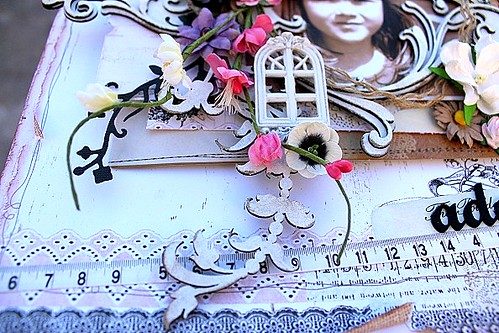
Here are some close-ups!

Adorable DA 5

I just love the shabby look the chippies gets when painted white and distressed.

Adorable DA 4

Adorable DA 3

The little roses are so cute and just perfect to tuck into flower clusters!

Adorable DA 2

Adorable DA 1

Thanks for stopping by today!

Helena


Sunday, 14 April 2013

Altered Dusty Journal and Tutorial with Belinda

Hi all!!
 
Today I am sharing my altered Dusty Attic Journal with you as well as a tutorial on how I achieved the Moroccan look on the cover.
 
 
I loved the 'Moroccan' theme for the atc challenge and swap this month so I decided to continue the theme with my journal! The colours of Morocco are so rich and vibrant so it allowed me to go a little crazy with colour. :-)
 
STEP 1:
- Apply PVA glue to the front cover and add torn pieces of book paper all over. You can let the paper extend over the sides and then fold under and tape down later when the glue is dry. This will give you a nice look for the inside cover.


STEP 2:
- Now that the glue is dry, use a dry sponge to swipe some gesso lightly over the whole surface. Start with a very small amount of gesso on the sponge. You don't want it so thick that you can't see the text paper through it. It is best to keep it fairly dry to prevent any warping of the cover too.
 
 
STEP 3:
- Place a template over the dry surface and swipe some Gel Medium over it with a palette knife or used credit card. Set aside to dry.
 
 
STEP 4:
- Now comes the fun part: adding colour!! I have used a combination of Pickled Raspberry, Peacock Feathers and Seedless Preserves Distress Inks and rubbed into the cover with a sponge.
 
 
STEP 5:
- Next I applied Dylusions Ink Sprays in Bubblegum Pink, Crushed Grape and Vibrant Turquoise. These colours are BRIGHT!!! They were even just a little too bright so I added some water to a Dusty Attic Mini Spritz Bottle and sprayed over the cover. I lifted the journal up at the top and allowed the water to run down. Once dry I sponged a little gesso over the top.


STEP 6:
-Once I had the background completed, I started to layer on some embellishments. First I added some pieces of the Marrakesh Trellis small that I had painted with gesso. Once they were glued in place I then sponged some more gesso over the top.


STEP 7:
- Then all remaining embellishments were added to give the journal a Moroccan feel.


I used the same Dylusions Ink Sprays to colour my Dusty in Bloom flowers and then applied gesso to the edges once they were dry. The face embellishment was made using a Moulds by Mel face mould. I used Martha Stewart air drying clay. Once it was dry I applied Dusty in Colour Bisque and Alabaster. To give it a more aged look I also applied Dusty Attic Crackle Varnish and then sprayed Dylusions Vibrant Turquoise over the top wiping away the excess so the colour remained mostly in the cracks.
 
My chipboard and Dusty In Bloom leaves were all painted with gesso and then Peacock Feathers Distress Ink was added to the edges.
 
Products used:
 
 
CHIPBOARD:
 
DUSTY IN BLOOM:
DA0810 Leaves
 
DUSTY IN COLOUR:
 
Thankyou so much for checking out my tutorial and project today!! I hope it has inspired to get altering your own Dusty Journal!!
 
Cheers
Belinda


Saturday, 13 April 2013

April ATCs by Belinda, Helena, Louise & Mistra

Today we have some more fabulous DT 'Moroccan' ATC's to share with you.

'Morocco' by Belinda Spencer
 
At first I had no idea what a Moroccan themed atc should look like. Thank goodness we have Google! I discovered a lot about Morocco. :-) I discovered the gorgeous rich and vibrant colours of Morocco and that most of the world's roses for making perfumes are grown there. Who knew, right?
 
This is what I came up with...
 
 
I always start my atcs by taking a 12" x 12" sheet of cardstock and creating a background. Here I used torn book paper glued onto white Bazzill and then coated with a thin layer of white gesso. Next I applied lots of vibrant 'Moroccan' colours using Dylusions Ink Sprays.
 
 
Then I chopped it up into atc size pieces and Mod Podged on some rose print napkin before layering on my embellishments. I wanted to use a quote from the movie 'Casablanca' but it didn't quite work so I have added Morocco in Arabic at the bottom of my ATC.
 
DUSTY ATTIC PRODUCTS USED:
 
I can't wait to see the gallery bursting with colour from everyone's atc's  this month!!


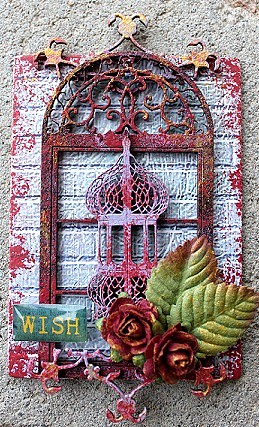
'Wish' by Helena Johansson
 
Wish ATC April

Love this month's ATC theme - Morrocan! I have played with several Dusty in Color Acrylic paints; Cranberry (DA0910), Dusty Pink (DA0907), Sugar Plum (DA0908) and Vintage Gold (DA0926). I have used a Mini Arch Window (DA0818), a Mini Morrocan Lamp (DA0836), Morrocan Design that I cut into pieces (DA0838), Dusty Roses Claret (DA0955) and Dusty Rose Leaves (DA0962).

I have used sponges to paint the chippies and just played with the different shades until I was satisfied. On the Mini Arch Window I also used a little, little black ink, just to darken it a bit. The roses and leaves was painted with Vintage Gold.


'Life is a Treasure' by Louise Collins 
 
Until I started designing for Dusty Attic, ATC's were something I had made very little of. In fact, the only few I had made had been for the DA challenges!

But part of my Design Team requirement is to create one ATC every month, along a particular theme, along with the rest of the team.

Now this theme I thought would be by far the hardest, but it turns out is was actually quite simple, since I was using some very decorative DA chippies, one product being the Moroccan Lamps from the January 2013 release.

So I googled 'Moroccan Theme' for inspiration and ended up creating this...

 
It is sooooo far away from anything I would usually make but I adore the warmth and richness of the colours! I also used new DA ATC Frames #4, and their Acrylic paints.


Moroccan ATC by Mistra Hoolahan
 

This month's theme at Dusty Attic was Moroccan, and Jen has the perfect everything to bring that little bit of Moroccan Essence into your work, with Marrakech Trellis Panels, Moroccan Lamps and ATC Frames to match!  She also has Moroccan Borders and Designs for a complete look.


Morocco is one of destinations on my bucket list... one day I have to visit there.  Just to experience those fabulous colours, authentic tastes {oh imagine a real Tagine}, the stunning architecture... all those wonderful things, one day I will!  Until then I can dream...

I chose to focus on the wonderful colours of the spices; cumin, paprika, saffron, turmeric and cinnamon.  An then highlighted it all with gold accents.

And then of course I had to add a teal coloured bird, as you do!  But the bird symbolises the freedom to up and go, escape your cage and just be gone... to Morocco!! 


Why not join in the fun at Dusty and create a Moroccan ATC yourself, there is a challenge each month on the Ning Site, with a prize up for grabs!  And there's definitely loads of inspiration to be found!


Thursday, 11 April 2013

Capture the Adventure with Dusty Attic Chippies, Blooms & Paints! - with Gabrielle Pollacco

I've been wanting scrap this cute photo of my little Great-niece Kiera for while now....and I just knew I wanted to use that awesome fishnet chippie from Dusty Attic Designs....actually I used a whole lotta the Dusty Attic for this one.  I used the Grass Clusters #1, Grass Clusters #2, Ornate Corner, Shells, Mini Bird Houses, Fishnet Panel, Birds a Field, Corrugated Card, plus a number of the New Dusty In Color Paints (Navajo white, Bisque, Meadow Green, Hot Chocolate and the New Mixed Media Crackle finish....AND some of their new Mini-roses!! 
I painted all the pieces white to start with...then used a variety of inks and paints to lightly color the chippies.  The papers are a mix of the gorgeous Maja Design papers from their Vintage Summer Basics collection and their Vintage Spring Basics collection. 
The blue and white blooms I used here are from a bargain bin at Michaels, and I just added leaves from Dusty Attic to finish up the bloom clusters.....I love these for the perfect finish for a cluster. 
I painted the little bird house with Navajo White, inked with some brown chalk ink and added a coat of the DA Crackle medium.  For the shell I mixed a little sand into some Gesso to add a little texture to the shell.  I added a little sea glass to finish the beach look. 
For the corner chippie I did a little script stamping and again added the Dusty Attic Crackle medium on top of it.  Here's a full list of the goodies I used to make up this page:

Supplies:
Chipboard: Dusty Attic (Grass Clusters #1, Grass Clusters #2, Ornate Corner, Shells, Mini Bird Houses, Fishnet Panel, Birds a Field)
Corrugated Card: Dusty Attic
Paints & Mediums:  Dusty Attic (Navajo White, Hot Chocolate, Meadow, Bisque), Dusty Attic Crackle Medium
Flowers: Dusty Mini-roses (Caramel, Sky Blue), Dusty Leaves, Petaloo (white flower), Michaels Bargain bin blooms.
Patterned Paper: Maja Design ~ Vintage Summer Basics (1905, 1934), Vintage Spring Basics (April 7th)
Stamps: Bo Bunny Script Stamp
Rub-on: Daisy D's
Other: Burlap, Cheese-cloth, loose buttons, Shells, Sea Glass, Bo Bunny Jewels

Is everyone else as ready for the beach as I am?  Goodness!  We went to the Maple Syrup Festival here in Ontario and it was soooo cold!  We had a blast and ate some great food but boy, am I ready for summer! 

Wednesday, 10 April 2013

"WOW - ATC" by Geraldine Pasinati

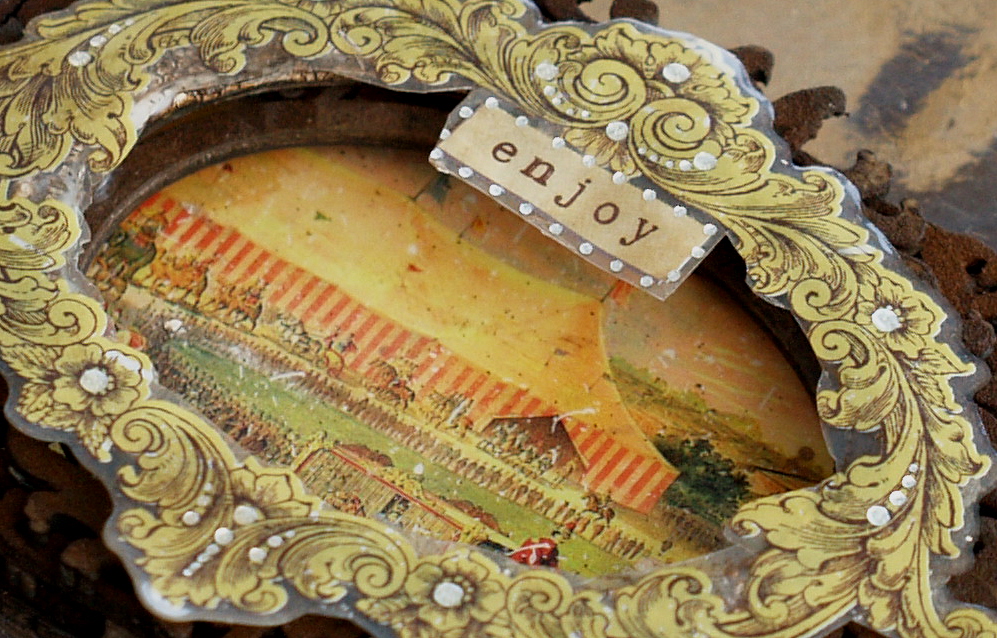
Hello there! This month we have a fantastic theme here at Dusty Attic for ATC's....'Morrocan'. Today I'm sharing my Morrocan inspired April ATC....'Enjoy'. I always try to look a little 'left of centre' when I create and with this theme I couldn't help but be inspired by the ornate details in the two Dusty Attic frames #4 & and #1 and by the magic of elephants and the circus.

Dusty Attic products:

My ATC is made up of several layers ~ I hope there are no height rules with ATC's because this is 1.5cm thick. The base Frame layers are coated with rusting powder and the base picture and top frame are from Glitz.

If you have never used rusting powder and would like to try ...heres a little 'How to' tutorial:

Cover chipboard in glue or mod podge.
Coat the glue with rusting powder and allow to dry.
Spritz heavily with 'Brown Vinegar' (not white).
Spritz with a light coat of bleach.
Allow to dry naturally...do not heat set!
** TIP** you cannot rush the drying process or you won't get the rust colouring**

On that note, as my ATc says....'Enjoy' the blog!
thanks for dropping by. G!


Monday, 8 April 2013

Guest Design Team Member - Introducing - MEL CONNELL


Hi my name is Mel Connell. I'm from the hometown of Dusty Attic, Perth, and have lived here all my life. I am 36, have been with my partner Lawley for 17 years now, and have two kitties, Olive and Scarlett.
I am so very excited to have been asked to to the Guest DT spot for April at Dusty Attic. I just love this product. It's a staple in my scrapbooking adventures and love using it as much as I can.

I teach and am on the Design Team at Tomorrows Memories here in Perth
 (where you can buy your very own Dusty Attic chipboard products).
 I also have my own creative business called

I got a tad excited and made a bunch of layouts and an OTP to show you. I hope you like them. Be sure to stop by the Dusty Attic Ning, there is always plenty of inspiration, challenges, and chatting going on over there!

Project one: Curio Shadow Box

Note from Dusty Attic - those cute botles are a mould from Moulds by Mel


Dusty Attic product used: 

Garen Frame Set DA0606
Dusty in Colour Alabaster DA 0902
Dusty Attic shadow box tray

Project Two: Kassie
April Sketch challenge


Dusty Attic Product Used:

Dusty Attic in Bloom Bridal Veil DA0855
Dusty Attic in Bloom Vintage Rose DA0803
Dusty Rose Leaves DA096
Dusty Roses Pink Sorbet DA0954
Dusty Roses Whisper Blue DA0969
Dusty Roses Latte Cream DA0959
Dusty Roses Latte Cream DA0960
Dusty in Colour Pest DA0918
Lace Border #2 DA0844
Dusty Attic branches


Project Three: Sitting on top of the World


Dusty Attic Product used:

Skeleton clock face DA0430
Mini ABS set upper DA0861
Dusty Attic clouds


Project Four: You are so Beautiful


Dusty Attic product used:

You are so beautiful Title DA0952
Mini Butterfly DA0364
Dusty Rose leaves DA0962
Dusty Roses White DA0970 & DA0971


Project Five: She is Amazing


Dusty Attic products used:

Wrought Iron Frame Large DA0230
Bookman ABC set DA0666
Dusty in Colour Alabaster DA0902
Dress Form #1 DA0396
Dusty in Bloom Bridal Veil DA0805
Dusty Roses White DA0971
Dusty Roses Pink Sorbet DA0954
Dusty Roses Whisper Blue DA0969


Project Six: Our Memories


Dusty Attic product used:

Scroll border #1 DA0219


Project Seven: Mt Hutt


Dusty Attic product used:

Dusty in Bloom Bridal Veil DA0855
Dusty Rose Leaves DA0962
Marrakesh Trellis Large DA0820
Dusty in Bloom Bridal Veil DA0805
Bookman ABC set DA0666
Dusty Roses Whisper Blue DA0969
Dusty in Colour Faded Denim DA0913
Dusty Attic Flourishes
Dusty Attic Snowflakes