Showing posts with label frames. Show all posts

Friday, 1 December 2023

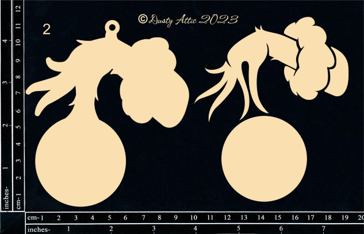
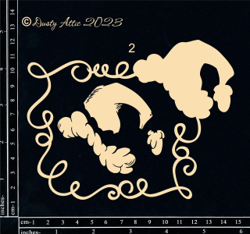
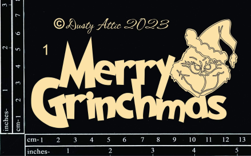
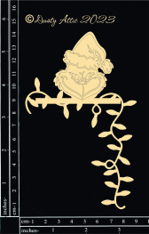
DECEMBER 2023 NEW RELEASE - Everything Grinch


HELLO EVERYONE AND WELCOME TO DECEMBER 


It is our amazing retreat month with only two weeks to go until "Grinch 2023 retreat" starts with a gorgeous bunch of ladies. 

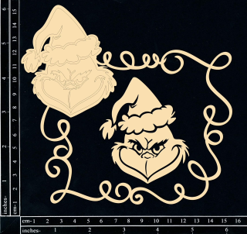
It is only fitting that we have a NEW RELEASE and it is SPECTACULAR from frames to ornaments, wreaths, alphabets, numbers, corner pieces and more of  Grinch, Max his dog and Cindy Lou Who! 

Have a look on the Online store HERE where they are all these and many more are ready to order.


~~~~~~~~~~~~~~~~~~~~~~~~~~~~~~~~~~~~~~~~~~~~~~~~

Did you see the cute little Sleigh that Jen Burns created the other day with one of the NEW MDF range? 


FROM THIS ...


TO THIS ...


Saturday, 26 June 2021

Dream - Michelle Van Oudtshoorn - Mood Board Inspiration

 Hello Dustyattic fans

I am back on the blog today with my project inspired off the gorgeous moodboard for June. These colours are just so pretty and I loved working with these colours:

So pretty and so dreamy!!

Here is my moodboard inspiration:
Here I have used a 49 and Market Irrevocable Beauty Timekeeper paper and some of the 49 and Market Lilac ephemera to layer my photo. I painted all my chipboard with Prima Alchemy paint and some of it I also added some waxes to enhance these. I first attached the ephemera, and added the DA1529 flower frame behind the paper before adhering to my page. 

The Juliette window frame DA2358 was then added, before layering my flowers.

Once I had layered my flowers, I added my ivy leaves DA2601 tucking under the flower cluster.


The little owls DA0755 are so adorable and come in pieces they can be built up - eyes either open or closed. 


Once I had finished I then added the title Dream DA1602, and added some pearls and shiny thread


These are the Dusty Attic chipboard pieces I have used:


There is still time for you to enter the monthly moodboard challenge by using the moodboard as inspiration and adding your entry to the Dusty FANattics facebook page - you could win one of two $50 vouchers worth of awesome Dusty Attic chipboard products.

Thanks for popping by,
Michelle


Friday, 20 November 2020

Lovely -- Joanne Simmons - Mood Board Inspiration

Hello and welcome!  Oh my gosh - I had to dive right in when I saw this months mood board.  Seriously sooooo pretty.  Lets have another look.


Seriously pretty hey!

I decided to pull out some pretty 49 & Market paper that I have been hoarding along with some Dusty chippy along with a pic of my daughter (thats her on the left of the pic) and her friend who has just graduated from Year 12 and leaving school.  Another of those proud mum moments!


To start I laid those awesome ornate gates on my page and built up my cluster from there.  I used some Card Deco inks to cover my chippy.

I added the pretty die cuts and also tucked in the chipboard daisies.  These along with that pretty frame I covered with some acrylic paint and then added some glitter glue over the top.


I finished with a really simple title from the Wordpack #14.  I struggle with titles for my layouts, but I find that Dusty Attic have the perfect selection without being too "cheesy"


I hope I have inspired you to give the moodboard a try.  There is is some wonderful prizes up for grabs.

Dusty Attic products used.


Until next time
Happy crafting


Thursday, 10 September 2020

Never in a hundred summers... - Michelle Van Oudtshoorn

Hello Dusty Attic fans

Welcome to September - for us in NZ it means spring and moving into longer and bright days, yay! Today I am on the blog with my Dusty Attic project for September. 


This is a photo of my sister - back in the mid 1970's! Oh my gosh it is such a long time ago! We were on one of our family holidays in this photo, in a city called Durban in South Africa - it was a family favourite holiday destination, right on the beach.
I have used lots of bits of chipboard to make up my layout. I first started with the left over outer bit from the distressed frames DA2673, and then painted frames from polaroid frames and get framed rectangles sets. 

The photo was entwined with the frame, then added paper, and adhered this to the background paper down the centre to be able to tuck the frames in under this. Then the bits of netting have been added under the top and bottom of the photo.

I then added the wooden pieces to the bottom of the frame, before adding the flower cluster. Once this was done, I have then added the smaller of the two compasses and the anchor.
I then do a compass, anchor and flower cluster at the top right of the page.

I have finished off by adding the word sentiment across the top of the frame, dusting art stones and adding in muslin.

These are the products I have used:


Thanks for visiting the blog.

Thanks,
Michelle


Saturday, 18 January 2020

Laughter, makes the world a better place - Rachelle Sigurdson

Hello Dusty Attic Fans, today I am here to share with you a bright, happy LO layering lots of Dusty Attic's AMAZING chipboard pieces.....

The Dusty Attic used: https://dustyattic.com.au/
Retro Frame
Retro Frame
Whimsy Frames #2
Whimsy Frames #2
Squiggly Frame #5
Squiggly Frame #5
Notebook Edge Border
Designer Disc #10 - Words
Designer Word Disk #10
Beaded Flourish #4
Beaded Flourish #4
Circle Mesh Small
Circle Mesh Small
Foliage #8
Foliage #8
mini Number Grid
Mini Number Grid
Fire Flies
Fire Flies
Mini Captions #6
Mini Captions #6
Laughter makes the...
Laughter makes the....
Dusty in Color
Dusty in Colour Sunshine
Sunshine & Denim
The 49 and Market used: https://www.49andmarket.com/shop/
Old School
Old School - Penmanship
Penmanship
Lacey Trim - White
Lacey Trim -White
Enchanted Petals - Sunshine
Enchanted Petals-Sunshine
Garden Petals - Sunshine
Garden Petals-Sunshine
Botanical Blends-Navy
Botanical Potpourri-Navy

Other Elements used: Clear Gesso, Clear Crackle Paint, Lyndy's -Afternoon Delight Denim, Drop Dead Gorgeous Green & Pineapple Paradise,Liquid Pearls, Black Ink Pad,Prills....Here are a few close ups....
For the background I ripped Penmanship, inked the edges & glued the lace & Notebook Edge Border into the layers. I primed the chipboard with the clear gesso, then applied a thick coat of clear crackle paint onto some areas....


Once the crackle had dried I first painted the pieces with the DA paints listed above, the to add sparkle I went over top with the Lyndy's in the same color tones.....

I framed the main photo with the Whimsy Frame, that I had glued the Squiggly Frame on top, & framed the other photo with the Squiggly Frame. I cut the Retro Frame in half & framed the Mini Number Grid, then glued the photo' on top of the Retro Frame.....


Thank you so much for taking the time to look.....Rachelle