Hello and welcome Dusty Attic friends. Tina with you today. I hope this post finds you all well and I expect busy with the festive season only a few short weeks away. So with the festive season coming up I thought I would do another festive project. This time around I haven't used the new release chip boards but some of the older pieces. I have done so to show you that any piece can be adapted to suit your project.
With my project "Christmas Magic" I will show you how you can do this yourself with only a few different medias. Hope you enjoy it!

My starting point was layering a torn piece of Snow Covered Trees over the top of Seasons Greetings. These papers are from the new collection of 49andMarket. I then sanded all of the edges to bring a shabbiness to the project. This is the easiest way to create this.

[caption id="attachment_9711" align="aligncenter" width="300"] WE-87889-seasons-greeatings-b[/caption]
 WE-87889-seasons-greeatings-b[/caption]
[caption id="attachment_9700" align="aligncenter" width="300"] WE-87902-snow-covered-trees-a[/caption]
 WE-87902-snow-covered-trees-a[/caption]
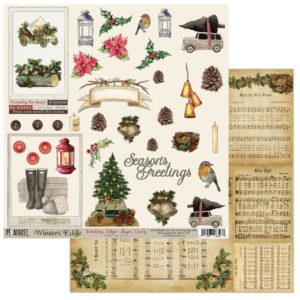
[caption id="attachment_9726" align="aligncenter" width="300"] WE-87933 Winters Edge Laser Cut Sheet[/caption]
 WE-87933 Winters Edge Laser Cut Sheet[/caption]
I have also used a couple of the Emphemera from the Winters Edge Laser Cut Sheet.

I made lots of layers using 49andMarket Flowers. For this project I have used lots of bits and pieces left over from many other projects. The green leaves and branches of other 49andMarket flower packs that you can see above have all been heavy sponged with a little white gesso.

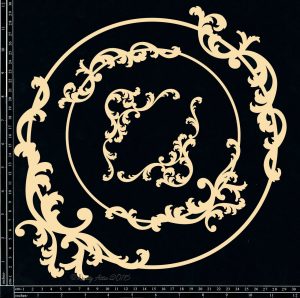
My Dusty Attic goodness started with the addition of the small Baroque Frame. I think this is probably my all time favourite piece of Chipboard. It is elegant and stylish and well just perfect for absolutely every project I seem to do.
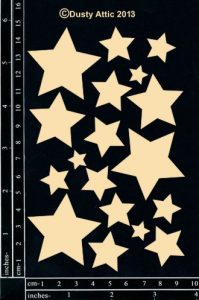
The Baroque Frame was dressed firstly in white crackle paste. I then went over it in a white acrylic paint lightly. Then I gave it a quick coverage of a clear drying adhesive and then sprinkled over fairy dust glitter. You may not be able to see all the fabulous details of the glitter and crackle in the photographs but trust me is looks just gorgeous. And the texture of all the medias are beautiful. I did this also with the Stars you can see in the project.
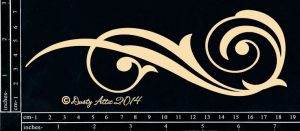
My next piece of Dusty goodness is the gorgeous Border Lace #4 which you can see below. I have cut it into 5 separate piece and place them hanging from the base of the Baroque frame and photo. This has been dressed in white gesso and I splashed a little of the Cadence Shake and Gilt over randomly. I also added some of the smaller ornate pendants coming out of the Border Lace as you can see in the close-ups. I also popped some micro beads on the ends of these too.


Here above you can see the border lace and ornate pendants but you can also see the Scroll #2. This gorgeous piece was dressed in Perfect Pearls Snow.

[caption id="attachment_2048" align="aligncenter" width="199"] Stars #1[/caption]
 Stars #1[/caption]
I have also used flowers from the Floral Mixology Pina Colada collection and changed them up using a little of the Candence shake and gilt. I popped some microbeads in the centres of these flowers and the Blossom Blends to make them really shine. And I added in some of the smaller poppy flowers from the Blossom Blends Poppy collection which you can see below.
[gallery grids="News" image_size="large" columns="4" ids="311,820,525,793"]


Above here you can see the lantern which was used from the Laser Cut Out sheet. They are just the perfect little added embellishments to take your project one step further.

Well that is all from me today. I hope you have enjoyed my Christmas project.
Until next time happy scrapping and take care. x


beautiful.x
ReplyDelete