Hello, Rachelle here, I have been very busy, being a Dusty Attic Elf! For me it's the season of winter, snow, glitter, cold, Christmas & giving, so I thought I would take the time, to do step by step photos of 4 of my Winter- Christmas LO's, Wreath & 3 cards.....I will first show you all the projects I did this month using Dusty Attic, then I will show you the TUTs....The first 8 I did Tuts, so I will list the products in the Tuts...
Believe " With Tut To Follow"
Brrrr "With Tut to Follow"
Full Hands & Heart With Tut to Follow
Christmas Magic
The Future is Bright

Shine
Let it Snow

Keep me warm
The Dusty Attic used:http://www.dustyattic.com.au/

Ornate Frame 2 pk

String Frame small

Beaded Tinsel

Icicles

Mini Holly

Ornate Pendants

Doily #5

Marrakesh Trellis small

French Flourish 2pk

Fancy Trim #7

Gem Drop Border

Baroque Corners

Mini ABC lower

Mini Script ABC

Dusty in Colour Oceania
Other products used, Maja Design, Home for the Holidays, 49 and Market, Rustic Poinsettia Canvas Blooms, Garden Bloom-Dusty Shale, Garden Vine-Dusty Shale
Merry Christmas
The Dusty Attic used:

mini Icicles

Mini Holly #2

Mini Holly #3
mini Merry Christmas

Wreath with Berries-small
I also used the I Wish Collection from Maja Design, & 49 and Market's, Rustic Canvas and Burlap Small Blooms
The Dusty Attic used:

Christmas Banners

Holly Flourish

Icicles

mini Merry Christmas
Snowflakes

Page Pebbles

mini chicken wire

String Frame Set

Paisley #1

Leaves

Word Pl@y #9

Teeny Tiny ABC
"Believe" With Photo Tut...
The Dusty Attic used:

Wreath with Berries

Holly Flourish

Foliage #4

Believe #2

Dusty Attic Pearls
Corrugated Paper

Bubbles Stencil

Dusty in Color Hot Chocolate

Dusty in Colour Oceania

Dusty in Colour Mountain Meadow
The 49 and Market used:
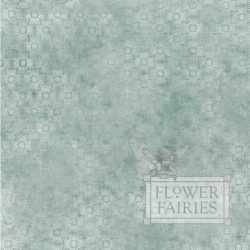
Flower Fairies-In the Garden-BS
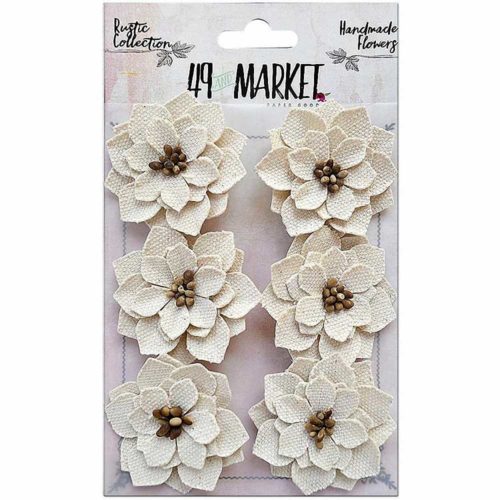
Rustic Poinsettia Canvas Blooms
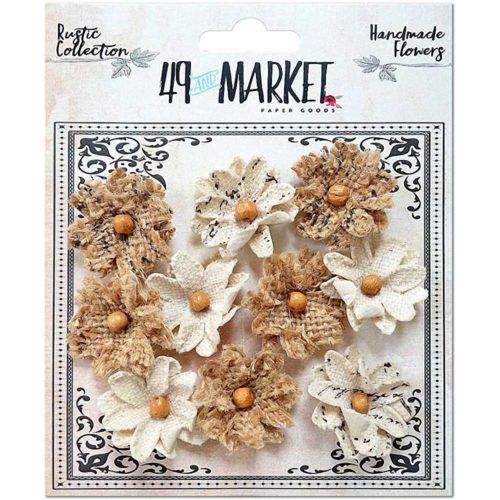
Rustic Canvas and Burlap Small Blooms
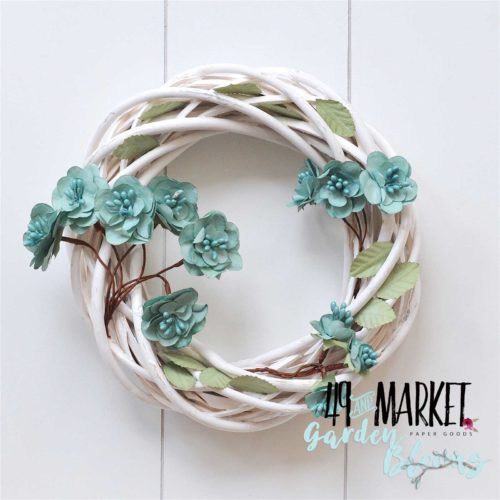
Garden Blooms- Dusty Shale
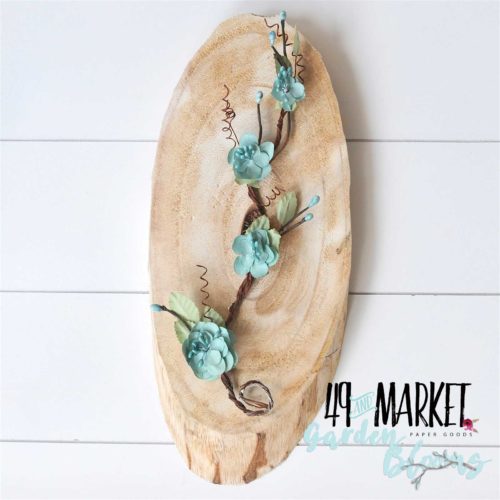
Garden Vine-Dusty Shale
Other elements used: Prima Clear Gesso, Prima snow texture paste, Prima glass glitter-pearl, clear crackle, LuminArt H20-Heavenly White, Shimmerz, Inklings-Chocolate & Diamonds, Nuvo Crystal Drops-Antique Rose, Liquid Pearls Robins Egg,Dreamweaver Translucent embossing paste, burlap string, lace, ribbon,old doily, pine cones, place mats
Close ups...
Tutorial
Where I live, we get WINTER, snow & cold. Our days are short, & I spend much more time, inside our home, so I do more Scrapbooking, in the winter months, to pass the winter away. I love to work on winter LO's because of the Snow Texture. You may find my tuts confusing, because I do them, in the order, that I have taken the photos. I have so much on the go, when I am working on a project, plus I have to allow pieces to dry. I do not use a heat gun, I let the pieces dry naturally, either in my front south window, when the sun is out, or my bedroom closest, the smallest warmest room in our home. It has a floor heater, so a placed a rack over top it, & will place pieces of the projects, on that, to allow quicker drying. I also, depending on my day, may have missed a few photos, so I apologize for that.
I painted the small,& large wreath, string & pearls with clear gesso, then glued on some burlap string, & pearls. I painted all of this with the clear gesso again Once the gesso dried I randomly painted them with clear crackle...
Primed the FF"In the Garden-BS" with clear gesso, let dry then did some stencil work, using the DA Bubbles Stencil, & translucent embossing paste...
shows stencil work...
I painted the flowers, with LuminArt H20, Heavenly White, to give them shimmer, & changed the flower centers, using Prills-Sage Advice....
Glued lace, onto a piece of card stock, that I had cut into a circle
Using a brush, I applied Prima snow texture & sprinkled on the glass glitter, on the wet texture, to the outside edges of the flowers....
Glued the Flower Fairies circle, onto the lace & card stock....
Glued the holly flourish onto the berry wreath. I primed the flourish with the clear gesso...
Primed with clear gesso, & painted with clear crackle...
Painted the wreath & pearls with Nuvo Crystal Drops-Antique Rose
Painted the Holly flourish, with altering DA paints, Oceania, & Mountain Meadow...
Painted clear crackle, on to the Holly Flourish...
Applied Prima Soft Gel, to the BS of the FF circle,,,
& glued it on to the corrugated paper, that I had cut into a circle ( I put a weight on this until the gel dried). I primed the corrugated with the clear gesso, then painted it with clear crackle. I sprinkled on some mini art stones, while the crackle was still wet. I also primed the lace, with the clear gesso, Once every thing dried, I painted the stencil work, lace & corrugated paper with Shimmerz Inklings Sheer Bliss,to give it shimmer...
I painted these pieces, with Inklings Spotlight white, but was not happy with the color so went over it with the LuminArt Heavenly white...
Painted the lace & stencil work with the sheer bliss...
Glued lace under the corrugated paper, primed it & painted it with sheer bliss...
Glued the berry wreath onto the back ground...
then the smaller wreath..., I painted the Holly Flourish with Liquid Pearls-Robins Egg, then applied snow texture on the wreaths, flourish & the outside edge of the corrugated paper
Started the flower clusters...
Added more flowers
Glued on the title
Glued on some foliage...
Glued on some pinecones, that I sprayed with a acrylic sealer, then primed with clear gesso. I then painted them with the LuminArt Heavenly white, & applied, using a brush, the snow texture &sprinkled on glass glitter on to the wet texture...
Stitched & glued on the hanging piece & bow..
Took photos outside, staging it with the handmade doily, that I found @ a second hand store for 25 cents, & placing on a round place mat, to stage the photo, then I thought this frames the wreath so I decided to use this as a back ground...
I primed the doily & place mat with the clear gesso, once the gesso dried I painted the doily & matt with the sheer bliss...

Applied snow texture & glass glitter to the outside edges of the mat, I do sections, over a paper plate, using a paint brush to apply the snow texture, then sprinkling on the glass glitter, while the texture is still wet. I tip the project, as I am doing this, so I can keep the excess glitter, I bend the plate & pour it back into the jar...

No sun out today, so into the closet it goes!!!!
"Burr" with step x step photo tut....
Close ups of completed LO.....


The Dusty Attic used:

Ornate Pendants

Beaded Tinsel

Mini Holly
Snowflakes

Winged Frame set

ATC Frame #4

Marrakesh Trellis Small

Mini Script ABC

Dusty in Colour-Oceania
I used Maja Design's Vintage Frost Basics Collection, & from 49 and Market I used:Rustic Canvas and Burlap Small Blooms, Rustic Poinsettia Canvas Blooms, Garden Bloom-Dusty Shale
Other elements used: Prills Sage Advice, Prills Mini Pearls, Tim Holtz Snowflake Stencil, Dreamweaver Translucent Embossing Paste, Nuvo Crystal Drops-White Blizzard, Prima Snowflake Paste, Prima Glass Glitter-Pearl, Tim Holtz Clear Crackle, Shimmerz Inklings-Chocolate & Diamonds,Dusty Attic Paint Oceana,Clear gesso, Liquid Pearls-Robin's Egg, Petaloo Berrie picks & pinecones
Photo Tutorial
I trimmed the outside edges, of the 6th of December sheet, (about 1/8 of a inch),distressed the edges & glued it onto the 8th of December sheet.. I then hand stitched these pieces together...
I did some stencil work, using Tim Holtz snowflake stencil & Dreamweaver Translucent Embossing Paste
Shows stencil work...
Once the embossing paste dried, I brushed on some Nuvo Crystal Glitter Drops-Blizzard
I cut out these 2 pieces, from the Dec 8th sheet, did some punch work, using Martha Stewart Cherish punch, glued on the Dec 6th sheet, hand stitched & distressed the edges....
Primed all the chipboard, with clear gesso...I do this to make sure the crackle sticks to the chipboard...
I then pained these pieces, with Shimmerz Inklings Chocolate & Diamonds..
Applied drops of liquid pearls-Robins Egg
I painted these pieces, with DA paint Oceania, then clear gesso...
I then applied a thick coat of clear crackle
& placed the Ornate Pendants over top the wet crackle
Dry & completed Chipboard pieces...
Primed with clear gesso, then painted with Inklings Chocolate & Diamonds
Primed with clear gesso
Painted with Inklings Chocolate & Diamonds
Primed with clear gesso, applied a thick coat of the clear crackle, then once the crackle dried, I painted the Winged Frame, with the Inklings Chocolate & Diamonds
I applied 2 coats of clear gesso, to seal the color, so it does not bleed through the snow texture....
I did the same to the frame, as I did with the Ornate Pendants...
Glued the Photo under the frame...
Glued on the pearl dangles & Tim Holtz icicle
Using a brush, I applied Prima Snowflake paste, sprinkling on Prima glass glitter, while the paste was still wet. I do not like the snowflake paste by its self, it comes to life with the glitter....
Primed
Painted with the DA Oceania
Applied clear crackle
Once the crackle dried, I painted these pieces, with the Robins Egg, Liquid Pearls...
I painted the flowers, with LuminArt H20 Heavenly White, to give them shimmer. I also glued on some of the glass glitter on to the flower centers...
Changed the flower center, using Prills-Sage Advice, then applied snow texture, to the outside edges, sprinkling on glass glitter, on to the wet texture
I glued down the Marrakesh Trellis...
Placed drops of glue, I use Ranger Glossy Accents, it dries fast & holds...
Sprinkled on some glass glitter...
Glued on the Ornate Pendants...
Glued on the frame...
Glued on the beaded tinsel...& the top part of the LO...
Applied drops,of the Robins Egg Pearls,to the Beaded Tinsel....
Glued on the framed photo...
Glued on Bottom part of LO & Snow flakes... I primed the snowflakes with white gesso, then painted them with the clear crackle, & once the crackle dried I painted them with the LuminArt, heavenly white for the shimmer...
Started this cluster, using 49 and Market's, Rustic Pointsettia Canvas Blooms, Garden Blooms, Petaloo Berry Picks & pinecones. I picked the small pine cones, cut off the bottoms to make them smaller, then sprayed them with a acrylic sealer. I also applied the snow texture & glass glitter on to the pine cones...
I painted on another coat, of the Inklings Chocolate & Diamonds on the frame, for the Shimmer & Started a cluster here...
& here, top right corner...
Glued on Quote, & glued on some Prills-Mini Pearls onto the snow texture...
Shows the droplet on Jona's nose...
Added a flower cluster over the Santa Frame...
Added the title....
added the mini holly into the cluster...
& into these clusters....
"Full Hands & Heart" Photo Tut....
Close ups of completed LO....


The Dusty Attic used:

Antique Frames

Star Banner

Beaded Tinsel

Icicles

Mini Holly

Mini Marrakesh Trellis

Ornate Pendants

Tropical Foliage #4

Tropical Foliage #5

If you Think.....

Dusty Attic Pearls
The 49 and Market used:
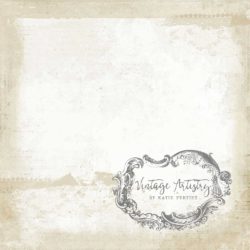
Vintage Artistry Collection.....The Report-BS 2 sheets
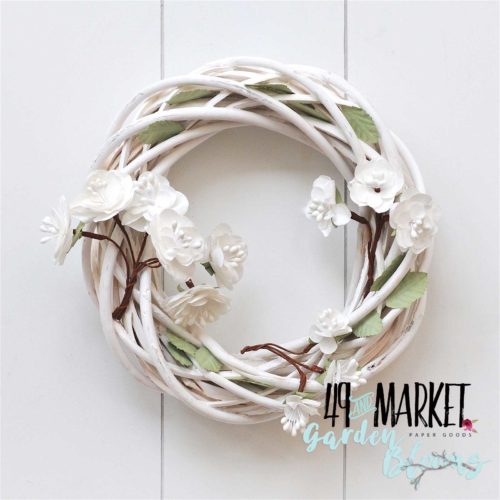
Garden Bloom-Alabaster
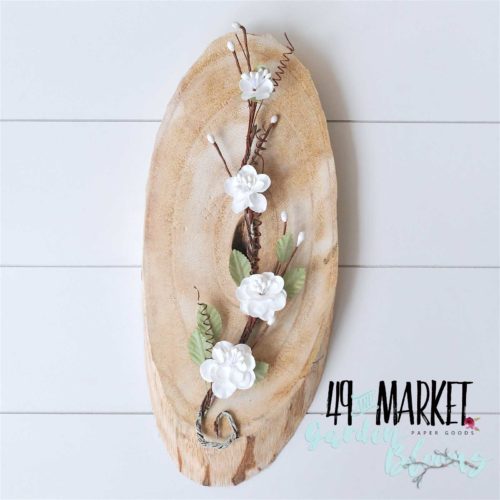
Garden Vine-Alabaster
Other elements used: white gesso, clear gesso, TH clear crackle, white crackle paint, Prima Snow Texture Paste, Prima glass glitter pearl, Prills Mini Pearls, Nuvo Crystal Drops-Pale gold, Shimmerz inklings- chocolate & diamonds, LuminArt H20-Heavenly white, lace
Photo Tut....
I used 2 sheets of The report-BS, cut out the inside of 1 sheet, as shown. I glued that piece onto card stock, & distressed the edges...
Using a ruler, I ripped the remains of the 2nd sheet & applied snow texture, & glass glitter...
I primed all these pieces, with clear gesso
Then painted most of the pieces, with clear crackle...
These were painted with Shimmerz Inklings Chocolate & Diamonds, let dry, then applied drops of the pale gold liquid pearls...
I glued on strips, of scraps of chipboard, onto the background of the LO...
Then glued on these strips (icicles)
The crackle had dried, so I painted the pieces with the inklings-Chocolate & diamonds, & the LuminArt H20 Heavenly White....I also applied snow texture, glass glitter to some of the pieces. (Sorry I did not take photos, but you can see where in the close ups of detail)
I glued pieces of lace, under the icicles...then applied snow texture, glitter & prills onto the top of the icicle
To give the flowers shimmer, I painted them with the Heavenly White..I glued on some glass glitter, onto the flower centers, & applied snow texture & glitter onto the outside edges of the blooms...
Glued on more strips of paper & the DA Icicles, I did 2 layers of chipboard icicles...
Glued on the framed title...
Glued on the Star Banner, I painted it with white crackle paint...
Glued on the Mini Marrakesh Trellis
& the the pieces from the Ornate Pendants...
Glued some Prills onto the Marrakesh Trellis, also glued on some DA pearls...
Glued on the framed photo...
Glued on the outside of the background. I applied the snow texture & glass glitter onto the inside edges....
Glued on the tropical foliage #4
then the Tropical Foliage #5
Glued on garden blooms...
Christmas Magic

The Dusty Attic used:http://www.dustyattic.com.au/

Decorative Frame #1

Baroque Frame set-Circle

Ornate Frame #5

Beaded Tinsel

Mini Holly

Stars

Holly Flourish
Mini Merry Christmas

Crazy Stitching Large

Mini Marrakesh Trellis

Leaves

Word Play #5

Sparkle Stencil

Threaded Beads Stencil

Dusty Attic Pearls
The 49 and Market used: http://www.49andmarket.com/shop/
Tattered-BS
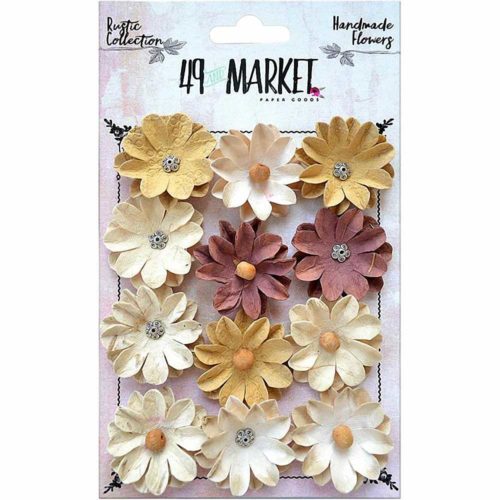
Rustic Barn Small Blooms

Rustic Canvas and Burlap-Small Blooms

Rustic Canvas and Burlap- Medium Blooms
Other Elements used: Prima Clear Gesso, White Gesso, Snow texture paste, glass glitter pearl,say it crystals, Tim Holtz clear crackle, Petaloo Berry Picks, Dreamweaver transparent paste, LuminArt Jasper Red Silk & H20, iridescent gold H20, Prills-Stop Whinning,Nuvo Crystal Pearls-pale gold,corrugated paper, Bobunny lace, ribbon
Close Ups


Tut
I cut the bottom & top, of the Tattered -BS sheet at a angle...
Cut out a circle, using the Botanical Press sheet, the size of the smaller Baroque Frame Set
Primed all the paper with clear gesso
Primed the lace with clear gesso
Did stencil work, using the DA sparkle Stencil & Dreamweaver Translucent paste
Did Stencil work using DA Threaded Bead Stencil & Translucent paste
Painted ribbon with jasper red-H20
Primed the corrugated paper,with clear gesso, then painted on clear crackle
Primed with clear gesso, applied clear crackle to some areas (You can see where I used it, in the close ups)
Glued ribbon under these 2 pieces..
Glued the frames, onto the photos
I applied snow paste & the glass glitter, after the crackle had dried, on to the holly flourish & corrugated paper. I then glued the paper, with the ribbon, onto the corrugated paper
Pulled out flower centers, painted the gold flowers, with the iridescent gold H20, then using a brush I applied snow paste, & sprinkled on glass glitter over the wet paste..
Glued the Baroque frame, onto the circle, & glued the framed photos together...
Glued on Flower centers, using Prills-Stop Whinning
I had glued the larger piece, on to cardstock, then I glued on the crazy stitching (I primed it with the Clear Gesso & painted it with the Jasper red-silk). I the glued down the top & bottom...
Glued on the crazy stitching on to the top & bottom
Glued on the frame & painted all of the stencil work with the iridescent gold H20
Glued on the framed photos
glued on the title
cut the holly flourish & glued it on
I painted the ribbon with the jasper red H20. Started the cluster with the bow, rustic bloom, & crystals
glued on the Mini Marrakesh Trellis
&here
& here, I primed all the DA pearls with the clear gesso, then painted them with the jasper red -silk. also added clusters..
Glued on the beaded tinsel, I used Nuvo Crystal Drops-Pale gold. Added more Rustic Blooms to the Cluster..
Added the Berry Stem..

Applied clear crackle, & placed stars on the wet crackle...Once the crackle dried I cut out the stars & painted on the iridescent gold H20
Added the stars...
added Christmas & wordpl@y...I glued the word play on to scraps of the red ribbon
Glued on some leaves & holly into the clusters, glued some crystals into the stars
Shine "TUT"

The Dusty Attic used: http://www.dustyattic.com.au/

Doily #5

Gem Drop Border

Scallop Borders

Stars #3

Marrakesh Trellis Small

Mini Icicles

Leaves

Word Pack #11

Word Play #9

Paisley #1

Dusty in Colour Mountain Meadow
The 49 and Market used:http://www.49andmarket.com/shop/
Vintage Artistry

The Report-BS

Tattered-BS

Botanical Press

Garden Bloom-Dusty Shale

Rustic Canvas Blooms Small

Rustic Poinsettia Canvas Blooms
Other elements used: Prills Sage Advice, Dreamweaver Translucent Embossing Paste, Prima Snowflake Paste, Prima Glass Glitter-Pearl, Tim Holtz Clear Crackle, Dusty Attic Paint Oceana,Clear gesso, Liquid Pearls-Robin's Egg, LuminArt H20 Heavenly white, Prima Glass beads, Prima,say it in crystals
Close ups...
Shine Tut....
I cut out these circles, primed them with clear gesso, then painted them with a thick coat of clear crackle...
While the crackle was still wet, I placed the DA doily on top. I had cut the doily, primed it with white gesso, painted it with clear crackle, & once the crackle dried, I painted it with LuminArt H20,-Heavenly White
I decided to do the tut, after I got this far, so there is a few missing photos. When the Vintage Artisry Collection came out, Janene said that this Collection is neutral & can be used for any project, so that is why I decided to play with Collection, for Winter, Christmas LO's & cards. I am very happy I made that choice! I used the 6x6, I cut the Report-BS in half (the bottom layer) distressed the edges & glued it on to card stock. The bottom measures 9.5 inches wide & 6 inches in height. The next layer is 6x6 "the Report-BS),using a ruler, I ripped it at a angle, distressed the edges, then using a brush, I applied the snow texture, & sprinkled on the glass glitter, over the wet snow texture. The top layer is 6x6 tattered-BS, ripped at a angle, distressed edges, applied the snow texture & glass glitter. I then glued on the Mini Icicle, did the same treatment as I did on the doily, but also applied the snow texture & glitter on to the top. I did not cut the rest of the circle, off of the doily, I used it to glue it behind the card....
I cut off the other half of the circle on this doily & glued it onto the card...
I primed the Marrakesh Trellis, then painted it with the LuminArt H20, Heavenly White, once that dried I applied drops of liquid pearls-Robins Egg...
I painted the flowers, with the Heavenly White, then glued some glass glitter on to the flower centers...
I changed the flower centers on the canvas blooms, using Prills-Sage Advice....
Using a brush I applied snow texture & sprinkled on glass glitter while the texture was still wet...
Applied clear crackle, & placed stars on the wet crackle...
Glued on the Scallop Border ( I did the same as I did on the doily & icicle), & glued on the Marrakesh Trellis...
Started on a cluster, with a bow & altered Rustic Poinsettia Canvas Bloom..
Added garden blooms & paisley...
Added the gem drop border, title, Word Pl@y, leaves,stars & another cluster. I glued some glass beads on to the Marrakesh Trellis. I had primed the title, & gem drop border, with clear gesso, painted them with the DA mountain meadow paint, then applied clear crackle. Once the crackle dried I painted them with the Robins Egg Liquid Pearls...
Let it Snow Tut

The Dusty Attic used:

Creative Layers #4
extra snowflakes

Spring Tree

Stars

Ornate Pendants

Mini Chains

Doodad #2

Doodads #5

Gem Border

Leaves

Word@y #9

Sparkle Stencil

Threaded Beads Stencil

Dusty in Colour Mountain Meadow
The 49 and Market used:

Tattered-BS 6x6

The Report-BS 6x6
Paper Clippings

Garden Bloom-Dusty Shale

Rustic Canvas and Burlap Blooms Small

Rustic Poinsettia Blooms
Other elements used: Prills Sage Advice, Dreamweaver Translucent Embossing Paste, Prima Snowflake Paste, Prima Glass Glitter-Pearl, Tim Holtz Clear Crackle, Dusty Attic Paint Oceana,Clear gesso, Liquid Pearls-Robin's Egg, LuminArt H20 Heavenly white, Prima Glass beads, Prima,say it in crystals, Prima lace
Close ups...
Tut for let it Snow
I Cut the Tattered 6x6 in half, then primed it with clear gesso. Using the DA threaded bead stencil & Dreamweaver translucent texture paste, I did some stencil work on both pieces...
Using a ruler, I ripped the 6x6 of the report-BS, distressed the edges, & did some stencil work using DA sparkle stencil & the translucent paste...
I glued these pieces down, width measures 9.5 inches & height is 6 inches...
Glued on the bottom of the report piece, I painted the stencil work with the H20 Heavenly White...
Then the scallop border & lace ( did the same treatment on the chipboard pieces as I did on the card above)...
Glued on the top of the report, I had applied the snow texture & glass glitter, & let it dry before I glued it on...
Primed with clear gesso, then painted with the DA Mountain Meadow. I then painted them, with the clear crackle paint, let dry, then painted them, with the Liquid pearls-Robins Egg
Primed with white gesso, then painted with clear crackle, once the crackle dried I painted them with LuminArt H20 Heavenly white...
I traced the circles of the snowman, from scraps I had from the Vintage Artistry Collection & glued these pieces onto the chipboard pieces....
I primed with the clear gesso, then applied clear crackle...
Primed with clear gesso, painted with mixing DA mountain meadow & oceana. I glued the 2 tress together, then painted all of the pieces, with the clear crackle, let dry, then the liquid pearls -Robins egg...
Gluing the snowman together, added scraps of chipboard to the BS...
I applied the snow texture to the bottoms of the circles, then glued them together...
The crackle has dried, & I painted the the snowman & border with the H20 heavenly white...
I glued the tree on to this piece, using clear crackle...
Glued on the chains...
cut off part of the chain & glued on the snowflakes...
Glued on the doodads..
Glued on another snowflake, snowman & tree. I applied snow texture on to the snowman & the tree...
Glued on some flowers,star & Mini Icicle...
Glued on the gem drop border, & the pieces from the Ornate Pendants
Glued on the word pl@y pieces
Glued on more doodads, on the top left..
Added anther cluster, top right & glued glass beads into the tree & the bottom doodad..
Added snowflakes & mini holly...Trimmed the paper clippings to just over 9/5 inchs wide, folded it in half a glued this onto the card part...
The Future is Bright
Yes it is, can't wait to see what Jennifer, has planned for us for the year 2017!

The Dusty Attic used:

Gem Drop Boarder

Star Banner

mini icicles

Branches 6pk

Woodland

The Future is Bright

Stars #3

Bubbles Stencil
The 49 and Market used:
Tattered

Garden Blooms- Alabaster

Garden Vine-Alabaster

Rustic Canvas and Burlap Small Blooms
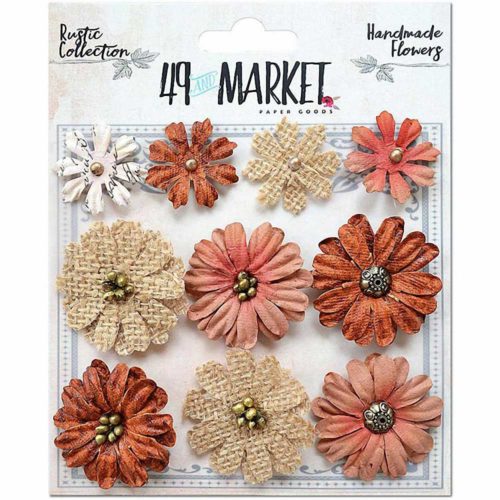
Rustic Melon and Burlap Bloom Mix 10 pc
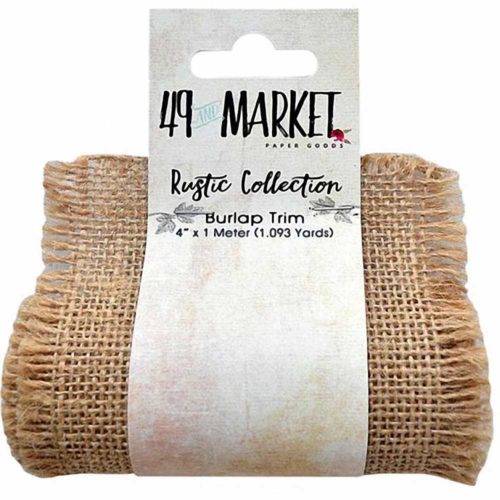
Burlap Net Ribbon Roll
Other elements used: clear gesso, white gesso, clear crackle paint,Dreamweaver translucent paste, LuminArt H20- iridescent gold & Heavenly White, Prima Snow Flake texture paste, Prima glass glitter-pearl, Prima say it in crystals, Prima Pearls, corrugated paper, lace, pinecones
Close ups.....


Tut

I cut the top of the Tattered sheet,at a angle, then painted it with clear gesso...

Did some stencil work, using Dusty Attic's Bubble Stencil & Dreamweaver Translucent paste...

Once the stencil work dried, I glued the Tattered sheet, onto cardstock & painted the Stencil work with LuminArt iridescent Gold...

I primed the corrugated paper with clear gesso, then painted on clear crackle paint. Once that had dried I glued ribbon under, then glued on the top piece of the tattered.

I painted the corrugated paper, with the iridescent gold, then using a brush, I applied the snow texture

While the texture was still wet, I sprinkled on some Prima Glass Glitter-Pearl

Primed the woodland pieces with clear gesso, then painted them with white crackle paint, once the crackle dried I applied the snow texture to the outside edges,& sprinkled on the glass glitter. I glued the photo onto card stock, then glued the dried woodland on.

I let the glue dry, then filled in with more snow texture & glitter..

Trimmed of the excess cardstock & glued it on to burlap..

All chipboard was primed with clear gesso,except for the icicles, I primed them with white gesso. I painted the pieces of chipboard with clear crackle paint...

Once the crackle dried, I painted most of the pieces with LuminArt H20 iridescent gold, I used LuminArt H20 Heavenly White, on the icicles. I then applied snow texture paste, using a brush, & sprinkled on the glass glitter pearl, while the texture was still wet...

I painted the flowers with perfect peals mists, biscotti, let dry, then I applied the outside edges, with the snow texture, sprinkling on the glass glitter on the wet texture. I put drops of glue on the flower centers & sprinkled on some glass glitter...

Glued the top on to the background..

Glued on the star banner...

Glued on a piece of scrap chipboard to raise the photo..

Glued on the gem drop border

Glued the icicles on to the lace. Wrapped Burlap around the photo & glued the photo down...

Glued on the Title

glued on the branches

& a burlap bow

Glued on rustic & garden blooms

Glued on more branches

Glued on more flowers

Added a few more flowers

Added the stars & crystals to the star banner...

Added more branches, in the large cluster, Also made 2 more clusters...

Added pine cones &pearls into the clusters..
Sparkle & Shine
Close ups....
The Dusty Attic used; http://www.dustyattic.com.au/

Holly Flourish

Icicles

Pine Sprigs

Stars

Swirly Christmas Tree

Fancy Trim #1

Fancy Trim #2

Doily #5

Word Pack #11

Threaded Bead Stencil

Sparkle Stencil

Dusty Attic Pearls
The 49 and Market used:

Tattered-BS 6x6
Specimen

Paper Clippings

Garden Bloom-Alabaster

Garden Vine- Alabaster
Other Elements used: Other elements used: clear gesso, white gesso, clear crackle paint,Dreamweaver translucent paste, LuminArt H20- iridescent gold & Heavenly White, Prima Snow Flake texture paste, Prima glass glitter-pearl, Prima say it in crystals, Prima Pearls,Tim Holtz distressed glitter-clear rock candy, Tim Holtz Distress Glitter Dust-Vintage Platium

Primed with clear gesso..

On the 6x6 tattered sheet I did some stencil work, using DA stencil sparkle & translucent paste, I also did stencil work, on the Specimen sheet, using the DA threaded Bead stencil & the translucent paste

Primed the chipboard with clear gesso, except for the icicle, I primed it with white gesso

Applied Snow flake paste & glass glitter

Painted with LuminArt H20, Heavenly White (white flower) & iridescent gold (cream flower)

Painted chipboard with clear crackle

Applied Snowflake paste & glitter

Glued these pieces onto cardstock

then this piece

& this piece

glued on icicle

applied snow texture & glitter
glued doily under
added holly flourish
added part of the title & swirly Christmas Tree
added sparkle & star
added quote
Started a cluster with garden vines & pine sprigs
added stars to the clusters
added pearls to the clusters
added DA pearls to the swirly tree
added Fancy Trim #2
Re applied snow texture, sprinkling on Prima Glass Glitter-Pearl onto the wet texture...
May this holiday season sparkle and shine, may all of your wishes and dreams come true, and may you feel this happiness all year round......
See you in 2017.....Rachelle


Rachelle's work is always awe inspiring gorgeous!! Truly incredible!!
ReplyDeleteJAW-DROPPING! Your winter layouts, cards, and art projects are absolutely the most beautiful I've ever seen. The time and effort you put into these projects never goes unnoticed. Thank you for doing the tutorials and sharing your craft.
ReplyDeleteOMGOSH!!!!!
ReplyDeleteRachel! what a glorious post with so much gorgeousness and holiday festiveness and sheer gloriously lovely pieces!! Thank you thank you for all of these yummy shares and for the massive amount of inspiration that just filled my head this morning! heehee
I felt the need to use all of the above words to encompass all that you have shared!")
And now I do believe,I Need more coffee to let it all sink in! Truly all beautiful works of art and I am so happy to be inspired by you and them!
Happy 4th week of Advent!
Merry Christmas as well!
hugs,
Jackie ")